I – Introduction: What is Virtualization Station
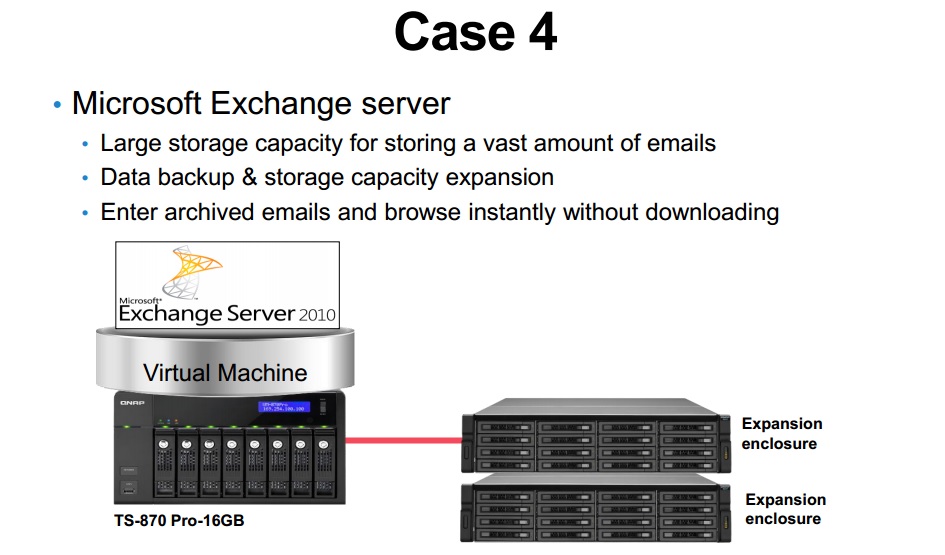
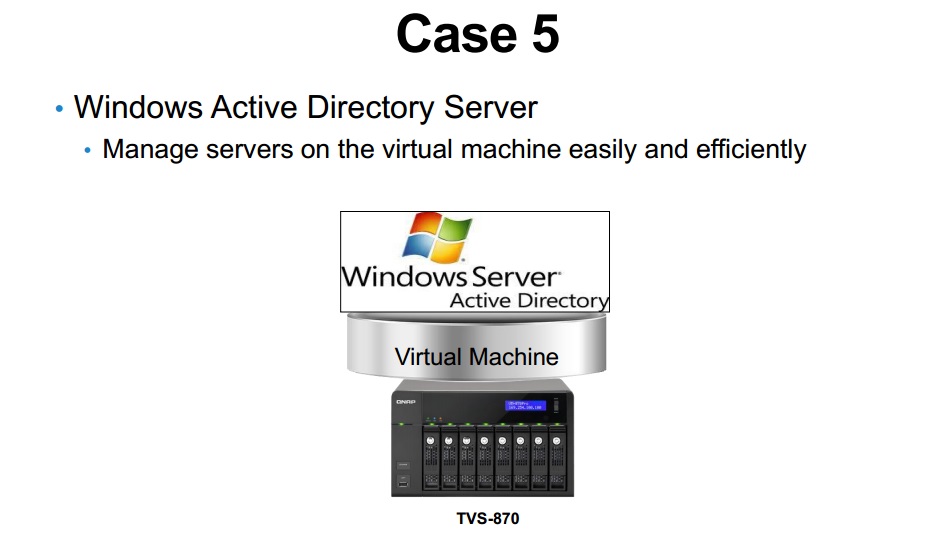
II – Use Qnap Virtualization Features As Internet Printer Server, IIS Web Server, ERP/EIP/CRM system, Microsoft Exchange server or Windows Active Directory Server
III – Which Models Supports Virtualization?
IV – Installation of Virtualization Station
V – How To Install a VM (virtual machine) via ISO file / DVD / CD
VI – Introduction Of User İnterface And Function Operating For Virtualization Station: How To Import / Export VM or Snapshot
VII – Virtualization Station Limitations
VIII - QNAP Virtualization Station Review: Want To Run VMs Securely And Cheaply? QNAP’s Virtualization Station Add-On App Does İt All Elegantly, Efficiently Thoroughly And Completely Epically Awesome (networkworld.com)
.
I – What is Virtualization Station & Which Models Supports Virtualization?
The First NAS Server with Centralized virtualization management:
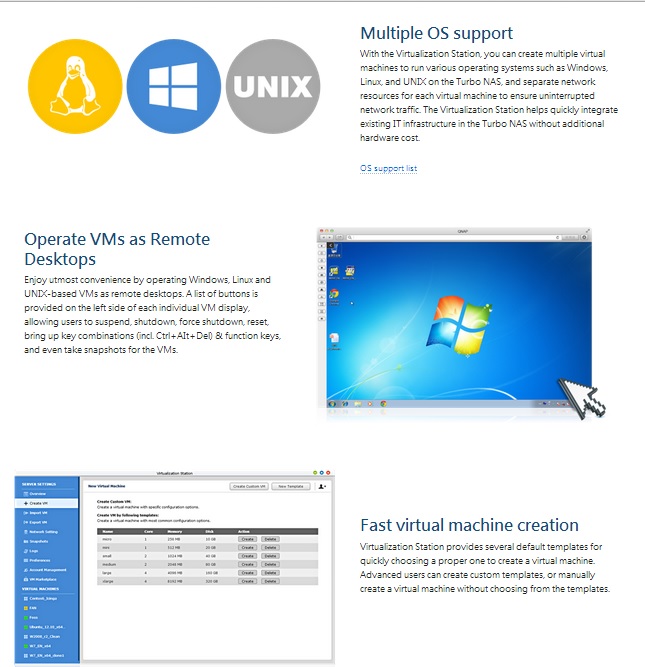
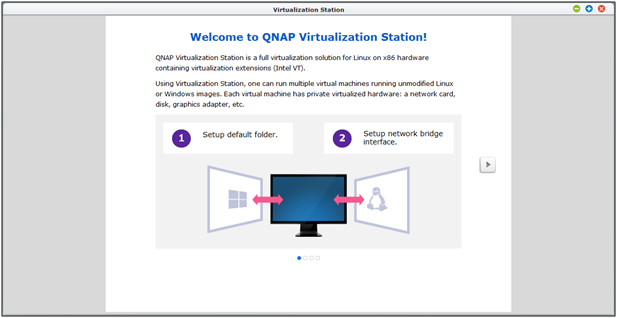
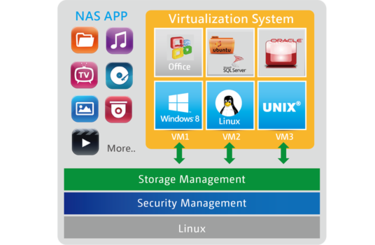
QNAP Virtualization Station enables virtualized desktop operations on the Turbo NAS for managing multiple virtual machines. With the easy-to-use interface, you can centrally manage all of the virtual machines created on the Turbo NAS with the least effort. Being capable of hosting multiple operating systems, the Turbo NAS is not only storage for data archiving and backup but also a comprehensive, powerful NAS server.
There are many benefits for using virtualized desktop operations: (1) virtual machines can be created with different operating systems (2) data can be accessed and files opened directly by applications installed on virtual machines (3) all operations are executed on the NAS to minimize the risk of data leaking and reducing network bandwidth usage as well.
Qnap Virtulization Station Presentation;
http://download.qnap.com/station/virtualization/QNAP_vNAS_series_slides_EN_v3_0206.pdf
What Qnap Brings With Virtualization Station;

.
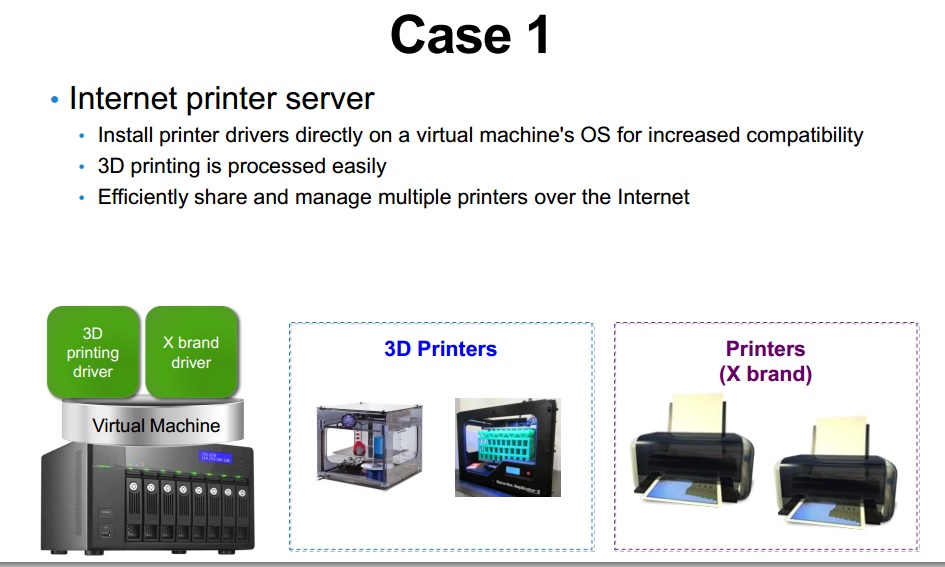
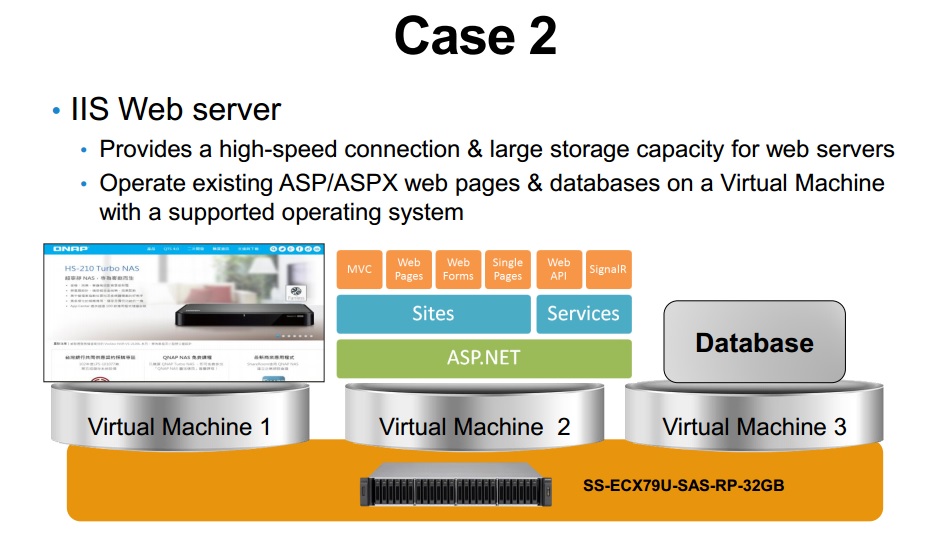
II – Use Qnap Virtualization Features As Internet Printer Server, IIS Web Server, ERP/EIP/CRM system, Microsoft Exchange server or Windows Active Directory Server

.
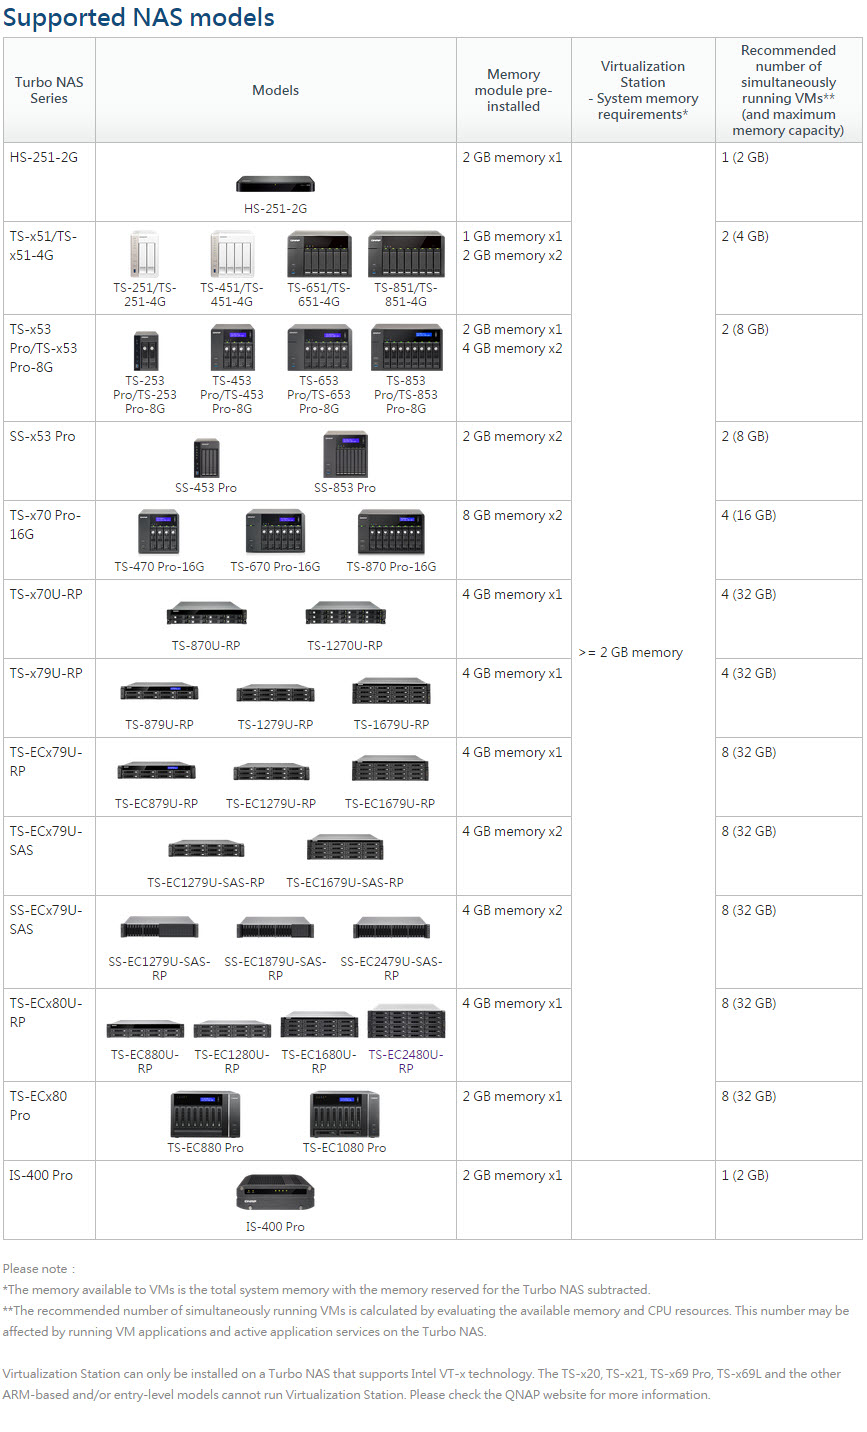
III – Which Models Supports Virtualization?
Requirements;

Qnap Models Down Below or Higher Hardwared Installed New Models With Minimum 4 Gb RAM (8 GB Recomended) Support Virtualization;
Download Virtualization Station
.
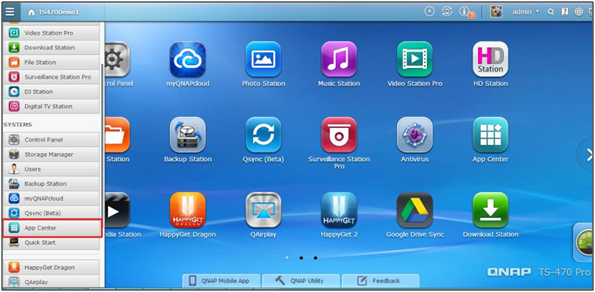
III – Installation of Virtualization Station
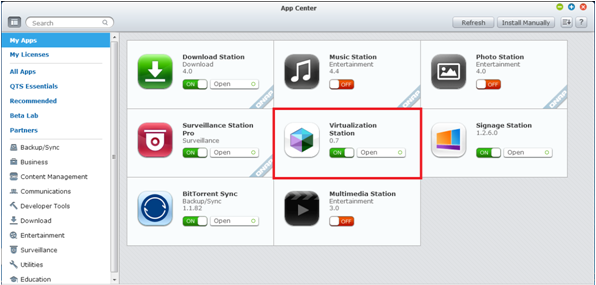
To install the Virtualization Station app
on the QNAP Turbo NAS, please log into the NAS Desktop as an administrator. Go to “App Center” >“Virtualization Station” and click “Add To QTS”. After the installation is complete, please launch Virtualization Station.
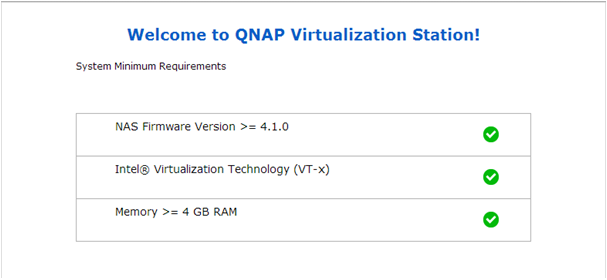
When you launch the Virtualization Station, it will first check to see if the firmware version of the QNAP Turbo NAS is 4.0.5 or above, if the BIOS for the VT (Virtualization Technology) has been opened or not, and whether the Turbo NAS has at least 4GB of memory.
Next, please choose the default folder on the QNAP Turbo NAS for locating the VMs (virtual machines) that you will create in the future.
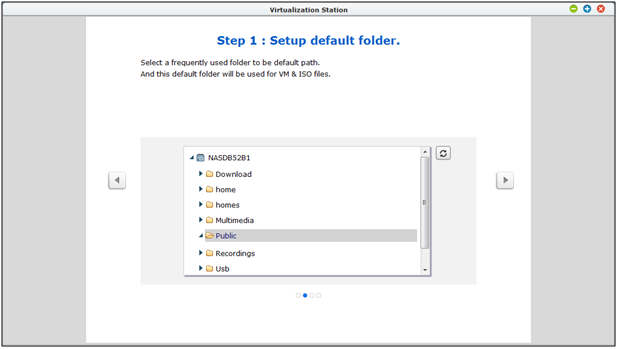
After setting default folder up, the Virtual Disks that are created on the VMs (virtual machines) will be located in the default folder.
Next, please choose the Ethernet for the VMs (virtual machines) that you will create in the future.
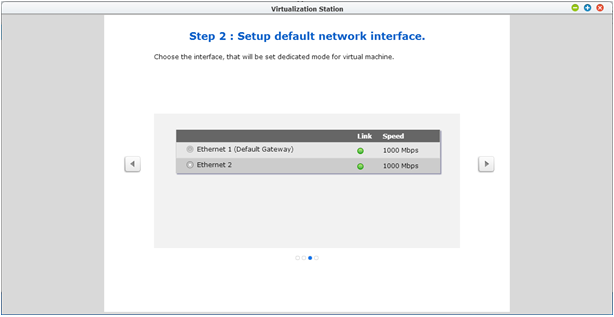
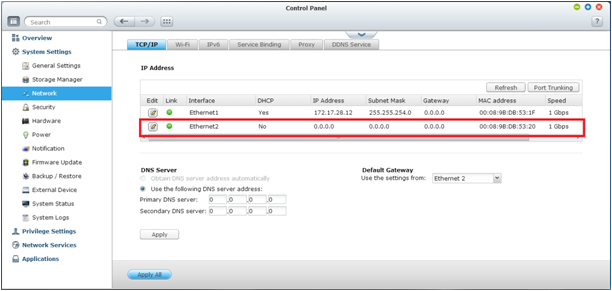
Please note: when you assign a dedicated Ethernet to a VM (virtual machine), this Ethernet will not be used by the QNAP NAS. Meanwhile, the DHCP function will be disabled and the IP address will be set to 0.0.0.0. Please refer to the illustration from QNAP NAS network setting page.
When you have finished setting the default folder and network interface, please click “finish” to start using the Virtualization Station on the QNAP Turbo NAS.

.
III – How To Install a VM (virtual machine) via ISO file / DVD / CD
Install a VM (virtual machine) via CD/DVD
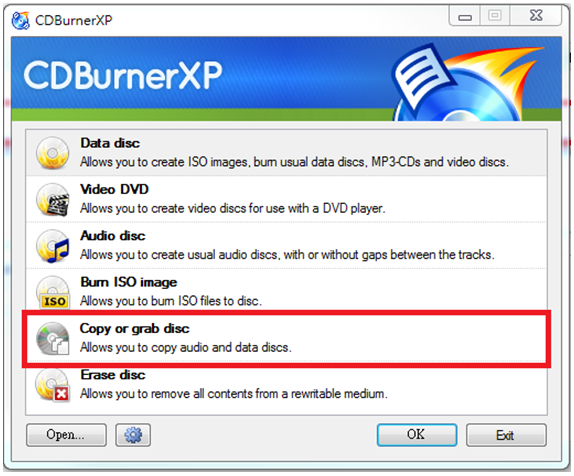
If you would like to install a VM (virtual machine) by using a CD/DVD of an operating system, you will first have to create an ISO image of the disc and store it in the QNAP NAS. If you do not have software to create ISO files, you can use the below link to download a suitable application. https://cdburnerxp.se/en/download
After downloading and launching CDBurnerXP, choose “Copy or grab disc” and then click “OK”.
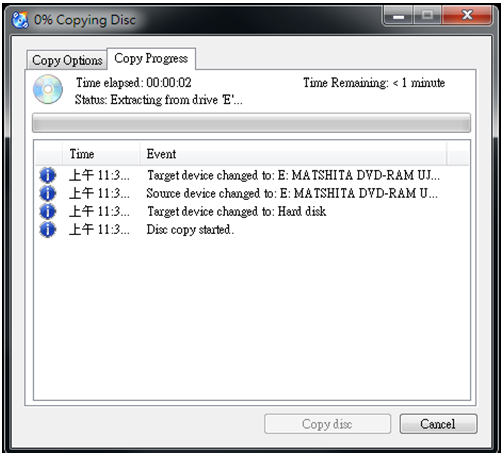
Select “Hard disk” as a target, then assign a destination folder, a name for the file and select “File type: ISO (Single track)”. Click “Copy disc” to begin the process.
1
An ISO image file of the CD/DVD will then be generated in the destination folder you selected.
Install a VM (virtual machine) via ISO file
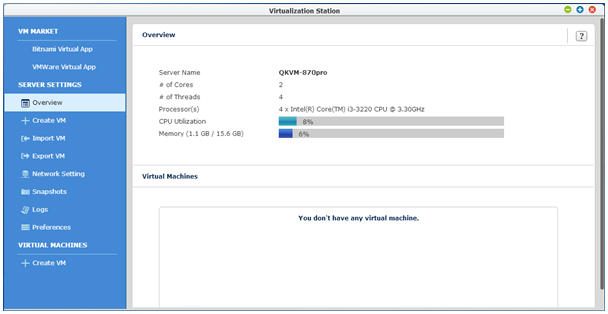
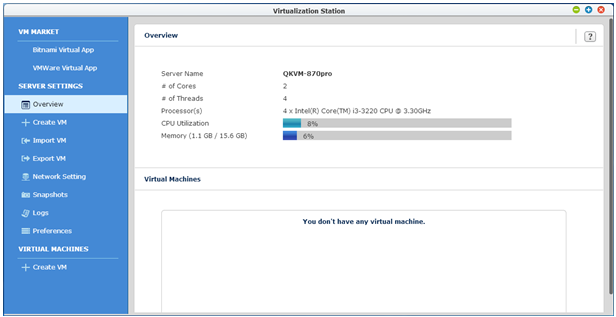
The Overview will show details of the QNAP Turbo NAS, including its name, CPU specification & usage, and total memory capacity & usage. Below these details, all of the VMs (virtual machines) that you created will be listed.
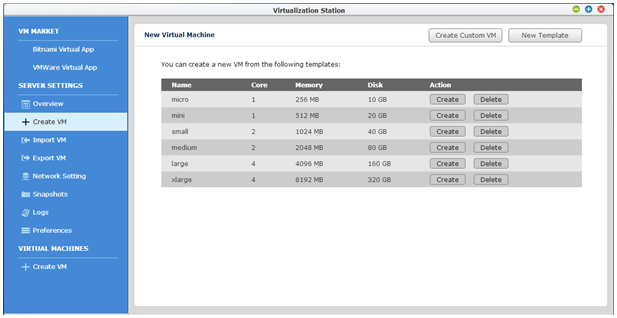
Create VM:
When you want to create a VM (virtual machine), please choose  , and then you can choose the different default template: “micro, mini, small, medium, large and xlarge” to build a personal VM (virtual machine).
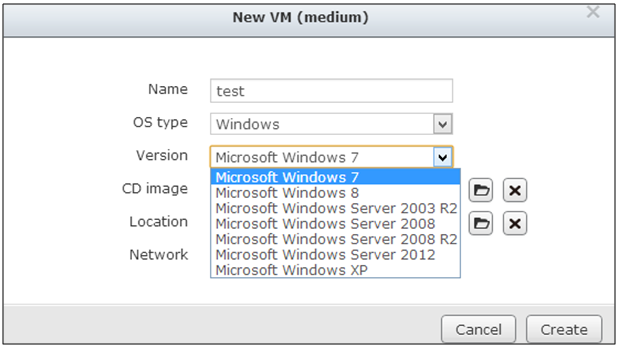
Next, you can configure settings the type & version of the operating system, the location of the CD image, the folder the VM will be located and the network interface.
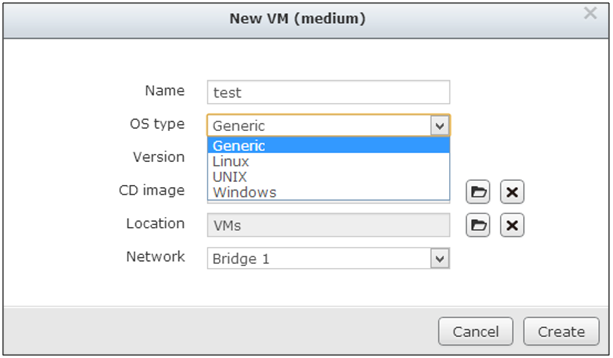
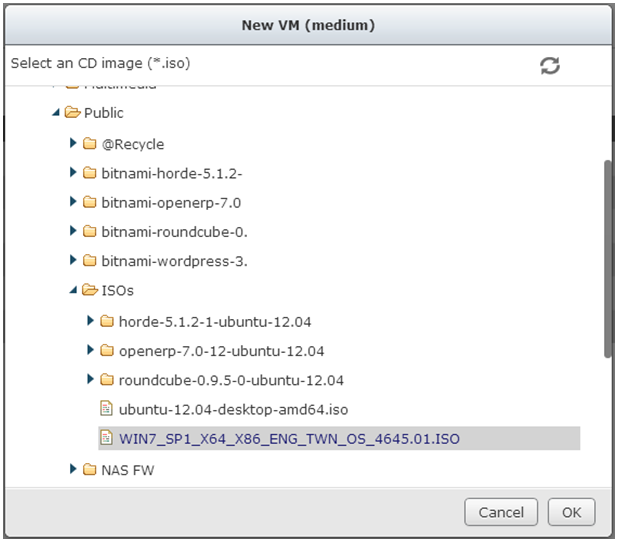

To finish the configuration, please click “Create”, and you will have created your VM (virtual machine).

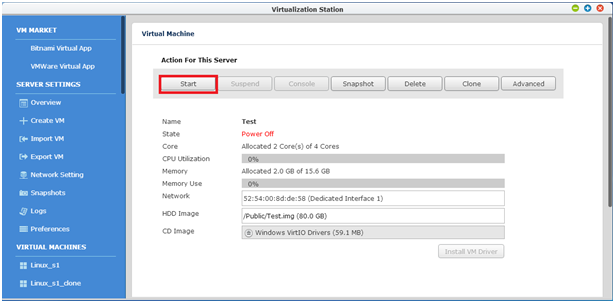
Next, click “Start” to switch on this VM (virtual machine).
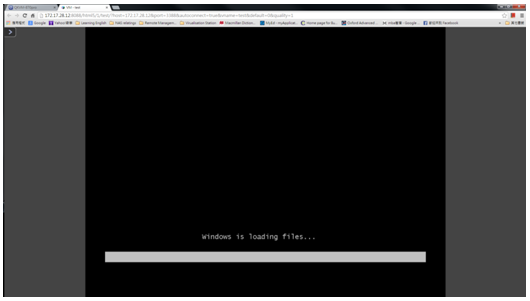
Please click “Console” to install the operating system on this VM (virtual machine).

.
IV – Introduction Of User İnterface And Function Operating For Virtualization Station: How To Import / Export VM or Snapshot
Overview:
The Overview will show details of the QNAP Turbo NAS, including its name, CPU specification & usage, and total memory capacity & usage. Below these details, all of the VMs (virtual machines) that you created will be listed.
1. Import VM:
When you want to import a VM (virtual machine), please choose  and then you can import the main VM file from the QNAP Turbo NAS or your PC.
6
Note: the file formats *.ova, *.ovf are compatible with the virtual machine exported from VirtualBox v4 and VMWare only; format *.vmx is compatible with the virtual machine created from VMWare Workstation 8/9 only; format *.qvm is only for Virtualization Station.
Next, you can configure the VM importing settings.
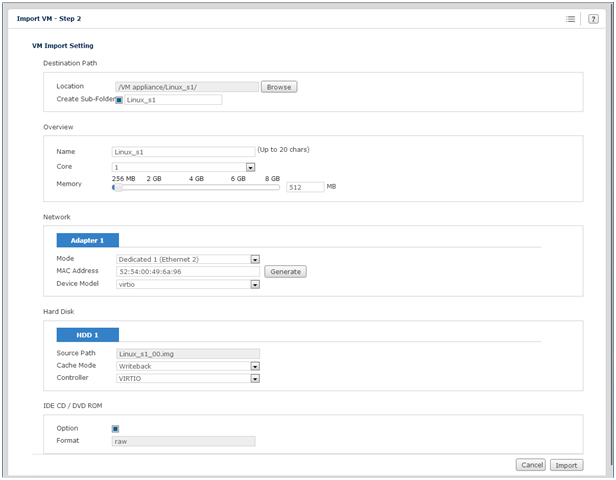
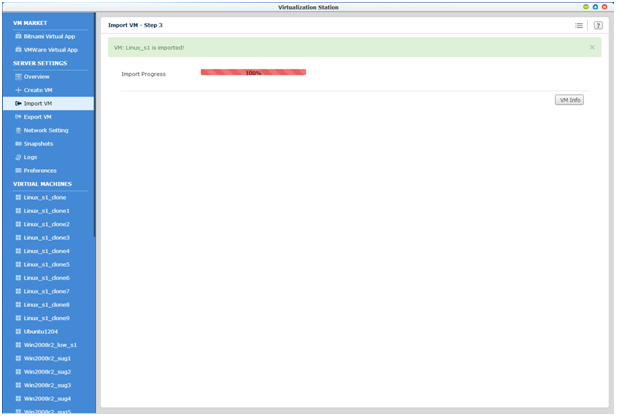
When you finish the configuration, click “import” and wait for the Import Process to finish. You will then see the VM that you imported on the Virtualization Station.

2. Export VM:
When you want to export a VM (virtual machine), please shutdown this VM (virtual machine) in advance of exporting.
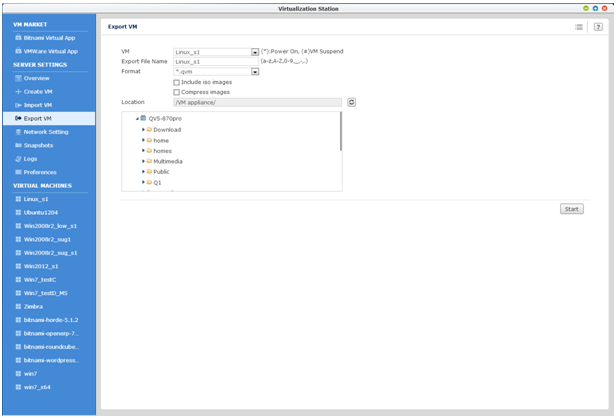
Next, please choose  ,and configure the settings that include the location & format for exporting files, images included in exporting (and if they should be compressed or not), and a file name for exporting files. After setting these configurations, please click “Start” to start exporting the VM.
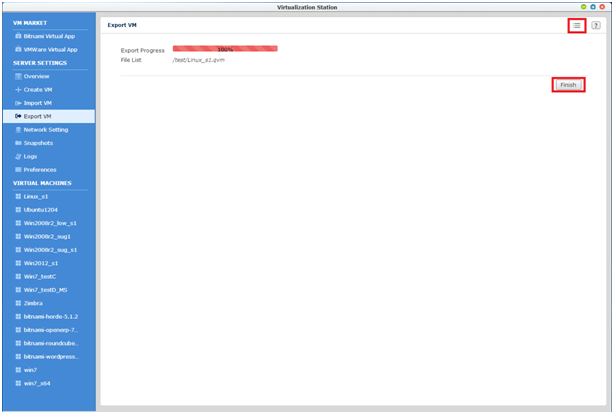
After the Export Process reaches 100%, click “Finish.”
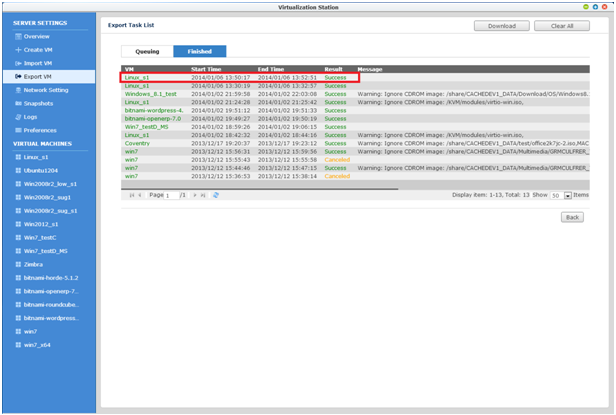
You can click  to check all VM export tasks.
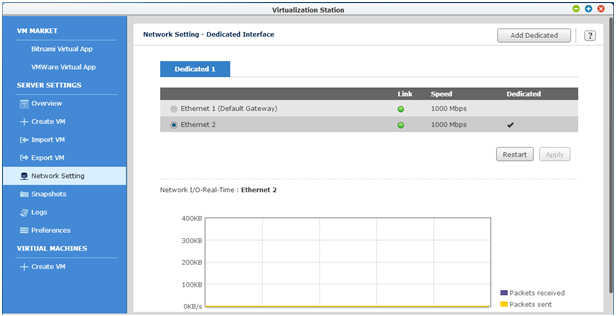
3. Network Setting:
When you choose ![]() ,you can see the Ethernets that the QNAP Turbo NAS is connected to or not and their transmitting speeds. The Default Gateway is only used for the QNAP Turbo NAS and the other Ethernets are used by VMs (virtual machines) on the Virtualization Station. You can check the bandwidth usage of VMs (virtual machines) in the Virtualization Station on the bottom of the “Network Setting” page.
,you can see the Ethernets that the QNAP Turbo NAS is connected to or not and their transmitting speeds. The Default Gateway is only used for the QNAP Turbo NAS and the other Ethernets are used by VMs (virtual machines) on the Virtualization Station. You can check the bandwidth usage of VMs (virtual machines) in the Virtualization Station on the bottom of the “Network Setting” page.
4. Snapshot:
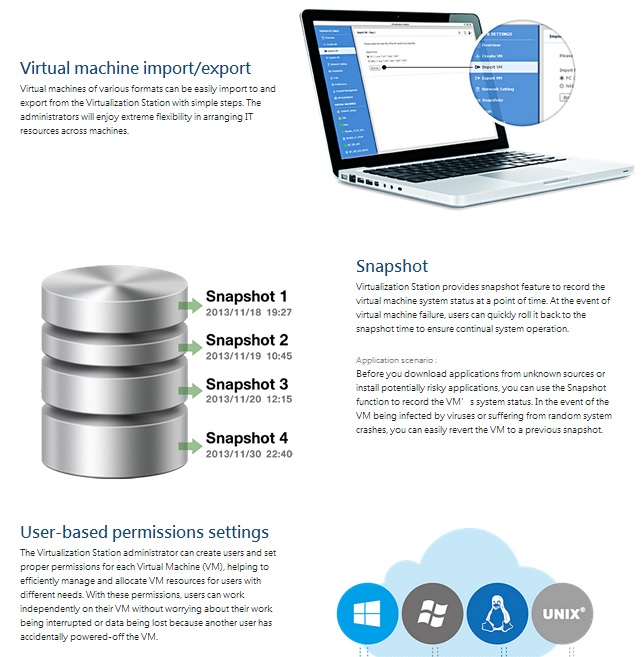
Virtualization Station provides a snapshot feature to record the virtual machine system status at a point of time. In the event of a virtual machine failure, users can quickly roll back to the snapshot time to ensure continual system operation.
First, please go to ![]() to choose the VMs (virtual machines) that you want to snapshot, and click “Snapshot”.
to choose the VMs (virtual machines) that you want to snapshot, and click “Snapshot”.
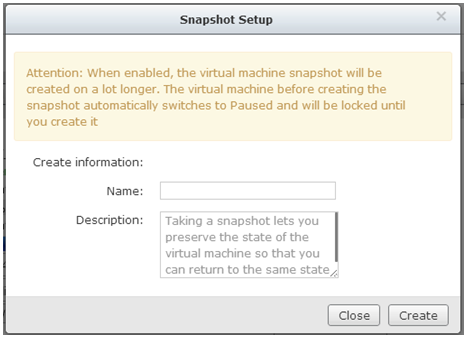
Next, please name the snapshot, and then click “Create” to start the process of taking a snapshot.

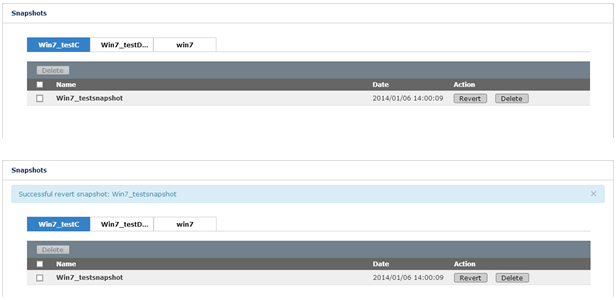
When you see the “Create snapshot [snapshot name] successful” message, then you can click “Hide” to go back the main page of “Snapshots”. Next please click ![]() to check all snapshot tasks, and if you want to recover the system status to the point of time that you took the snapshot, please click “Revert”.
to check all snapshot tasks, and if you want to recover the system status to the point of time that you took the snapshot, please click “Revert”.
5. Logs:
If you want to check the system logs of the Virtualization Station, please choose  to check. And if you want to download the whole report of system logs, please click “Download” to download a CSV file of the Virtualization Station system logs to your PC.

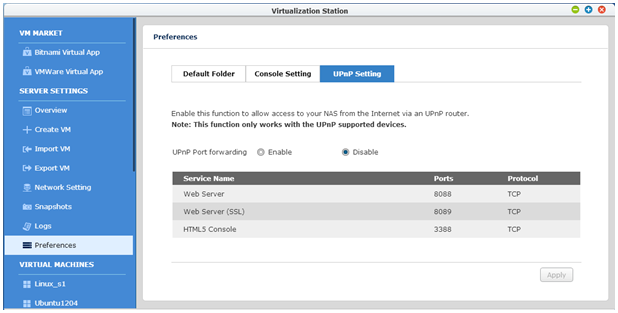
6. Preferences :
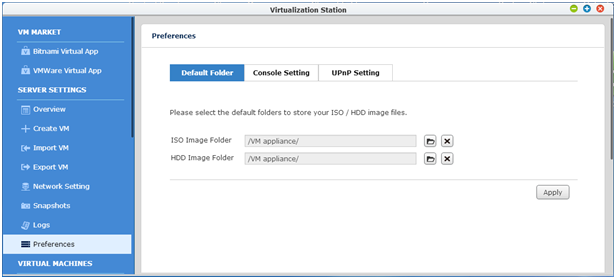
When you choose ![]() you will see the three preferences this page:
you will see the three preferences this page:
- Default Folder: you can set the default folder for the location of operating system disc images (ISO Image Folder), and the location of VM images (HDD Image Folder).
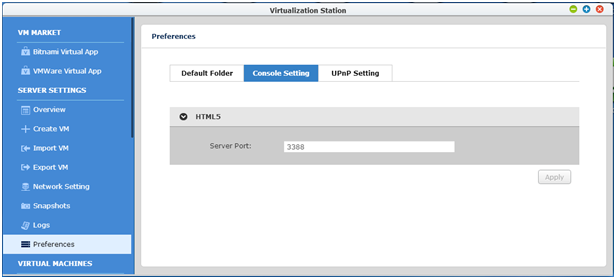
- Console Setting: You can change the default port for HTML5 server.
- UPnP Setting: You can enable/disable an UPnP router to allow access to your NAS from the Internet. (Note: this function only works with supported UPnP devices.)
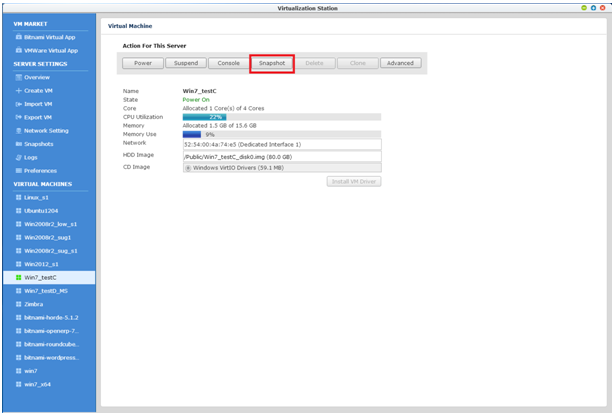
7. Virtual Machines :
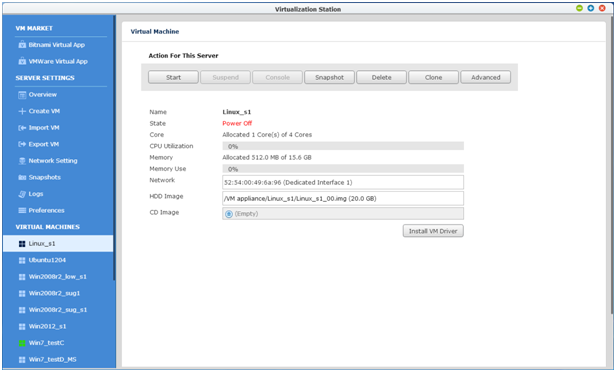
Through the list of Virtual Machines, you can view all of the VMs (virtual machines) that you created. And when you choose one VM (virtual machine), you can check the hardware information for this VM (virtual machine).
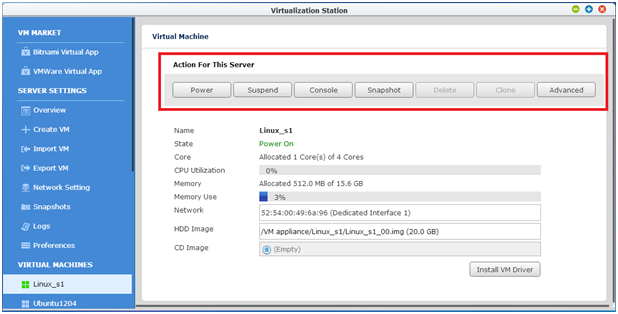
If you click [Power] it will reset power, power on or power off this VM (virtual machine).

- If you click “Suspend”, it will pause this VM (virtual machine) allowing you to “Resume” later.
- If you click “Console”, it will switch on this VM (virtual machine) and let you use the operating system on this VM (virtual machine).
- If you click “Snapshot”, it will record the virtual machine system status at a point in time.
- If you click “Delete”, it will delete this VM (virtual machine).
- If you click “Clone”, it will copy this VM (virtual machine) to another shared folder on the QNAP Turbo NAS.
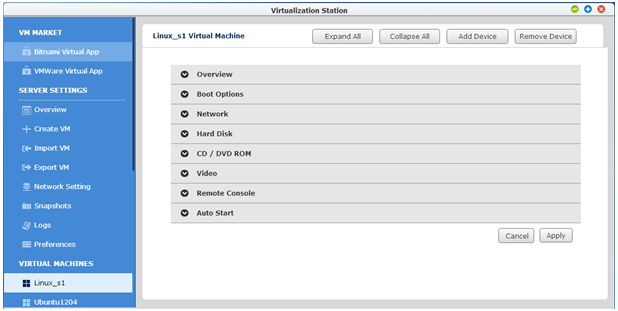
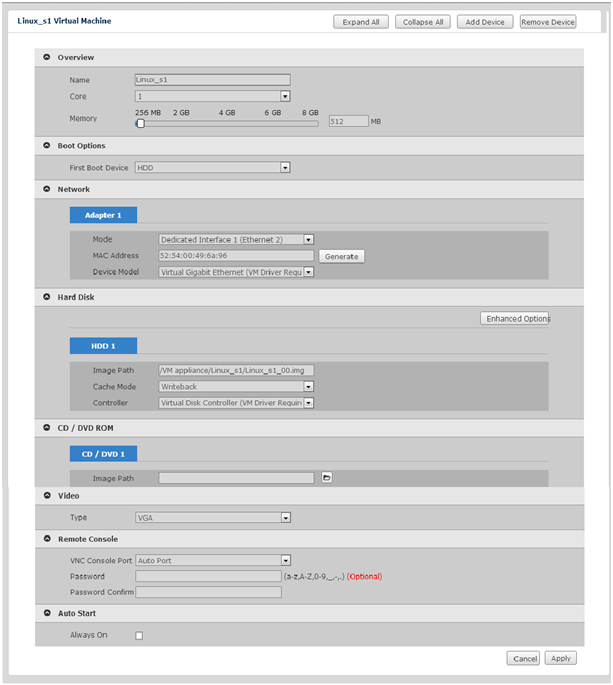
- If you click “Advanced”, you can configure every option of the VM (virtual machine) including network, hardware, boot options, CD-ROM, video, auto-start, and remote console.
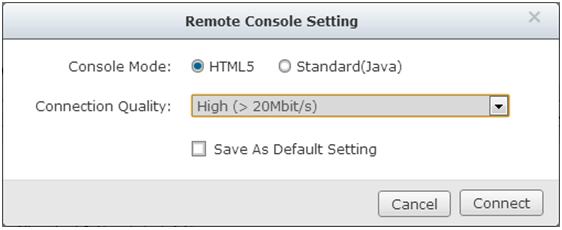
8. Console:
Please click “Console” to install the operating system on this VM (virtual machine). You can select the level of connection quality: High, Medium, Low and Ultra Low.
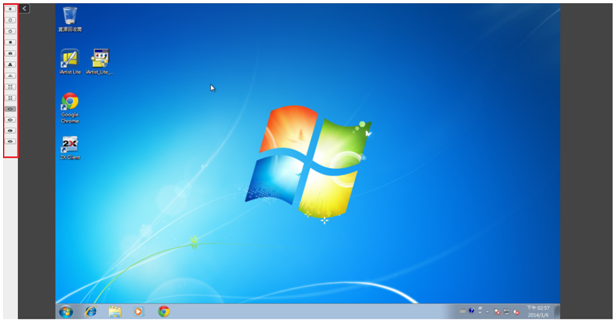
- If you click
 it will stop running this VM (virtual machine).
 - If you click
 it will reset this VM (virtual machine).
 - If you click
 it will shutdown this VM (virtual machine).
 - If you click
 it will force a shutdown of this VM (virtual machine).
 - If you click
 it will record the virtual machine system status at a point of time.
 - If you click
 it will trigger “Ctrl+Alt+Del” for this VM (virtual machine).
 - If you click
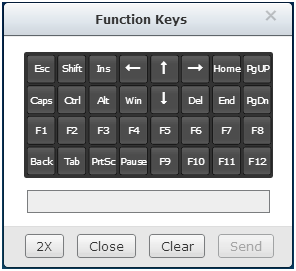
 it will show the software multi-keyboard for this VM (virtual machine).
- If you click
 , it will autofit to the size of window.
 - If you click
 , it will display in full screen.
 - If you click
 , it will switch connection quality to the high level.
 - If you click
 , it will switch connection quality to the medium level.
 - If you click
 , it will switch connection quality to the low level.
 - If you click
 , it will switch connection quality to the ultra low level.
.
V – Virtualization Station Limitation
Virtualization Station Limitation
| Item | Description |
| Maximum number of Virtual CPUs | Up to 4 for Intel® Core™ i3 / i5. Up to 8 Intel® Xeon. |
| RAM | Up to 30GB (Single VM). - Tower (16GB): Up to 14GB (Single VM). - Rackmount (32GB): Up to 30 GB (Single VM). |
| Maximum number of Dedicated networks | Up to 8. |
| Maximum number of snapshots | Up to 16 per VM (Virtual Machine). |
| Maximum number of simultaneously running VMs | The number of concurrently-running VMs is subject to actual usage of RAM, CPU capacity and running applications on VMs. Running multiple VMs at the same time may affect the performance of the NAS. (Note: Please visit QNAP’s website for detailed information. It is addressed on each supported NAS model.) |
| Maximum number of VMs | No limit. |
| Import VM File Support | *.OVA & *.OVF: VirtualBox 4.x and VMWare. *.VMX: VMWare WorkStation 8 and 9. |
| VGA Card | Standard VGA. (Please note: Direct X and OpenGL are not supported) |
| Port trunking (at least 4 Networking Interface Controller) | Support port trunking model for Dedicated network: - Active Backup - IEEE 802.3ad - Balance-tlb (Please note: before configuring port trunking, please ensure the Ethernet card is not already being used in a Dedicated network for VMs.) |
.
VIII – QNAP Virtualization Station Review: Want To Run VMs Securely And Cheaply? QNAP’s Virtualization Station Add-On App Does İt All Elegantly, Efficiently Thoroughly And Completely Epically Awesome (networkworld.com)
Want to run VMs securely and cheaply? QNAP’s Virtualization Station add-on app does it all elegantly, efficiently, and for free
Over the last few years I’ve reviewed a number of SOHO/SMB Network Attached Storage (NAS) products and, on the whole, I’ve really liked almost everything I’ve seen.
What’s really cool is that the leading manufacturers in this market have polished and re-polished to the point where these devices are amazingly powerful. They now all have add-on applications that extend their feature sets, incredibly slick browser-based management interfaces, and sophisticated hardware extensibility and just when I thought innovation in this market had slowed right down I discovered one company with a new feature that is, at least if you’re as much of a geek as I am, ridiculously cool: Virtual machine support!
Yep, in July QNAP, one of the leading NAS manufacturers, announced that an add-on application called Virtualization Station was available so, naturally, I had to get my hands on one of their NAS systems that can run it. This includes their TS-ECx80 Pro, TS-ECx80U-RP, TS-ECx79U-RP, TS-x79U-RP, TS-ECx79U-SAS-RP, SS-ECx79U-SAS-RP, TS-x51, and TS/SS-x53 Pro series.
I got my hands on a QNAP TS-451 NAS a few weeks ago and I’ve beaten it and Virtualization Station up fairly aggressively and I can report that the system is thoroughly and completely epically awesome.
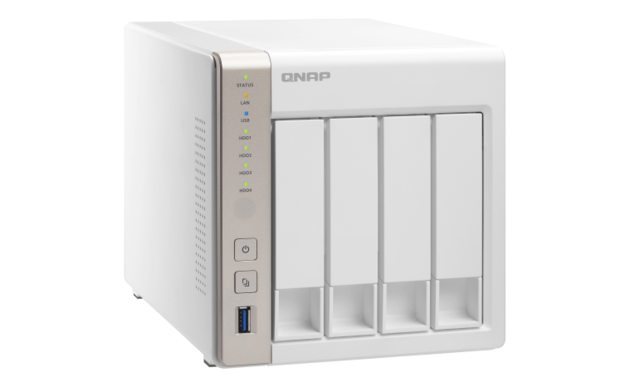
First, the hardware. The QNAP TS-451 is a four-bay NAS running a two-core, 2.41GHz Intel Celeron Processor. As standard it comes with 1GB DDR3L RAM but to run Virtualization Station you’ll need 4GB minimum (you can have up to 8GB total).
The system ships without drives and you can use 3.5” or 2.5” SATA (6Gb/s or 3Gb/s) hard drives or SSDs. These are mounted in hot-swappable trays and can be configured as RAID 0, 1, 1+0, 5, or 6. The TS-451 also has two Gigabit Ethernet ports, two USB 3.0 ports , two USB 2.0 ports, and one HDMI port.
Priced at around $680, the QNAP TS-451 is amazing value. It’s easier to say what it doesn’t do than what it does and it gets a Gearhead rating of 5 out of 5.
The QTS 4.0 Turbo NAS operating system is based on Linux and its Web-based user interface is a great piece of engineering. It’s slick, fast, and well-designed with multiple windows and multi-tasking.
There’s a large online library of apps to add to your NAS as well as mobile apps so you can access your stored content and apps from anywhere. In short, it’s loaded with features but the one that most concerns us here is the Virtualization Station, a free add-on application.
Based on QEMU, a generic and open source virtualization system, Virtualization Station supports Fedora 11 … 19, Centos 6.0 … 6.4, Ubuntu 10.04 … 13.10, FreeBSD 8.3 and 9.1, Sun Solaris 10 and 11, Windows XP, 7, 8, 8.1, Windows Server 2003 R2, 2008, 2008 R2, 2012, 2012 R2, RHEL Linux 6, SLES 11, and OpenSUSE 11 and 12. And you can add to that most other Linux distros as well as other OSes that are less mainstream but run on x86 or AMD hardware.
In Virtualization Station you can create VMs from scratch using ISO images or import .ova, .ovf, .qvm, and .xml VM specifications from your PC or NAS folders and .vmx specifications from your NAS folders. The Virtualization Station also provides links to VM stores offered by the Bitnami App Store and VMware Virtual Appliances Marketplace.
Virtualization Station provides access to the VM’s consoles via either an HTML5 or Java Web client and all VMs can be enabled for VNC access.
1I downloaded a couple of the Bitnami VMs, specifically the Ghost (an amazing blogging platform) and WordPress appliances. Getting them running was impressively easy. I’ll review both of them in future articles as there’s a lot more to say about these products.
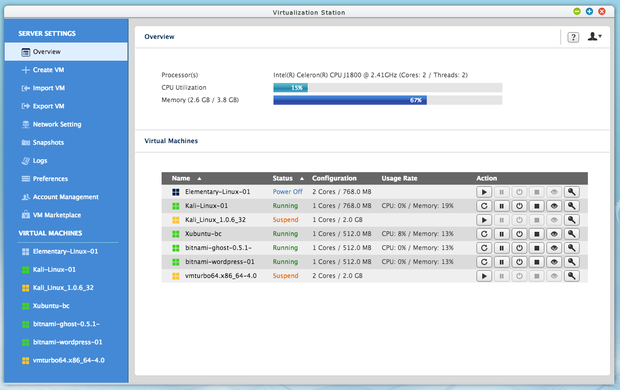
I also installed Kali Linux, Xubuntu, and VMTurbo VMs along with Bitnami Ghost and WordPress machines and as you can see I had four VMs running, two suspended, and one powered off.
The VM management interface is excellent and overall, the potential of Virtualization Station is enormous … but only to the technically minded.
If you’re a a business owner who wants to use thin clients or isolate sensitive apps for controlled access you’re not going to want to mess with this system; you’ll want someone who is comfortable with the concepts and technologies involved to set it up.; this is not something for the neophytes to wrangle. That said, once set up there should be no problems and running for extended periods without problems (other than those that, say, Windows causes anyway) shouldn’t be a problem.
I am absolutely sold on this product. It’s fast, flexible, incredibly useful, and solidly built. QNAPs Virtualization Station gets a Gearhead rating of 5 out of 5
http://www.networkworld.com/article/2686206/network-storage/qnap-virtualization-station-thoroughly-and-completely-epically-awesome.html
Virtualization Station: Virtualized Desktop Operations On The Turbo Nas For Managing Multiple Virtual MachinesVirtualization Station: Qnap NAS Üzerinde Çoklu Sanal Makine Kurulumu,