I – Tutorial: Configuring Time Machine Backup on QNAP QTS
II – Ready Time Machine On Your Mac
.
I – Tutorial: Configuring Time Machine Backup on QNAP QTS
I will say this and say it again until your ears bleed: back-up, back-up, back-up, back-up and then when you think you’re safe, back-up some more. If you’re on a Mac, Apple makes it easy. Since OS X 10.5, they’ve built a backup tool called Time Machine into the operating system. You can do this with a single hard drive, but those aren’t backed up themselves and if you’re on a MacBook, you have to unmount the drive before you can move your laptop.
Going with a NAS device allows you to provide backup to to every Mac in your house or place of business no matter where they are. QNAP makes it easy with full support for Apple’s Time Machine in every current NAS they sell from the silent fanless HS-210 meant for the home all the way up to the big rack mounted 24-bay units. I’ll show you how to set it up like I have.
Preparing Your QNAP
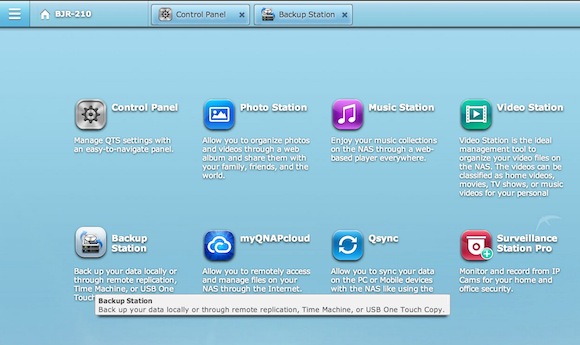
In your QNAP Interface, go to Backup Station. It should be in your home screen, but you can also easily access it through the control panel under Applications.
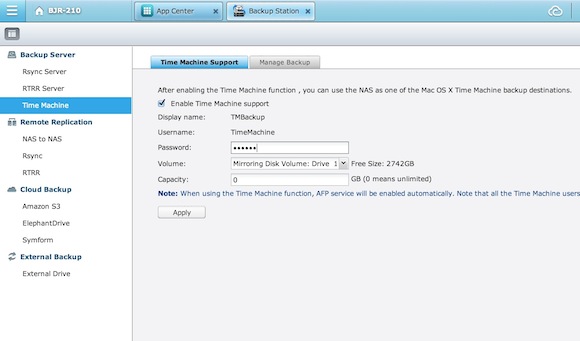
- Once Inside, choose Time Machine in the left hand menu. Take note of theTMBackup display name and TimeMachine username. You will need this later.
- Enter your preferred password in the Password box. This is different from your user password since the Time Machine Backup is its own user.
- Click on the Enable Time Machine box.
- From here, select a volume. If you’re using a 2-bay unit like the HS-210, you’ll likely only have 1 choice.
- Lastly, choose how much disk space you want your Time Machine server to use. If you only plan to use your QNAP for Time Machine backup, you can leave this at 0. If not, you can enter a manual amount in Gigabytes. 2TB would be 2000GB for example. By default, Time Machine will keep filling up the disk with backups until full since it is more than your typical backup.
- Once everything is done, click the Apply box.
You’re all set on the QNAP!
II – Ready Time Machine On Your Mac
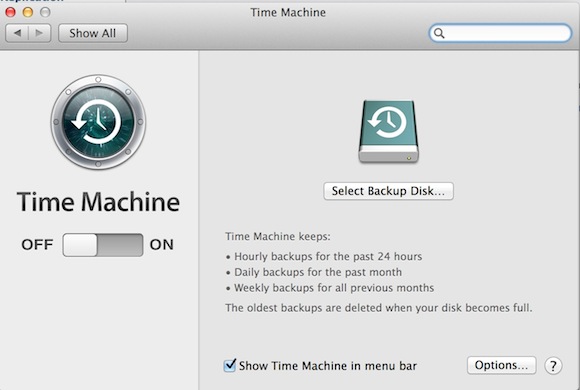
This should be the easiest backup you’ve ever done. Open up your System Preferences. You can find it either on your Dock, within Launchpad, or if worse comes to worse, in the Applications Folder. Now click on the Time Machine preference Pane. It’ll be the green circle looking one with a counter clockwise arrow. Click on the Select Backup Disk icon on the right side of the pane.
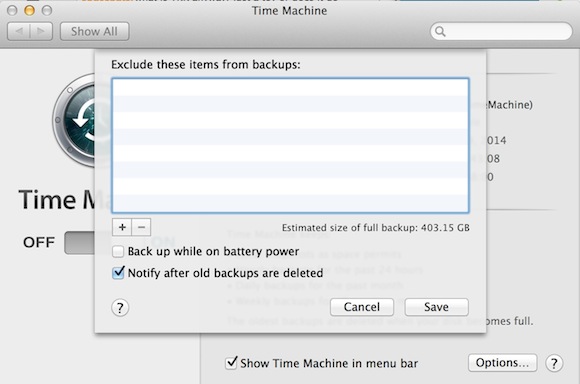
Here’s an important side step. If you have any external drives you wish to backup as well, they may be excluded by default. Click on Options in the lower right hand corner. If there are any disks listed that you’d like to include in your Time Machine backup, click on the disk and then click the - sign. If not, just press Cancel. You can also choose backup on battery power, but I would not recommend clicking on that. Always backup when connected to a power source. If you have no external drives, just skip this step entirely.
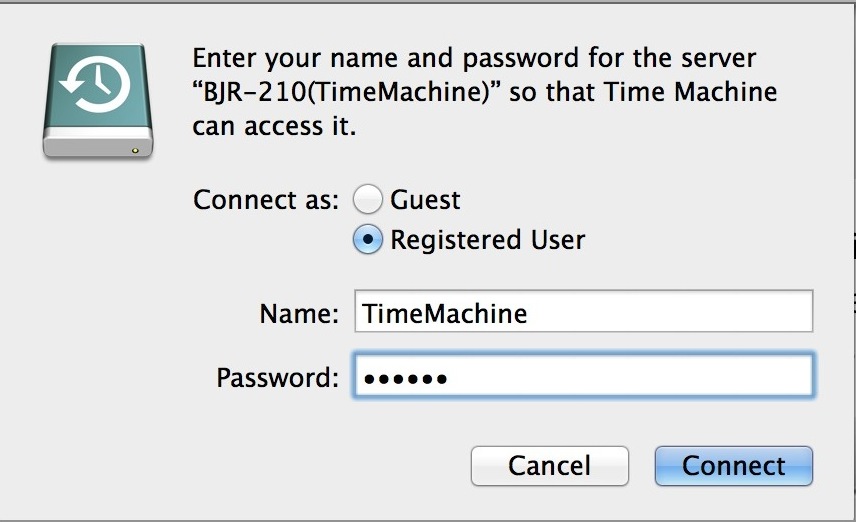
You’ll be given options of which disk you want to choose. You’ll be given an option between your QNAP, Apple’s own TimeCapsule (whether you have one or not), and any external disks you may have. Click on the TMBackup on whatever you named your QNAP.

You’ll now be presented with a login screen for the QNAP since it is a NAS instead of a direct attached storage. For the name enter TimeMachine. For the password, enter the password you created in the Backup Station. Once both boxes are filled click Connect.
Success!
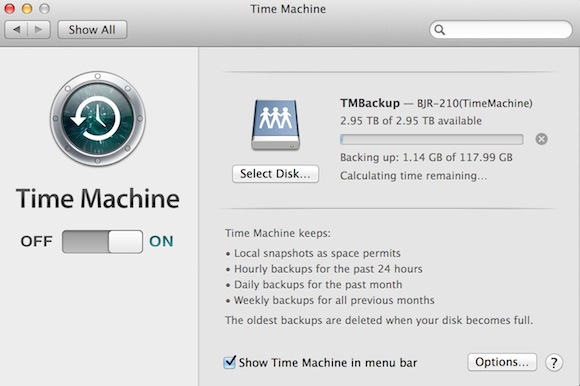
If you followed all the steps correctly, the Time Machine button in the left side of the preference pane will switch to on and the disk icon will have a progress bar showing how much time you have available for the backup. Depending on your network equipment, this will take a while, so I would recommend doing this right before you go to bed. It will take several hours, so don’t expect the same speeds you would with direct attached storage. Do not disconnect your Mac or you may compromise the Time Machine Backup. Now you may quit out of System Preferences. It’ll do its thing in the background.
That’s it. You can breathe a little easier knowing your data is a lot safer than it was before this process. You can now relax, or repeat the process for any other Macs you have in the house.
I hope you enjoyed this little tutorial. Keep tuned for more in our QNAP sponsored series.
http://geekbeat.tv/step-step-guide-configuring-time-machine-backup-qnap-qts/
Time Machine KurulumuTime Machine Setup,
what additional steps do I need to take to move an existing time machine backup (on an external drive) to my qnap so that the backups can continue seamlessly and I can leave everything happily to tm and qnap ?