I - How to Use Amazon S3 with QNAP Turbo NAS
II – Continuous Data Protection on QNAP NAS with ElephantDrive
III – How to Use Symform with QNAP Turbo NAS (Seems Doesnt Work Anymore)
IV – Backup QNAP NAS Data to Microsoft Azure Storage
.
I - How to Use Amazon S3 with QNAP Turbo NAS
Amazon S3 (Simple Storage Service) is an online storage web service provided by Amazon Web Services. QNAP Turbo NAS supports Amazon S3 to allow the users to back up the data from the NAS to Amazon S3, or download it from Amazon S3 to the NAS at anytime. Besides, the users can also create scheduled replication job for daily, weekly, or monthly backup.
To use the Amazon S3 feature on QNAP NAS, follow the steps below:
Getting an Amazon S3 Account
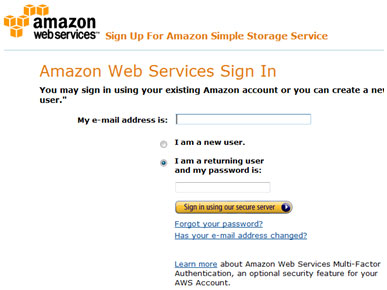
Step 1: Sign up/ Login Amazon Web Services Account
You need to sign up for Amazon S3 account (http://aws.amazon.com/s3/). For the price information, please refer to the Amazon web services website.
Step 2: Get Your Access Key ID and Secret Access Key
Once you have successfully signed up an account, you will receive your Access Key ID and Secret Access Key. Please keep your ID and key safe.

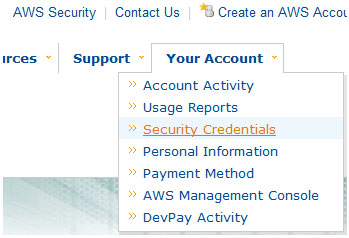
If you have missed the Access Key ID and Secret Access Key notification, click “Your Account” and choose “Security Credentials” to retrieve them.
You can check the account activities, view the payment, and change your profile etc. under “Your Account”. Now your Amazon S3 account is created and ready to go.
Using Amazon S3 on Your PC
Your Amazon S3 account starts with a clean root account. On the root is where you create buckets. A bucket refers to a root folder in Amazon S3. You can create multiple buckets, and upload your folders and images to the buckets. Before creating any remote replication job on QNAP NAS, please create at least one bucket on Amazon S3 by an Amazon S3 application. For the beginners, we recommend the S3Fox Firefox add-on.
Using Amazon S3 with Firefox S3Fox
Make sure you have installed Firefox browser and S3Fox.
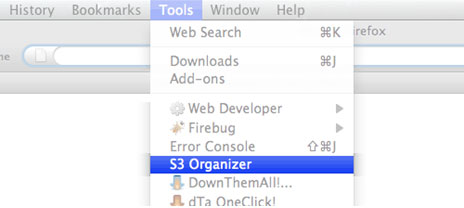
Step 1: Launch S3 Organizer
Open a Firefox web browser. Go to “Tools” and select “S3 Organizer”.
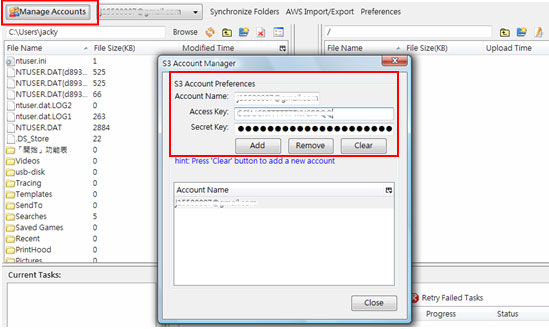
Step 2: Set up account
Click “Manage Accounts” and enter your Amazon S3 account information with S3 Organizer. Click “Add” to save the information.
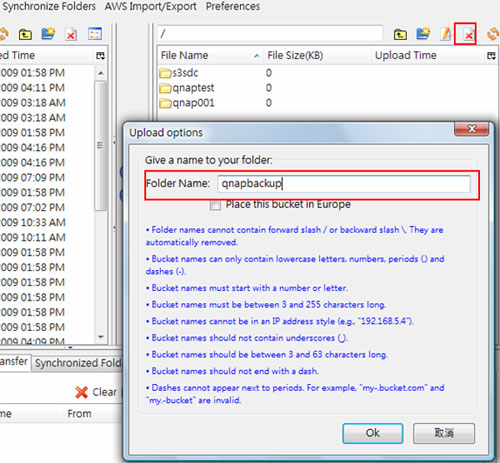
Step 3: Get connected, create the first bucket
Once you have entered the correct information, you will be brought to your account (which is blank by default). Your local folders are shown on the left and Amazon S3 buckets are shown on the right. On the right side of S3 Organizer, click “Create Directory”. Enter the bucket name, e.g. qnapbackup. Any folders created on root level will be your buckets. Your bucket name must be different from that of other S3 users. All the files and folders will be stored and organized under the buckets.
Step 4: Create folders and upload files
Double click your bucket and create a folder. You can upload files to the folder. By default, the files uploaded to your Amazon S3 account are not accessible by the public. For more information, please refer to this video tutorial.
Some Amazon S3-Supported Applications:
- Firefox browser with S3Fox plug-in.
- JungleDisk.
- Transmit – FTP/SFTP application for Mac.
- Backup Manager – Command-line tool for Linux.
- S3 Backup – Windows desktop application.
- jets3t – Open-source Java toolkit and application suite for Amazon S3.
- Sync2S3
- SME Storage.
- S3Sync.
Amazon S3 Support on QNAP NAS
You can back up the NAS data to or retrieve the data from the Amazon S3. Amazon’s services will generally accept requests that are received within 15 minutes after you login Amazon S3. Before getting started, make sure your system clock is set correctly according to your time zone. It is suggested to configure your NAS to automatically synchronize with the system clock using the Network Time Protocol (NTP).
Create Remote Replication Job on Amazon S3
Follow the steps below to create a remote replication job on Amazon S3.
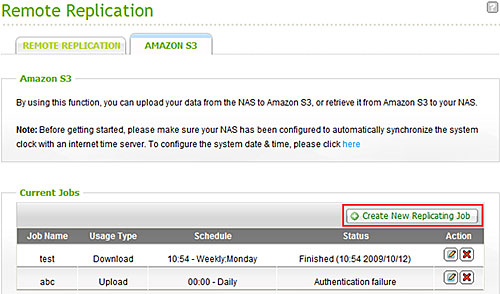
1.Login your QNAP NAS and go to “Backup” > “Remote Replication” > “Amazon S3″. Click “Create New Replicating Job”.
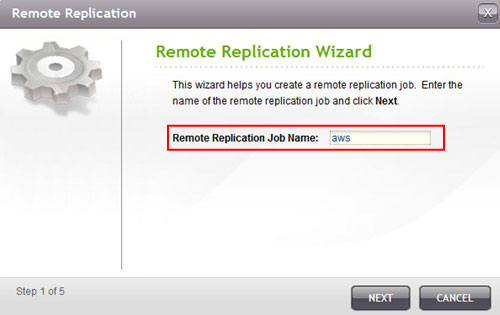
2.Enter the job name.
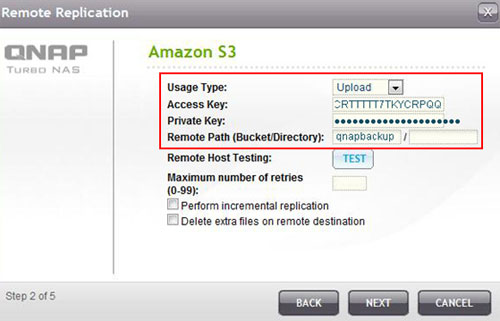
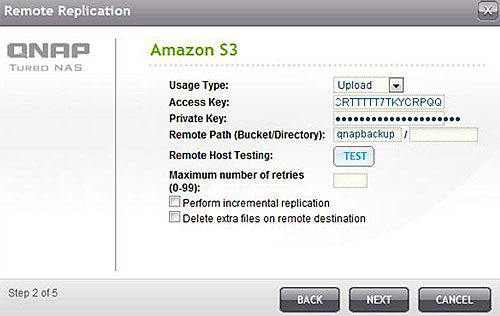
3.Select usage Type (Upload or download) from the dropdown menu. Then input the access key, private key and remote path. A bucket is the root directory on Amazon S3. You can do remote host testing by clicking “TEST”. Other settings are optional.

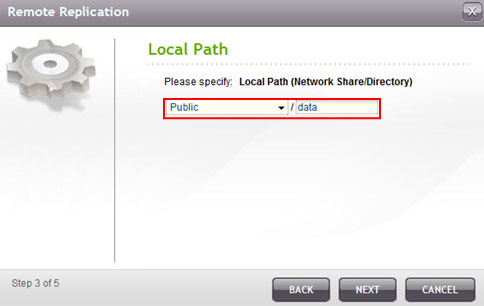
4.Specify the local path as Network Share/ Directory. Select the network share from dropdown menu and input the directory.
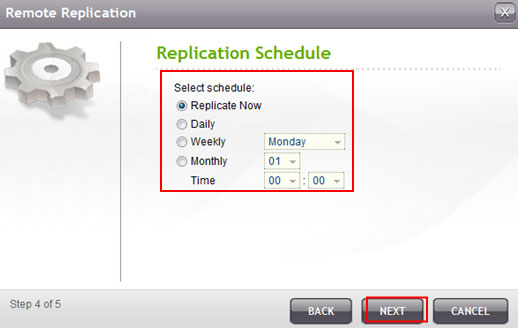
5.Specify your replication schedule.
6.Click “Finish” to complete the setup.

Upon successful job creation you will see the status of the replication job(s). You can edit or delete them if necessary.

.
II – Continuous Data Protection on QNAP NAS with ElephantDrive
Introduction
ElephantDrive is an online backup and storage service which provides scheduled and real-time data backup directly from QNAP NAS to an ElephantDrive account. You can manage the backup and restore jobs via the web-based management interface (http://www.elephantdrive.com/qnap/).
This how-to shows you how to create an ElephantDrive account from QNAP NAS and back up data from the NAS to ElephantDrive service.
.
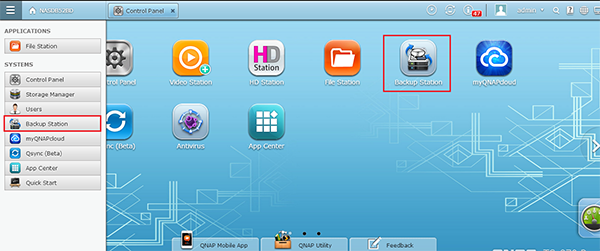
(1) Login to the NAS as ‘admin’ and go to ‘Backup’ > ‘Cloud Backup’ > ‘ElephantDrive’.
(2) Select ‘Enable ElephantDrive Service’.
(3) Enter your email address that will be used to create an ElephantDrive account.
(4) Enter a password for your ElephantDrive account and verify the password.
(5) Click ‘CREATE’ to create the ElephantDrive account and then click ‘OK’ to confirm.
(6) Click ‘APPLY’ to start the service. If you already have an ElephantDrive account, simply enter your login information and click ‘APPLY’.

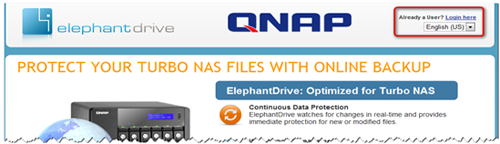
(7) Now click the link: https://www.elephantdrive.com/qnap and you will be brought to the ElephantDrive service page to manage your backup jobs.
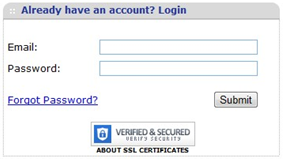
(1) On the ElephantDrive service page (https://www.elephantdrive.com/qnap), select your language and click ‘Login here’ on the top right hand corner.
(2) Enter your login information (same as the email and password you have entered on the NAS) and click ‘Submit’.
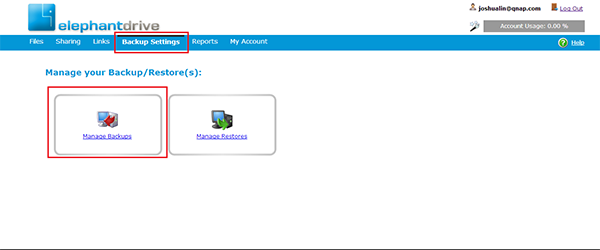
(3) Click the ‘Backup/Restore’ tab and select ‘Manage Backup Jobs’.
Note: There are already backup jobs for each share folder on the NAS and they are disabled by default.
(4) To enable and edit a backup job. Select your NAS under ‘My Devices’. You can add multiple QNAP NAS servers by entering the same login information on the ElephantDrive page of the NAS.
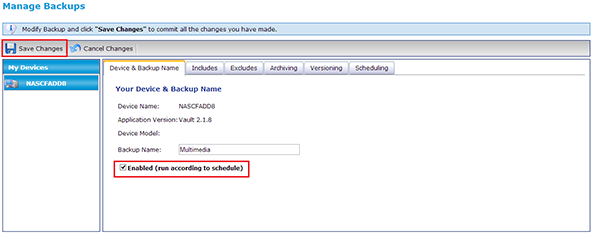
(5) Select the NAS network share, e.g. Multimedia, under ‘Backup Job’ and click ‘Edit Job’.

(6) Select ‘Automatic/Enabled’ to enable the backup job. You can also edit the job name.
(7) Click ‘Save Changes’. The folder is now ready to be backed up.
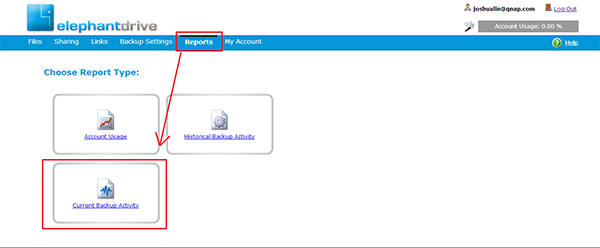
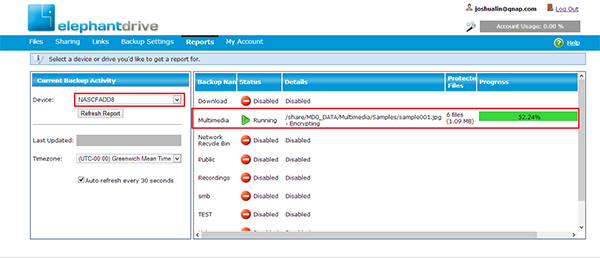
(8) You can verify the current backup activity in ‘Reports’ > ‘Current Backup Activity’. Select your NAS device and click ‘Submit’. The folder Multimedia will start being backed up to the cloud storage and the status is shown as ‘Running’.
(9) When finished, the status will become ‘Monitoring’ and the number and size of the files which have been backed up are shown under ‘Protected files’. ElephantDrive will monitor the NAS folder and back up any changes immediately.
To learn how to share files, manage your file versioning and archiving preferences, and access your files remotely, check out the ElephantDrive tutorials page.
.
III – How to Use Symform with QNAP Turbo NAS
- In the Administration section choose “Cloud Backup” from the Home page.
- Click the “Symform Tab” from the Cloud Backup Landing page.
- Click the “Get Started Now” button.
Symform will automatically download and install on your device. Once the installation is complete the configuration Wizard will walk you through a few simple steps to get your device backing up files and contributing local disk space to the Symform Cloud Storage Network.
If you would prefer to install the packages manually
Ideally you would install Symform on your QNAP device directly through the QNAP web admin (under myQNAPcloud > Cloud Services > Symform), but if that doesn’t work you can do the installation manually by following these steps. The same process works for updating an old version of Symform.
Download the installer: http://download.symform.com/control/current/qnap/SymformInstaller_0.1.qpkg
In a web browser log in to the QNAP Turbo System Web interface.
If your login looks different from these instructions you likely have an older version of the QNAP firmware. If so, you should upgrade by following these steps.

Click on the “App Center” icon.

Click on the “Install Manually” button in the top right corner of the window.

Click browse and choose the SymformInstaller_0.1.qpkg downloaded earlier and click Install.

Click “OK” to confirm the installation.

Wait while Symform is updated.

Click “OK” to close the complete message.
Click “Close” to close the manual install dialog.

Congratulations, you now have the latest Symform software installed. The remaining instructions are optional to remove the temporary package that was installed along with Symform.
Find the SymformInstaller package in the list and click on the name “SymformInstaller”.

Click on the “Remove” button in the top right. (This will not remove Symform, only the temporary installer package.)

Click “OK” to confirm the removal.

https://community.symform.com/entries/36714156-QNAP-Manual-software-installation-or-update
.
IV – Backup QNAP NAS Data to Microsoft Azure Storage
QNAP QTS supports multiple cloud backup solutions
QNAP QTS offers easy-to-use, feature-rich, and secure cloud backup solutions that allow you to back up your data to a variety of enterprise-class public cloud storage services including Microsoft Azure, Amazon S3, Amazon Glacier, and IBM SoftLayer. It also supports various private cloud storage solutions that are compatible with S3, OpenStack Swift, and WebDAV. QNAP QTS is your cloud storage gateway that helps you build a simple and affordable disaster recovery plan, as well as worry-free data preservation for archival or compliance purposes.
This tutorial describes how to use QNAP’s Azure Storage App on Turbo NAS to back up your data to Microsoft Azure Storage.
QNAP QTS enables powerful and secure cloud backup
QNAP QTS Cloud Backup for Azure Storage supports the following features:
- Supports both manual and scheduled backup
- Supports full and incremental backup
- Supports flexible file filtering using type, date, and sizes
- Supports SSL transfer encryption and client-side AES-256 encryption
- Supports managing multiple cloud accounts
- Supports dashboard and job statistics
- Supports configurable network error recovery options
- Supports job activity logging for tracing history
- Supports multi-threaded data transfer in one job
- Supports concurrent job execution
- Supports restoring directly from the cloud for disaster recovery scenarios
Microsoft Azure offers reliable and high-performance cloud storage
Microsoft Azure provides scalable, durable cloud storage, backup and recovery solutions for any data, large and small. It works with the infrastructure you already have to cost-effectively enhance your existing applications and business continuity strategy, and you pay only for the data you’re storing.
Microsoft Azure provides three types of storage: (1) Blobs, (2) Tables, and (3) Queue. There are two types of Blobs: Block Blobs and Page Blobs. QNAP’s “Azure Storage” App uses Block Blobs to store your data, because Block Blobs are designed for large amounts of unstructured text or binary data such as video, audio and images.
The Concept of Blobs in Microsoft Azure
The Blob service contains the following components:
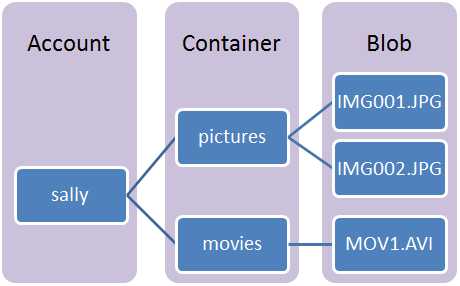
- Storage Account: All access to Azure Storage is done through a storage account.
- Container: A container provides a grouping for a set of blobs. All blobs must be in a container. An account can contain an unlimited number of containers. A container can store an unlimited number of blobs.
- Blob: A file of any type and size.
- URL format: Blobs are addressable using the following URL format:
http://.blob.core.windows.net//
Preparation for using Microsoft Azure
Get a Microsoft Azure Account
- You need an Azure account before using Azure Storage. An Azure account gives your applications access to all Microsoft Azure services. An Azure account can contain up to 200TB of blob, queue, and table data
- If you don’t have an Azure Service Account, you can apply for a Microsoft Account on the Microsoft Azure web site. Please note that Microsoft has an independent site dedicated for China-based users. If you would like to use Azure services in China, please visit Microsoft’s China Azure web site.

- If you already have an Azure service account, please follow the below steps to create your own Azure Storage account. Click “New” from the bottom left side on the navigation panel to create a service:

- Click “Data Service” > “Storage” > “Quick Create”
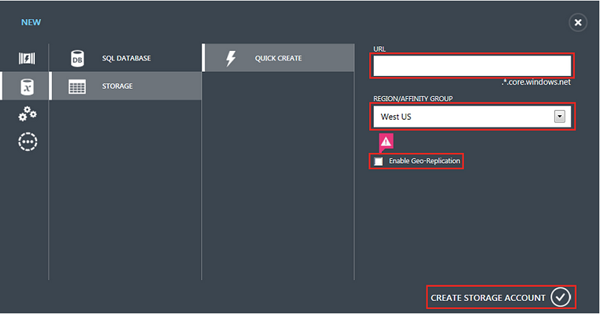
- In “URL”, enter a subdomain name to use in the storage account URL. This name will also be the storage account name.
- In “Region/Affinity Group”, select a region for the storage.
- In “Replication”, select the level of replication that you desire for your storage account. By default, it is set to “Geo-Redundant”. Other options are “Locally Redundant” and “Read Access Go-Redundant”.
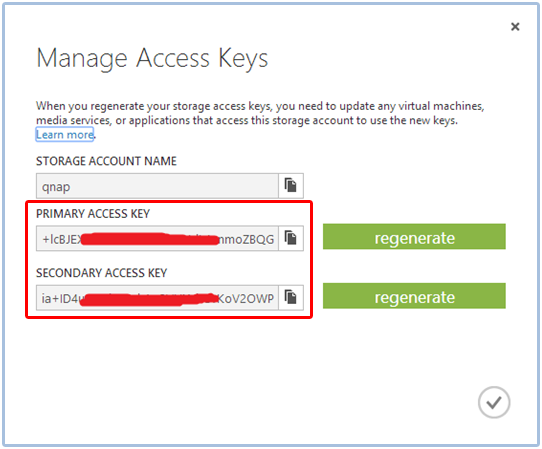
- After creating a Storage Account, click “Manage Access Keys” to get your Storage Account’s “Primary Access Key” or “Secondary Access Key” as you will need to input either Key in the QNAP Azure Storage App.
Installation on QNAP NAS
Install the Azure Storage QPKG
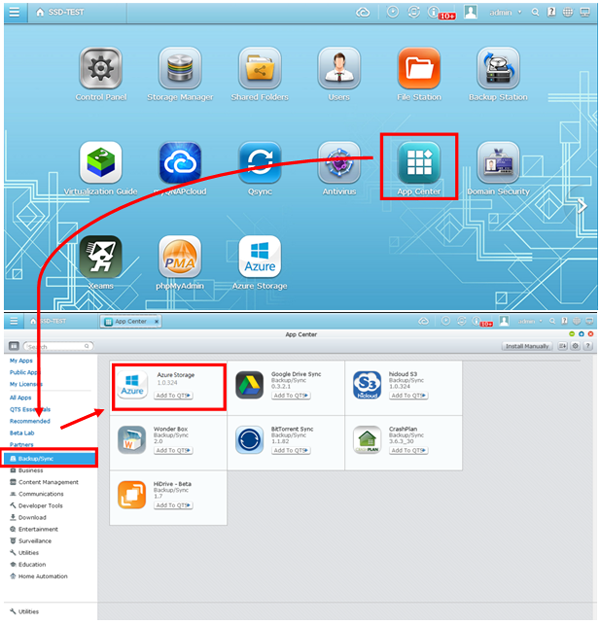
To install Azure Storage on your Turbo NAS, sign into the QTS web interface as an administrator. Then go to “App Center” > “Backup/Sync” > “Azure Storage” > Click “Add to QTS”
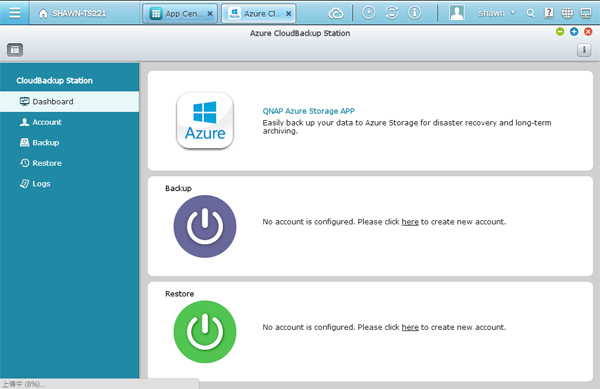
Launch Azure Storage
Launch “Azure Storage” from desktop, and click “Azure Storage” to open “Azure CloudBackup Station”

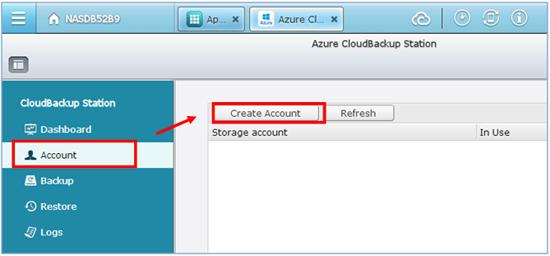
Create Azure Account
- Click “Account” > “Create Account” for backup and restore jobs.
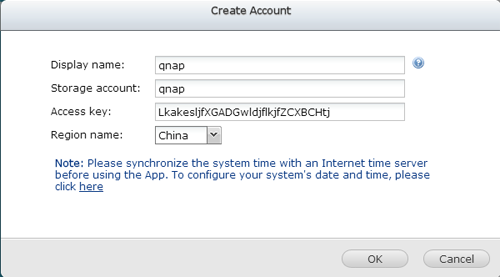
- Enter the “Storage account” and “Access Key” from your Azure storage account to finish the “Create Account” settings
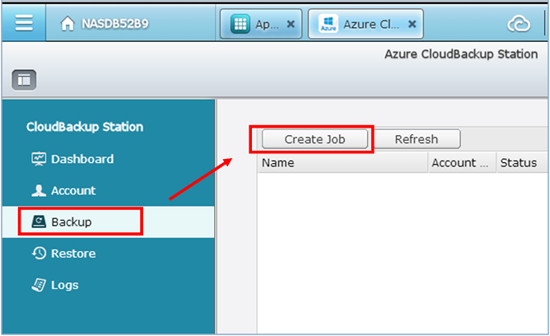
Create Azure Storage Backup Job
- Click “Backup” > “Create Job” to create a new backup job.
- Choose the backup folder(s). One or more source folders can be selected for backup.

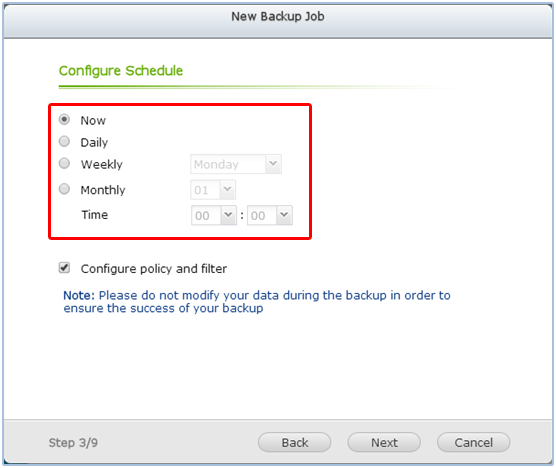
- Configure your backup schedule. You can select periodical schedules with “Daily”, “Weekly”, “Monthly”, or you can backup “Now”.
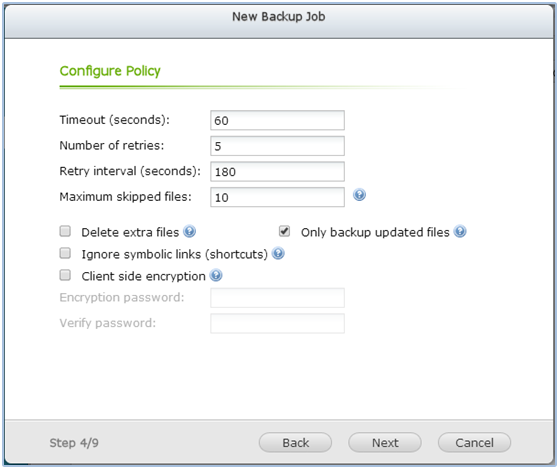
- Configure the backup setting. You can set up some connection parameters, and also can filter the backup file to make transferring more efficient.
- Select “Account” and enter the “Container name” then you can test whether your account is active or not. The container you use has to be empty. If you enter a non-existent container name, a new container will be created by this backup job.

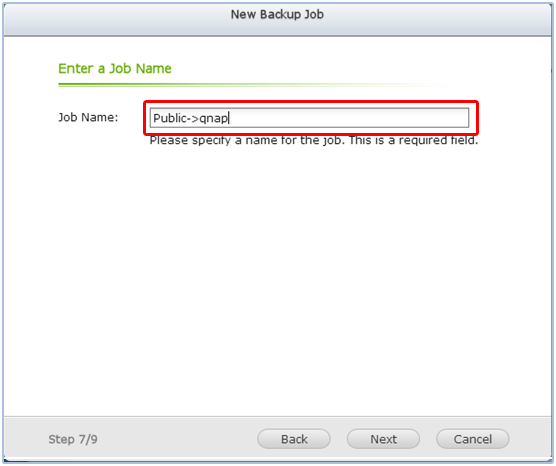
- Enter a name for your backup job (Default: Destination Folder -> “Container”)
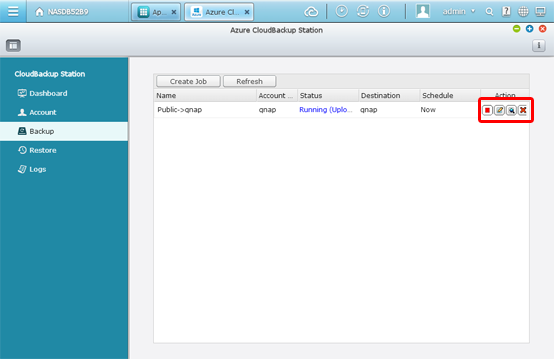
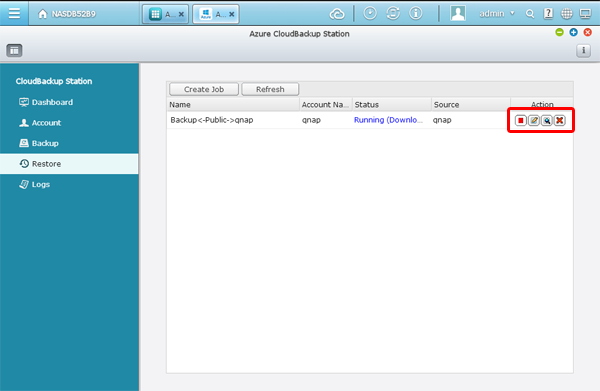
- The settings are now finished. You can carry out some actions for this backup job: starting/stopping a job, editing job configurations, viewing job logs, or deleting a job.
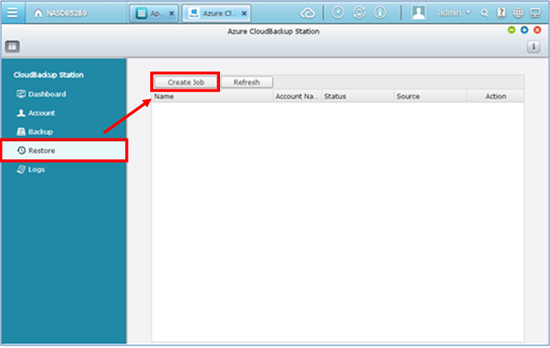
Create Azure Storage Restore Jobs
- Click “Restore”> “Create Job” to create a restore job
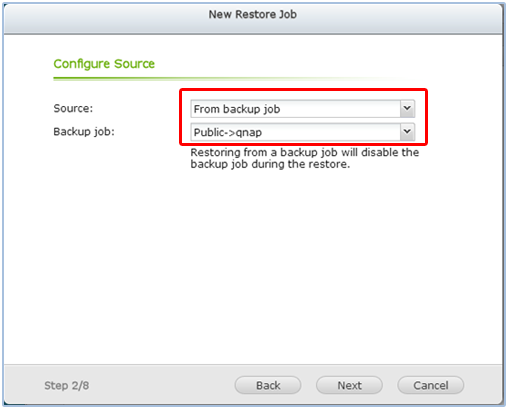
- Select restore job and designate the restore source. You can restore from an existing backup job or restore from Azure storage directly. If you restore from a backup job, you will be allowed to select which folder to restore.
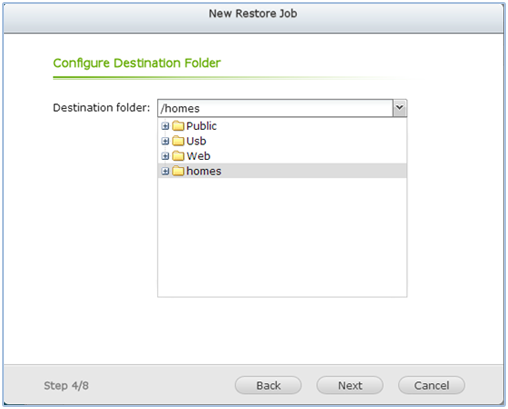
- Select the restore destination folder on your local Turbo NAS
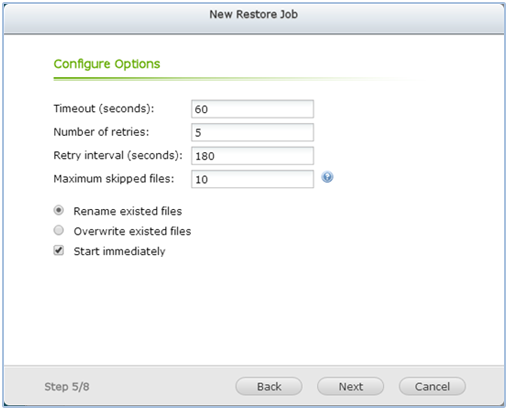
- Configure the restore settings. You can set up some connection parameters, and also can filter the restore file to make transferring more efficient.
- Enter a name for the restore job (Default: Destination
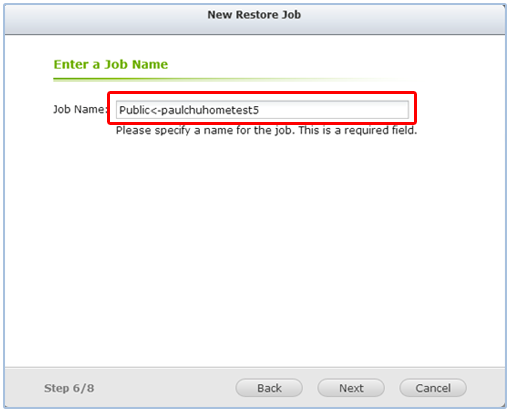
- The settings are now finished. You can carry out some actions for this job: starting/stopping a job, editing job configurations, viewing job logs, or deleting a job.
References
- How to configure, monitor and scale your storage account in Azure:
http://www.windowsazure.com/en-us/documentation/services/storage/ - What is an Azure storage account?
http://www.windowsazure.com/en-us/documentation/articles/storage-whatis-account/ - How to create an account?
http://www.windowsazure.com/en-us/documentation/articles/storage-create-storage-account/ - What is Azure Blob Storage?
http://www.windowsazure.com/en-us/documentation/articles/storage-dotnet-how-to-use-table-storage-20/ - What is the price?
http://www.windowsazure.com/en-us/pricing/details/storage/
