I - File Station: Access, Manage & Share Files On the Web Interface
II – Before Getting Started;
III – Managing Files Via File Station (Upload & Download, Copy & Delete, Move & Extract, Trasncode & Play Media File and Mount ISO Share)
IV – How To Set File Access Permissions Via File Station;
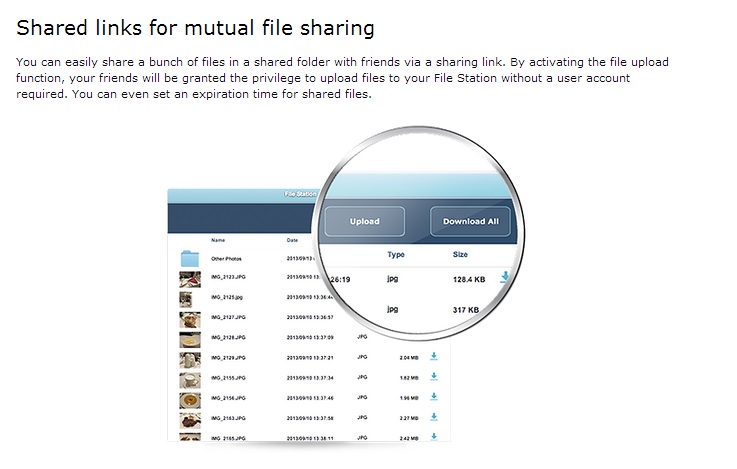
V – How To Share Files & Folders Easly Without Creating User / Giving Permissions
.
I – File Station: Access, Manage & Share Files On the Web Interface
.
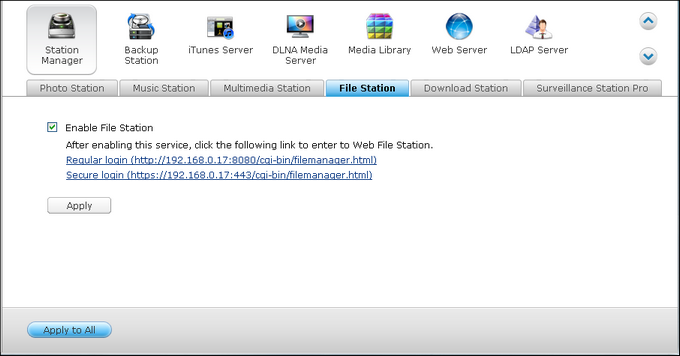
II – Before Getting Started;
Enable the service in “Control Panel” > “Applications” > “Station Manager”. Click the link on the page to access the File Station.
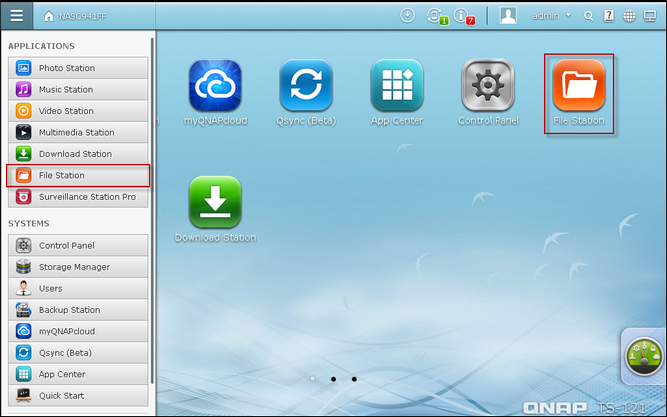
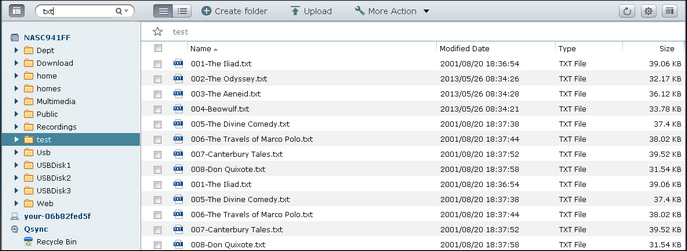
The File Station can be launched from the Main Menu or the File Station icon on the Desktop.
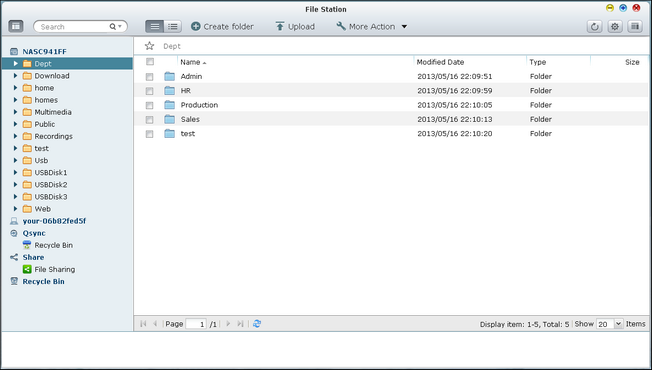
You can upload, download, rename, move, copy, or delete the files and folder on the NAS.
.
III – Managing Files Via File Station (Upload & Download, Copy & Delete, Move & Extract)
To use this feature, install Adobe Flash plug-in for your web browser.
| 1. | Select a folder and click |
| 2. | Click “Browse” to select the file(s). |
| 3. | Select to skip or overwrite the existing file(s) in the folder. |
| 4. | Click  to upload a file or “Upload All” to upload all the selected files. to upload a file or “Upload All” to upload all the selected files. |
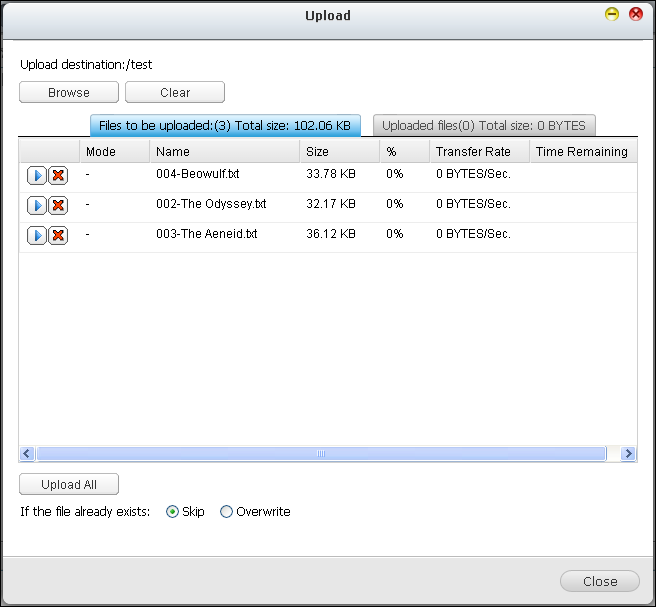
|
Note: The maximum size of a file that can be uploaded to the NAS by the File Station is 2GB without JAVA plug-in. |
| 1. | Select a file or folder to download. |
| 2. | Right click the mouse and select “Download” to download the file. Please note that if all files within a folder are selected, they will be compressed and downloaded as a zip file. |

| 1. | Select a shared folder or folder in which you want to create a new folder. |
| 2. | Click |
| 3. | Enter the name of the new folder and click “OK”. |
| 1. | Select a file or folder to rename. |
| 2. | Right click the mouse and select “Rename” to rename the file. |
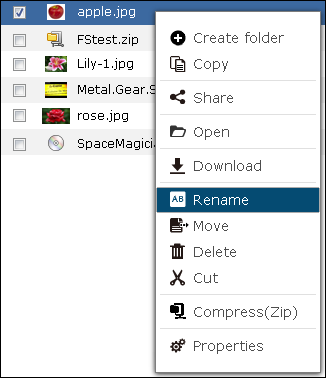
| 3. | Enter the new file or folder name and click “OK”. |
| 1. | Select the files or folders to copy. |
| 2. | Click  . . |
| 3. | Click the destination folder. |
| 4. | Click  and confirm to copy the files or folders. and confirm to copy the files or folders. |
| 1. | Select the files or folders to move. |
| 2. | Right click the mouse and select “Move”. |
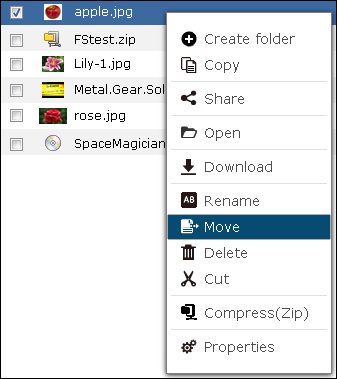
| 3. | Select the destination folder. Click “OK”. |
| 1. | Select a file or folder to delete. |
| 2. | Right click the mouse and select “Delete”. |
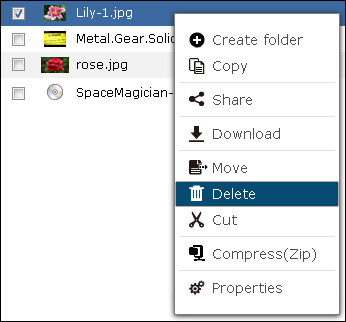
| 3. | Confirm to delete the file or folder. |
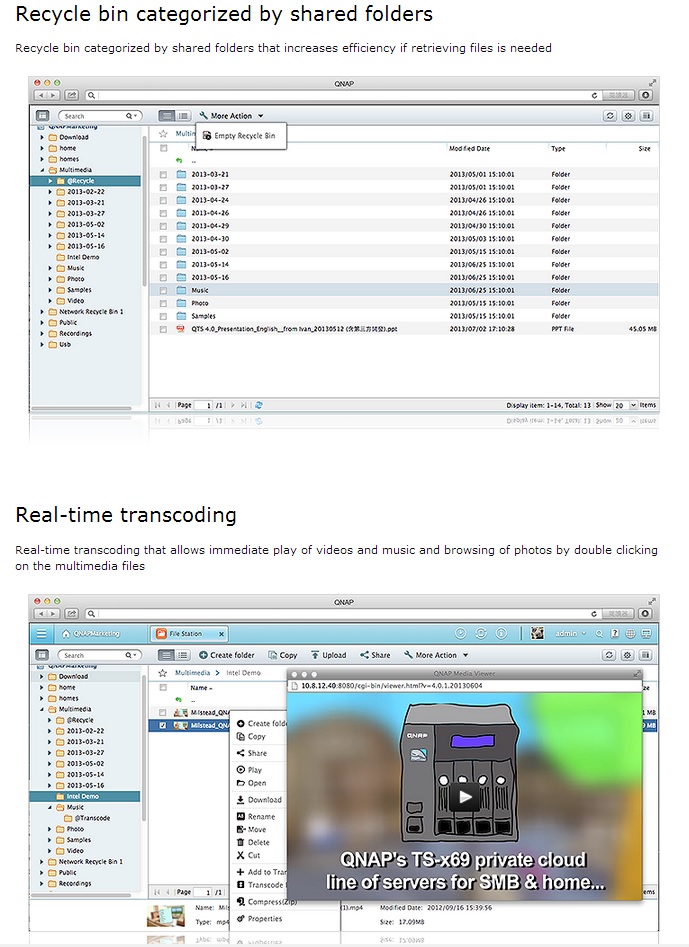
| 1. | Select a media file. |
| 2. | Right click the mouse and select “Add to Transcode”. |
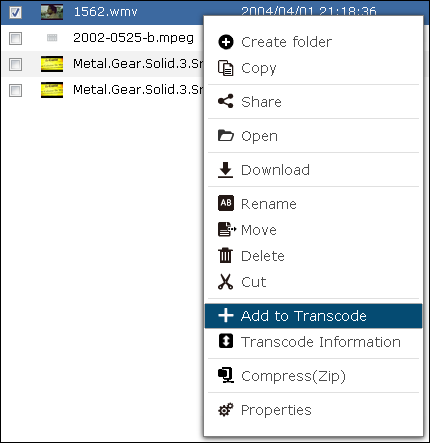
| 3. | Confirm to transcode the file. |
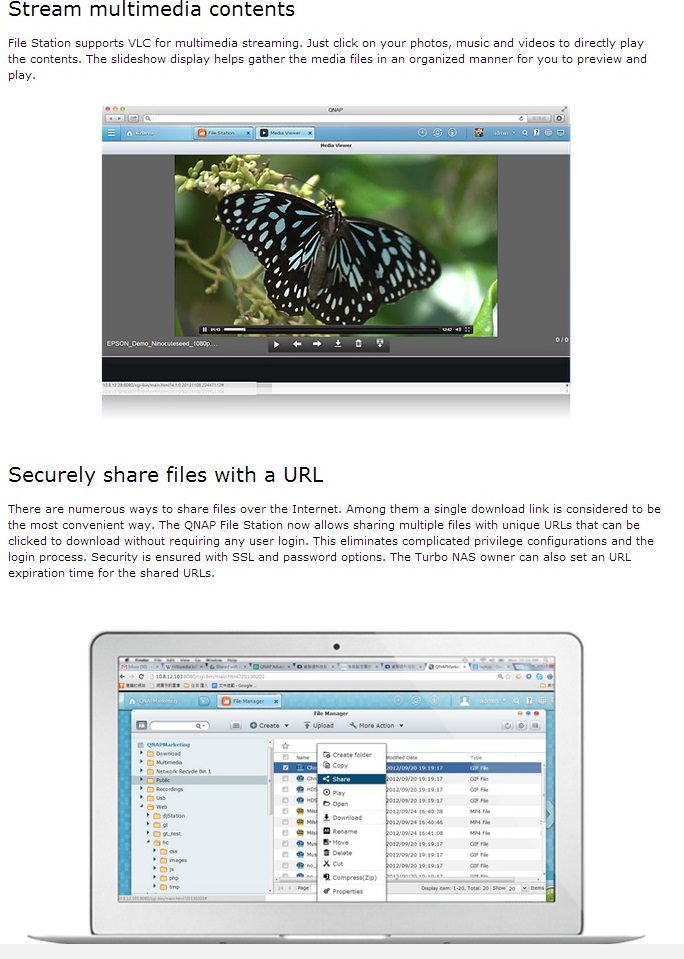
| 1. | To play a media file in different resolutions, left click the media file and select a desired resolution. |
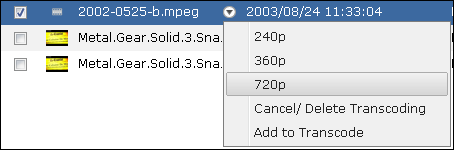
| 2. | The built-in QNAP Media Viewer will open to play the file. |
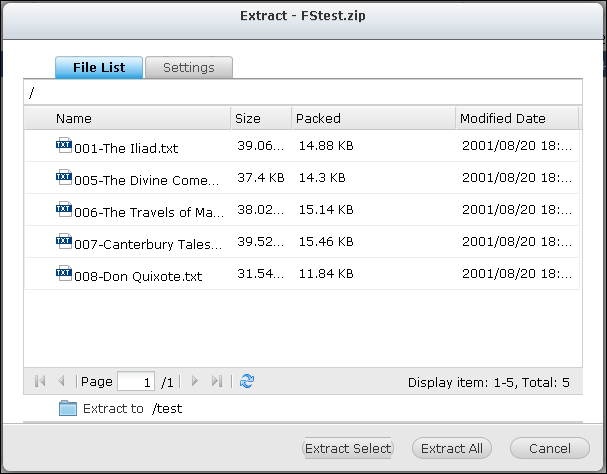
| 1. | To extract a zipped file on the NAS, right click the zipped file and select “Extract”. |
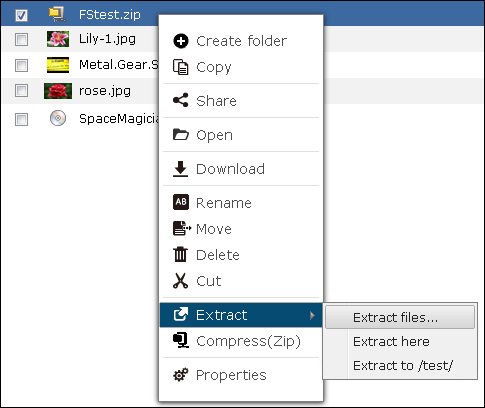
| 2. | Select the files to extract and configure the extraction settings. |
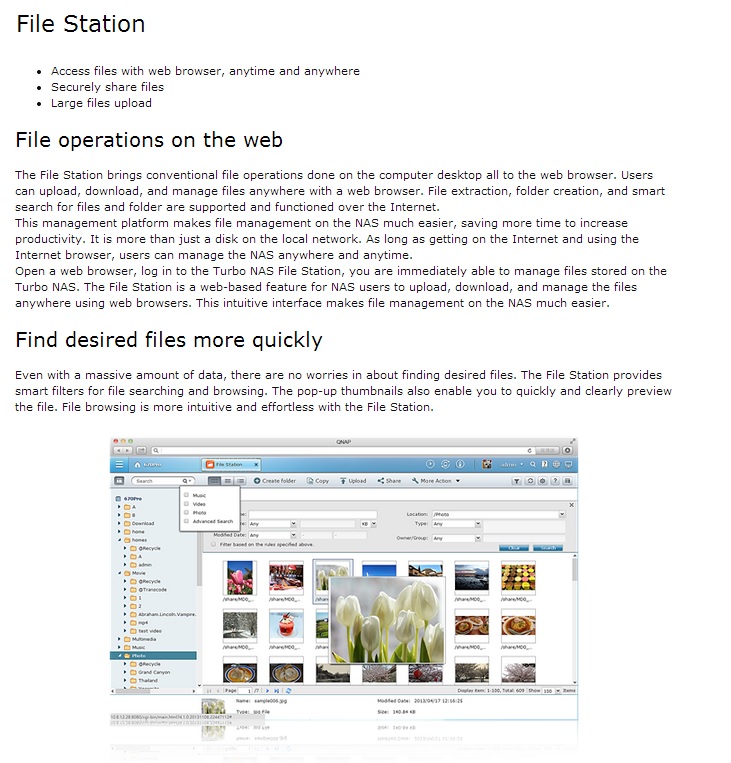
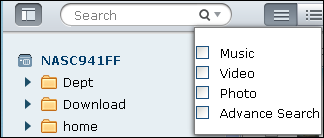
The File Station supports smart search of files, sub-folders, and folders on the NAS. You can search a file or folder by all or part of the file or folder name, or by the file extension, for example, AVI, MP3.
click the down arrow in the search box to reveal additional options. Check “Music”, “Video”, “Photo” to list corresponding files within the folder or specify detailed criteria in the advanced search (such as file size or type.)
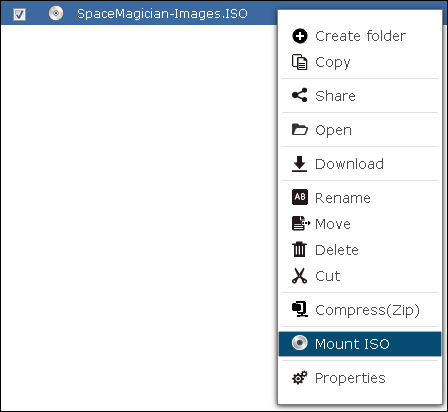
To mount an ISO file on the NAS as a shared folder, follow the steps below:
Locate the ISO file on the NAS. Right click the file and select “Mount ISO”.
Enter the share name and click “OK”.
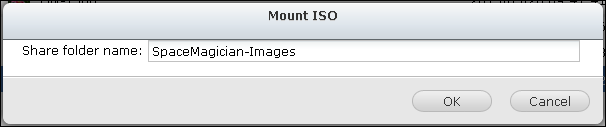
Click “OK” to confirm.
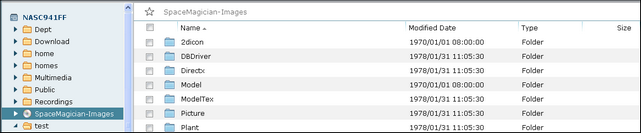
The ISO share will appear on the folder list. You can access the contents of the ISO image file. You can login the NAS web interface with an administrator account and specify the access rights of the users in “Privilege Settings” > “Share Folders”.
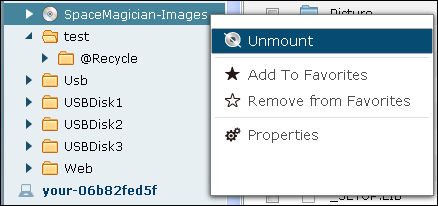
To unmount the share, right click the folder name and select “Unmount”. Click “Yes” to confirm.
.
IV – How To Set File Access Permissions Via File Station;
Set file/folder level permission
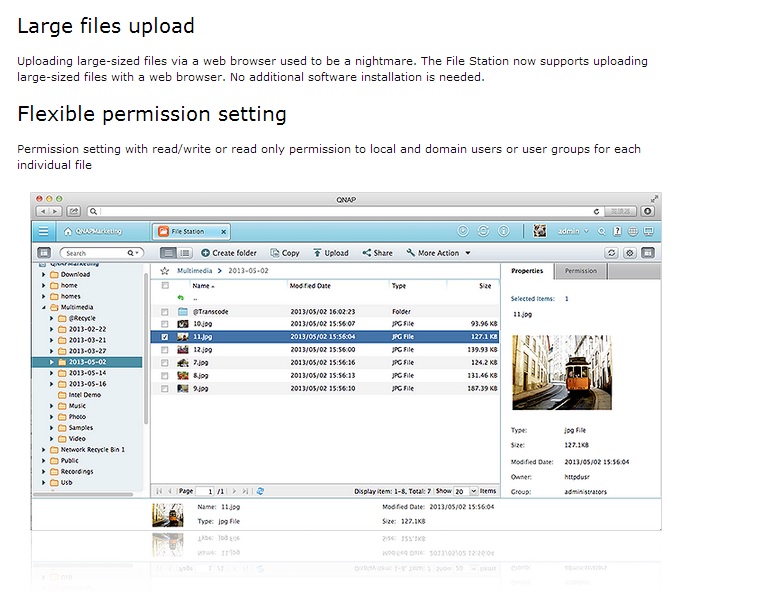
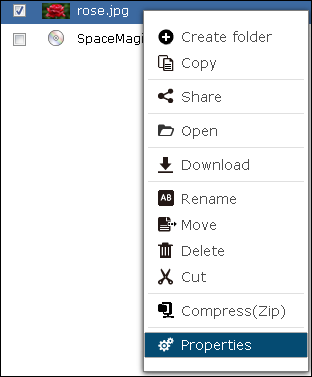
You can set file or folder level permissions on the NAS by the File Station. Right click a file or folder and select “Properties”.
If the “Advanced Folder Permissions” option is disabled in “Privilege Settings” > “Shared Folder” > “Advanced Permissions”, the following settings will be shown. Define the Read, Write, and Execute access rights for Owner, Group, and Others.
| • | Owner: Owner of file or folder. |
| • | Group: Group owner of the file or folder. |
| • | Others: Any other (local or domain member) users who are not the owner or a member of the group owner. |
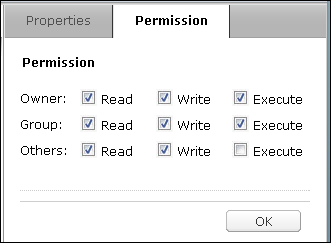
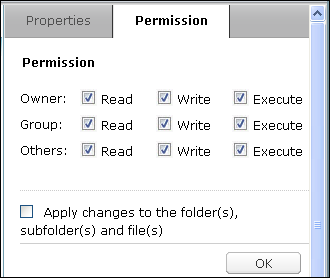
If a folder is selected, you can choose “Apply changes to folder(s), subfolder(s) and file(s)” to apply the settings to all the files and subfolders within the selected folder. Click “OK” to confirm.
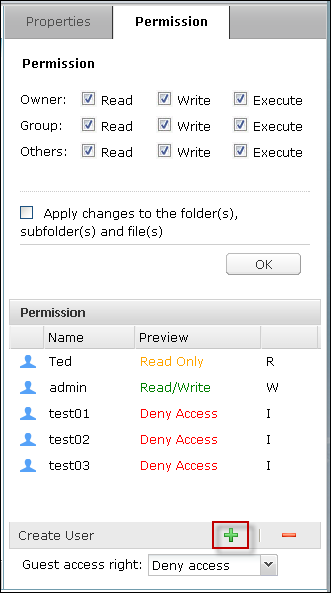
If the “Enable Advanced Folder Permissions” option is enabled in “Privilege Settings” > “Shared Folder” > “Advanced Permissions”, you will be able to specify the file and folder permissions by users and user groups. Click +.
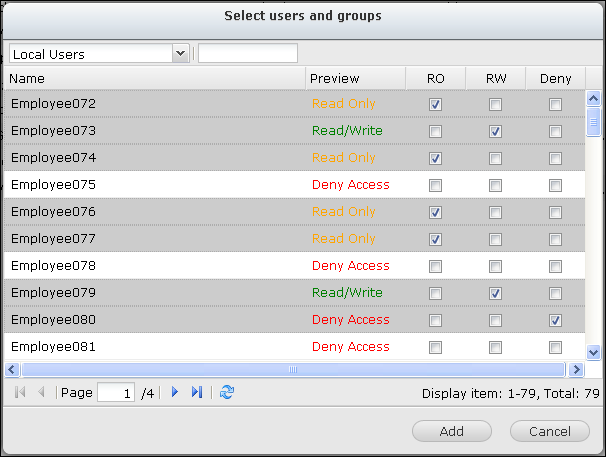
Select the users and user groups and specify the Read and Write rights. Click “Add”.
To remove the permissions on the list, select the user(s) or user group(s) and click -.
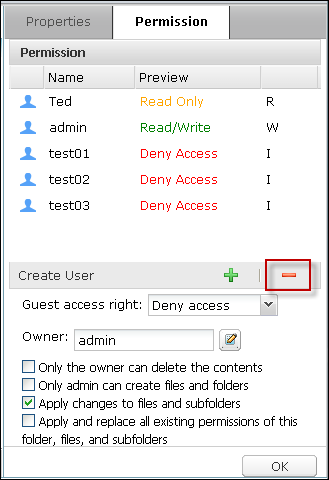
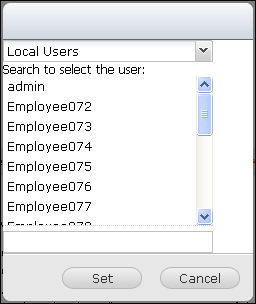
You can also define the file and folder owner by clicking  . Select a user from the list or search a username. Then click “Set”.
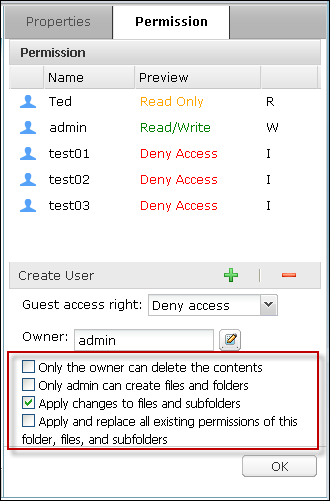
The following options are available for folder permission settings. You are recommended to configure folder permissions and subfolder permissions in “Privilege Settings” > “Shared Folders”.
| • | Only the owner can delete the contents: When you apply this option to a folder, the first-level subfolders and files can be deleted only by their owner. |
| • | Only admin can create files and folders: When you apply this option to a folder, only administrators can create files or folders. |
| • | Apply changes to files and subfolders: Apply changed permissions settings except owner protection to all the files and subfolders within the selected folder. The option “Only the owner can delete the contents” will not be applied to subfolders. |
| • | Apply and replace all existing permissions of this folder, files, and subfolders: Select this option to override all previously configured permissions of the selected folder and its files and subfolders except owner protection. The option “Only the owner can delete the contents” will not be applied to subfolders. |
.
V – How To Share Files & Folders Easly Without Creating User / Giving Permissions
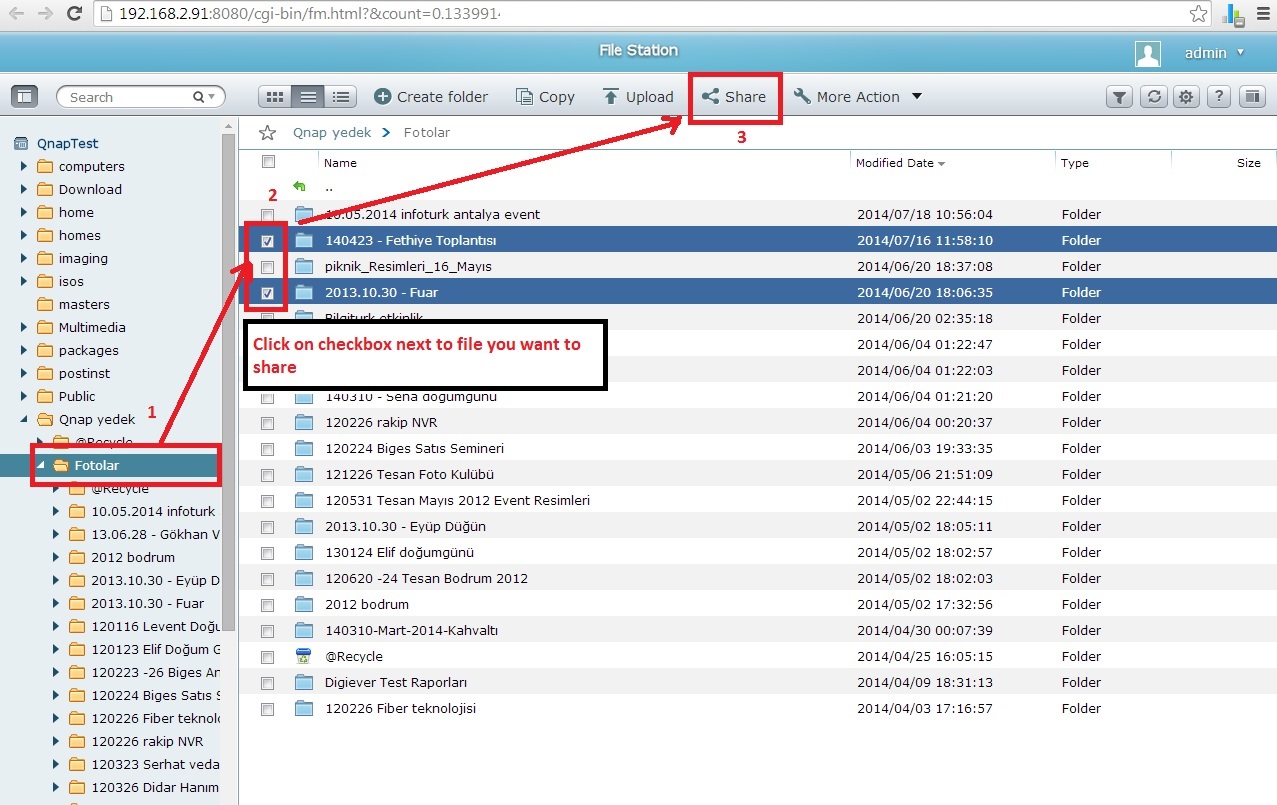
1 – On File Station Menu, Click Checkbox Of The File You Want to Share
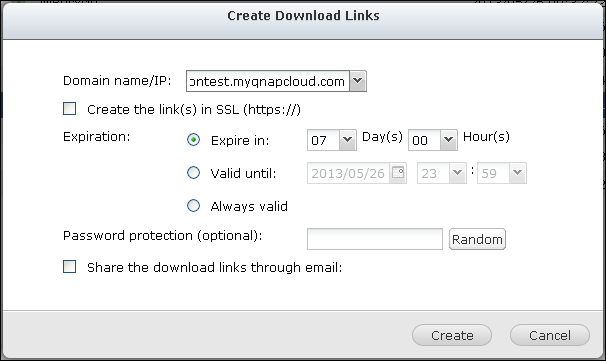
2 – Press Settings Anc Change Doman Name IP to Your WAN IP If You Want To Share Over With Mail or Social Media just Like Facebook

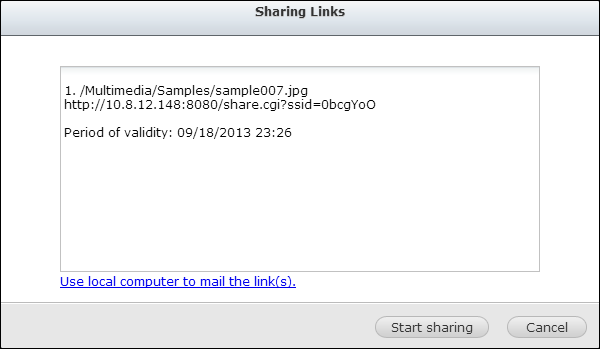
3 – Go To Send and Type Mail Adress. Choose “Use local computer to mail the link(s)” Option;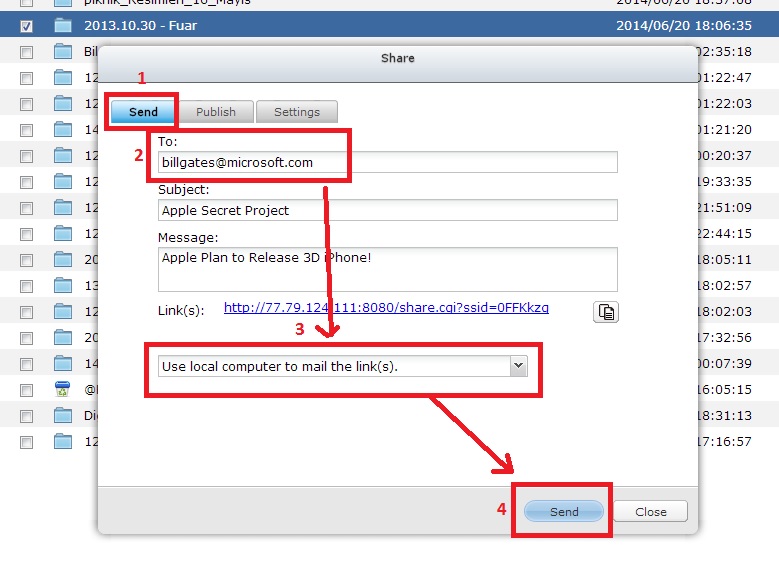
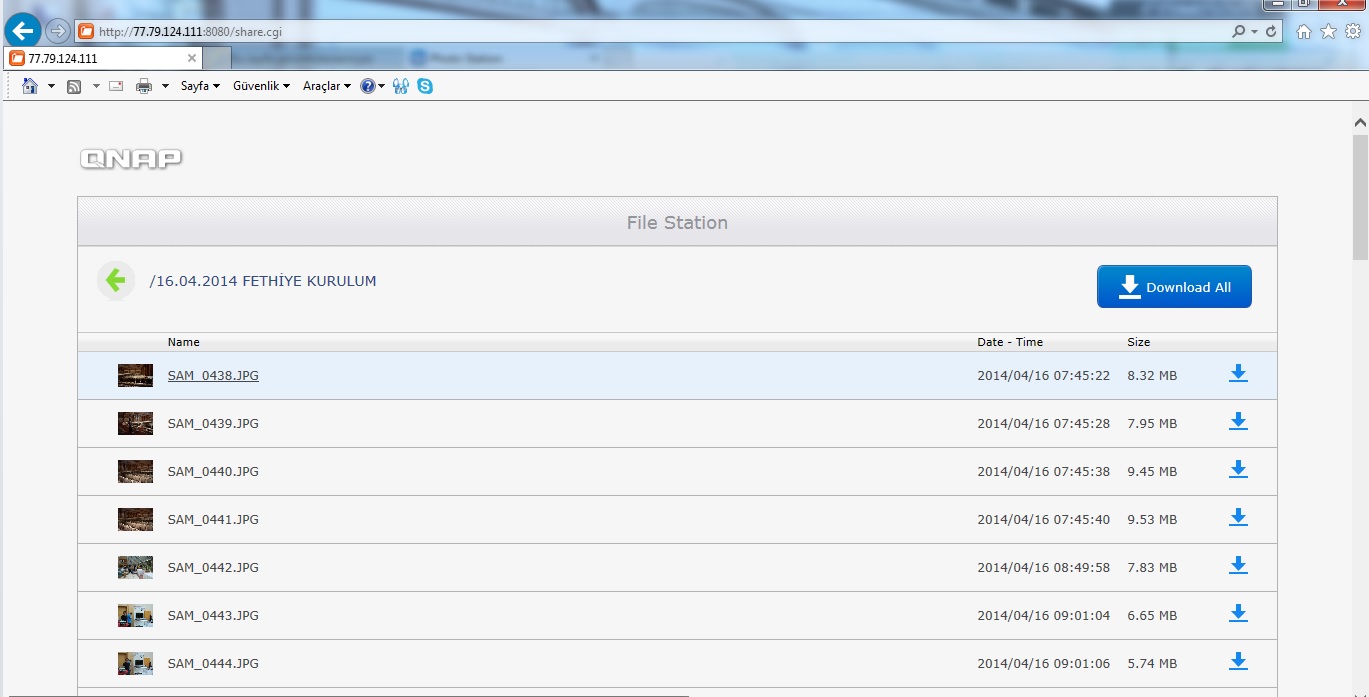
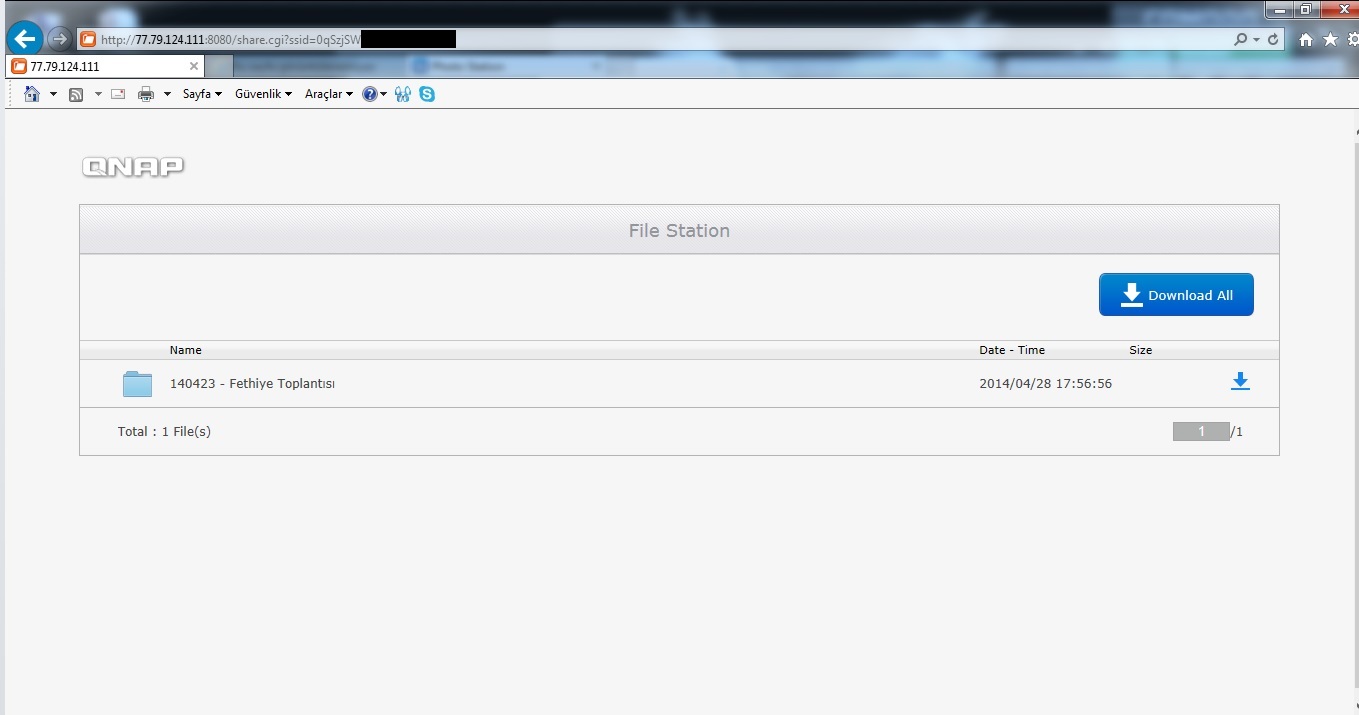
4 – Now Users Can Access& Download Your Files Easly;
.
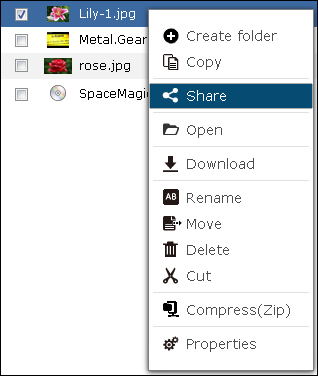
To share the files on the NAS by the File Station, right click the file(s) and select “Share”.
|
Note: This feature can only be used by admin. |
Select the IP or domain name of the NAS. Select to create the link(s) in SSL (optional) and specify the expiration settings and enter a password (optional).
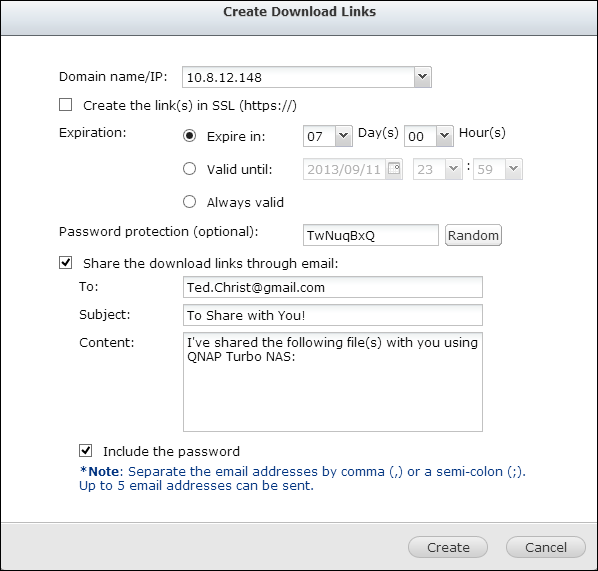
To share the links by emails, select “Share the download links through email” and enter the contents. Click “Create”.
|
Note: To use this function, the mail server settings must be properly configured in “System Settings” > “Notification” > “SMTP Server”. |
Confirm the information and click “Start Sharing”.
|
Note: Up to 1000 sharing links are supported. |
File Station: Access, Manage & Share Files On the Web InterfaceFile Station: Web Arayüzünden Dosyalarınıza Erişin, Yönetin & Paylaşın,

I am using File Station and I want to share a sub-folder in an existing shared folder. The problem is this: I right click the folder and get the option to Share. I select “Share” and get the option “To NAS user”. I then get a list of NAS users to share with, but only the first 10 users are displayed and I cannot select page 2, 3 or 4 of the user list. It does show that I have 34 users set up, but I can only see the 1st 10. Why?