I – About ISCSI Lun Snapshot/Backup
II – How To Back up an iSCSI LUN
III – How To Restore an iSCSI LUN
IV – How To Create an iSCSI LUN Snapshot
V - Manage LUN Backup/Restore/Snapshot by Command Line
IV – ISCSI Lun Incremental Backup?
.
I – About ISCSI Lun Snapshot/Backup
iSCSI LUN Snapshot/Backup
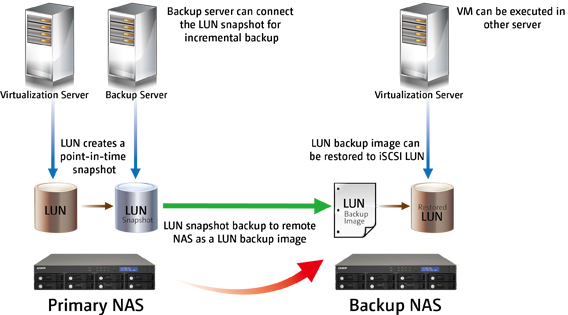
iSCSI LUN snapshot
Directly backing up an iSCSI LUN usually takes a long time. In addition, during backup a LUN usually continues to provide data access; this could cause backed up contents to be inconsistent with the original copy. QNAP provides LUN snapshot to overcome this. A snapshot uses little time to record the current LUN status, just like taking a picture. The IT administrator can further use the LUN snapshot to back up, restore, or allow access to the contents in the LUN.
LUN backup and restore
A LUN snapshot has the LUN status when the snapshot was taken. The IT administrator can use the LUN snapshot to back up contents in the LUN to various storage destinations, including Windows shared folders via SMB/CIFS, Linux shared folders via NFS, or simply local shared folders on the Turbo NAS. Instant and scheduled backup options are available.
In the event of LUN failure, the IT administrator can choose to restore the LUN by overwriting the original one or creating a new LUN.
LUN Snapshot access
Since a LUN snapshot has the LUN status in a certain time, when users need to obtain contents in that time, the IT administrator can mount the snapshot to an iSCSI target on the Turbo NAS to allow data access from users.
http://www.qnap.com/static/useng/fw_v35/snapshot.html
.
II – How To Back up an iSCSI LUN
Before backing up an iSCSI LUN, make sure at least one iSCSI LUN has been created on the NAS. To create iSCSI targets and LUN, go to “Disk Management” > “iSCSI” > “Target Management”.
1. Go to “Disk Management” > “iSCSI” > “LUN BACKUP”. Click “Create a new job”.

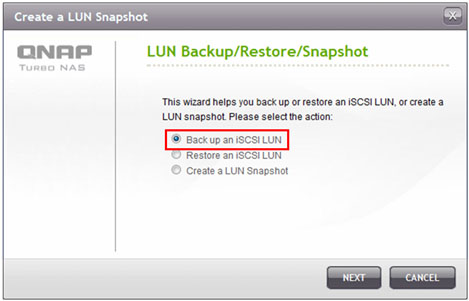
2. Select “Back up an iSCSI LUN” and click “NEXT”.
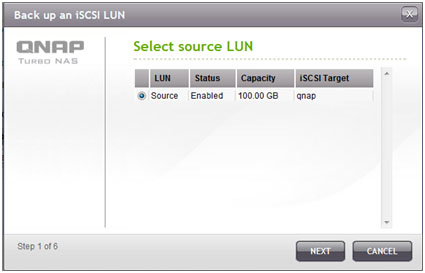
3. Select the source LUN for backup. If an online LUN is selected, the NAS will create a point-in-time snapshot for the LUN automatically.
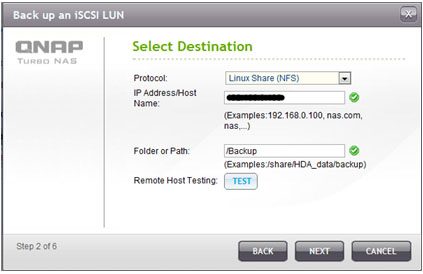
4. Specify the destination where the LUN will be backed up to. The NAS supports LUN backup to a Linux share (NFS), a Windows share (CIFS/SMB), and a local folder on the NAS. Click “TEST” to test the connection to the specified path. Then click “NEXT”.
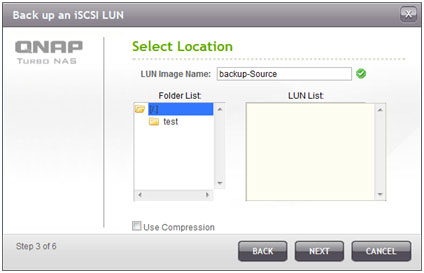
5. Enter a name of the backup LUN image or use the one generated by the NAS. Select the subfolder where the image file will be stored. Select to use compression* or not. Click “NEXT”.
*Use Compression: When this option is enabled, more CPU resources of the NAS will be consumed but the size of the backup LUN can be reduced. The backup time may vary depending on the size of the iSCSI LUN.
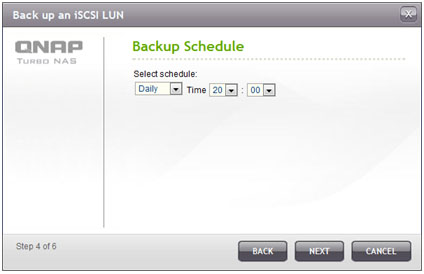
6. Specify the backup schedule. The options available are:
- Now
- Hourly
- Daily
- Weekly
- Monthly
In this example, the backup job will be executed at 20:00 daily. Click “NEXT”.
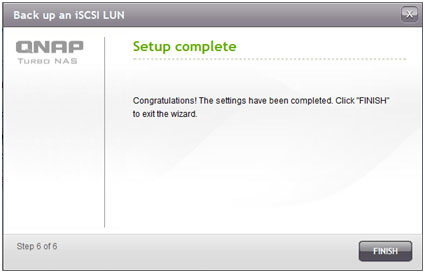
7. The settings will be shown. Enter a name for the job or use the one generated by the NAS. Click “NEXT”.

8. Click “FINISH” to exit.
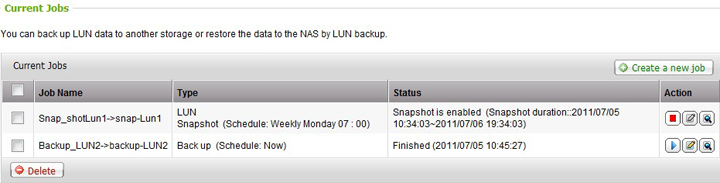
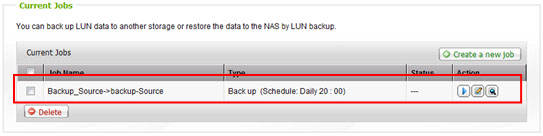
9. The backup job is shown on the list.
| Button | Description |
 |
Start the job immediately |
 |
Stop the running job |
 |
Edit the job settings |
 |
View the job status and logs |
.
III – How To Restore an iSCSI LUN
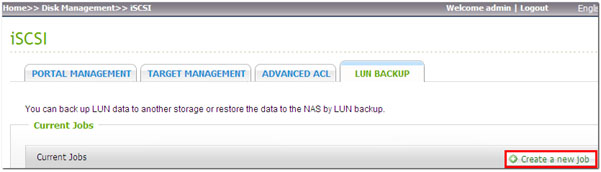
1. To restore an iSCSI LUN to the NAS, go to “Disk Management” > “iSCSI” > “LUN Backup”. Click “Create a new job”.
2. Select “Restore an iSCSI LUN” and click “NEXT”.

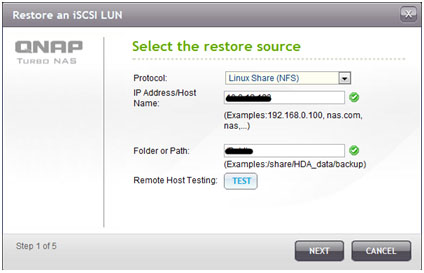
3. Specify the protocol, IP address/host name, and folder/path of the restore source. Click “TEST” to test the connection. Then click “NEXT”.
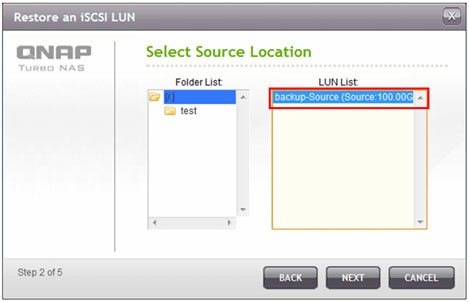
4. Browse and select the LUN image file. Click “NEXT”.
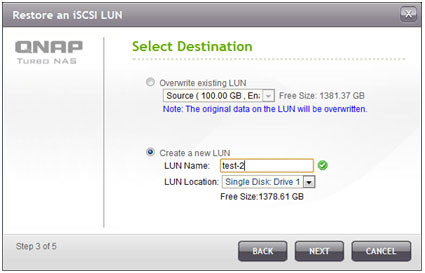
5. Select the destination.
- Overwrite existing LUN: Restore the iSCSI LUN and overwrite the existing LUN on the NAS. All the data on the original LUN will be overwritten.
- Create a new LUN: Restore the iSCSI LUN to the NAS as a new LUN. Enter the name and select the location of the new LUN.
Click “NEXT”.
6. The settings will be shown. Enter a name for the job or use the one generated by the NAS. Click “NEXT”.
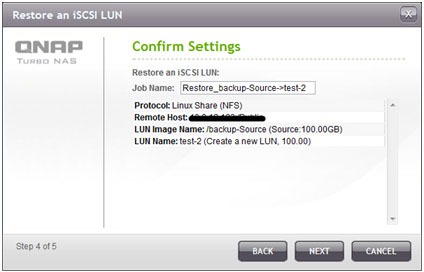
7. Click “FINISH” to exit.

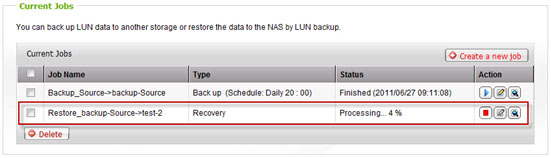
8. The restore job will be executed immediately.
| Button | Description |
|
Stop the running job |
|
Edit the job settings |
|
View the job status and logs |
http://docs.qnap.com/nas/en/index.html?lun_backup.htm
.
IV – How To Create an iSCSI LUN Snapshot
Before creating an iSCSI LUN snapshot, make sure at least one iSCSI LUN and one iSCSI target has been created on the NAS. To create iSCSI targets and LUN, go to “Disk Management” > “iSCSI” > “Target Management”.
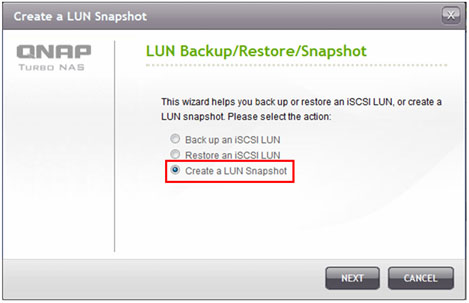
1. To create an iSCSI LUN snapshot, go to “Disk Management” > “iSCSI” > “LUN Backup”. Click “Create a new job”.

2. Select “Create a LUN Snapshot” and click “NEXT”.
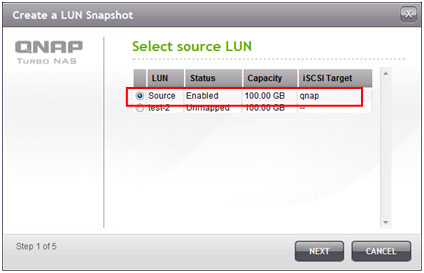
3. Select an iSCSI LUN on the NAS. Click “NEXT”.
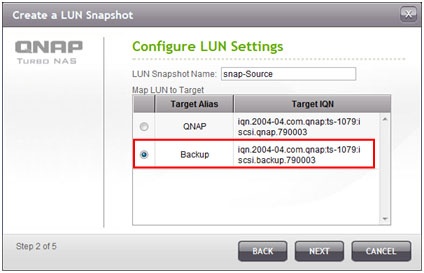
4. Enter a name for the LUN snapshot or use the one generated by the NAS. Select an iSCSI target where the LUN snapshot is mapped to. Click “NEXT”.
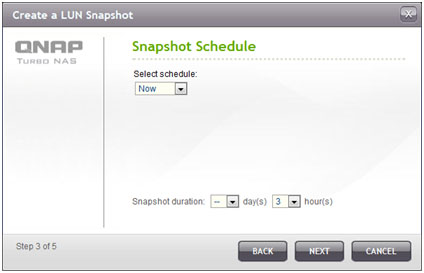
5. Specify the snapshot schedule and the snapshot duration. The snapshot will be removed automatically when the snapshot duration is reached.
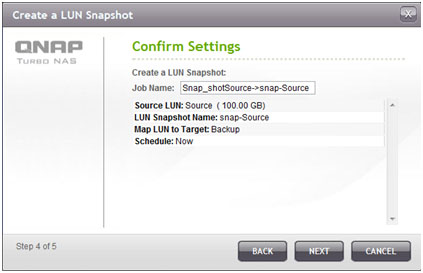
6. The settings will be shown. Enter a name for the job or use the one generated by the NAS. Click “NEXT”.
7. Click “FINISH” to exit.
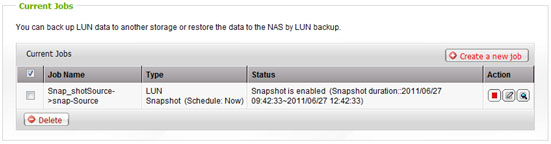
8. The snapshot will be created immediately. The status and duration will be shown on the list.
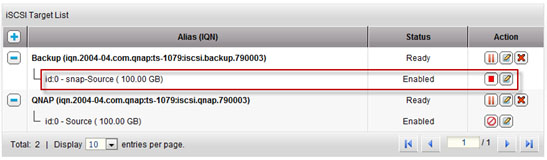
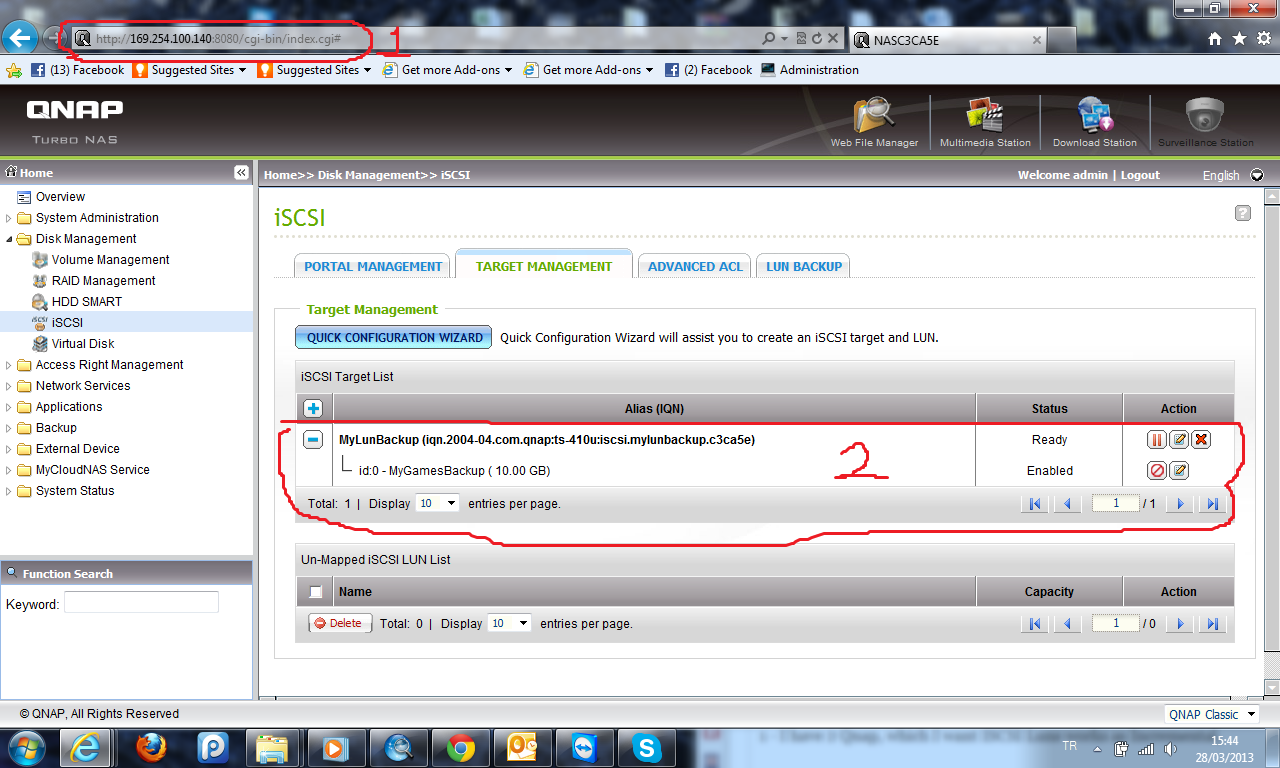
9. Go to “iSCSI” > “Target Management”, the snapshot LUN will be shown in the iSCSI Target List. Use iSCSI initiator software to connect to the iSCSI target and access the point-in-time data on the snapshot LUN. For the information of connecting to the iSCSI targets on QNAP NAS, please refer to How to create and use the iSCSI target service on the QNAP NAS.
.
V - Manage LUN Backup/Restore/Snapshot by Command Line
QNAP NAS users can execute or stop the iSCSI LUN backup, restore, or snapshot jobs on the NAS by command line. Follow the instructions below to use this feature.
| Note: The following instructions should only be operated by IT administrators who are familiar with command line. |
1. First make sure the iSCSI LUN backup, restore, or snapshot jobs have been created on the NAS in “Disk Management” > “iSCSI” > “LUN Backup”.
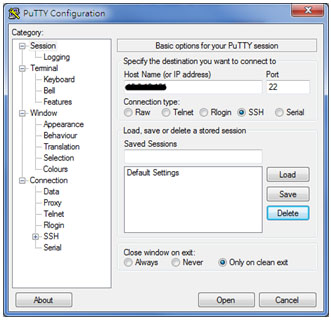
2. Connect to the NAS by an SSH utility such as Putty.
3. Login the NAS as an administrator.

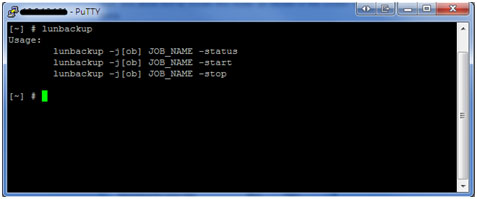
4. Input the command “lunbackup”. The command usage description will be shown.
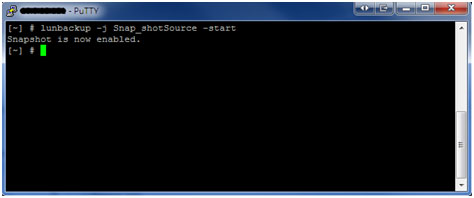
5. Use the lunbackup command to start or stop an iSCSI LUN backup, restore, or snapshot job on the NAS.
.
IV – ISCSI Lun Incremental Backup?
Does Qnap Lun Backup options works incremental? No, But you can do this with this document;
1 – I have 2 Qnap, which I want ISCSI Lun Backup works as Incremental,
2 – First, Open ISCSI Lun & Targets on each Qnap devices; (my Advice ise use same size)
3 – Create & Connect first ISCSI to first Server;
4 – Create & Connect Second ISCSI to the same server (Or Another Server on Wan);
5 – Install Netbak Replicator or Cobian Backup to first Server. Choose Files on your ISCSI as Home folder, and type the other Server IP adres as Target, and Create same folder names on this target.
By this way, you can Backup your files on Qnap ISCSI over Wan, with incremental.
Qnap Incremental Lun BackupQnap Incremental Lun Yedeklemesi,