“Q’center keeps you informed of system status of all NAS units!”
About Q’center
Q’center is a powerful QNAP Turbo NAS management tool. You can view the status and system information of multiple Turbo NAS units at the same time from a single unit. This tool makes it easy to inspect system resource usage, monitor disk/volume health, and perform other management tasks. With these centralized management tools, Q’center can better assist IT administrators and Turbo NAS users in system resource allocation and future capacity planning.
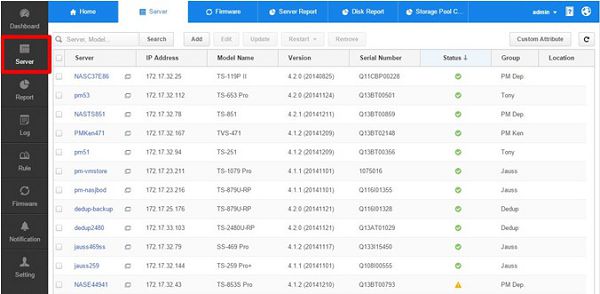
Server
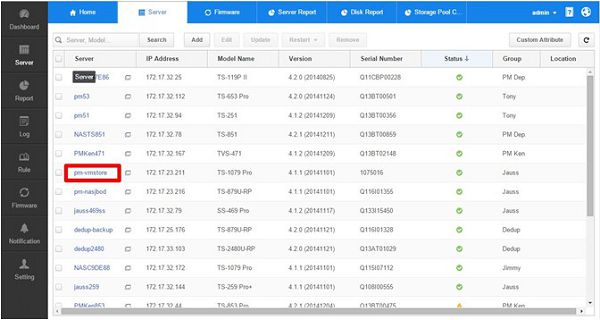
The “Server” screen allows you to inspect, manage and add Turbo NAS units to the managed servers list. You can view the operating status of every managed servers here. You can also go to the login page of that server by clicking  .
.
Select “Server” on the taskbar to bring up the menu.
Add new servers
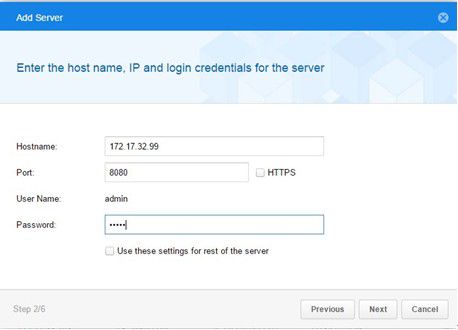
Select “Add”.
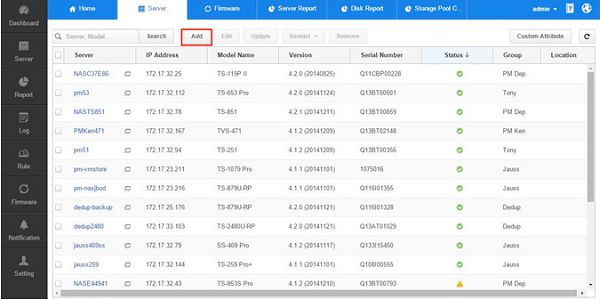
The system offers two ways to add new servers to the list: add a single server by IP address or host name, adding single/multiple servers by importing a CSV file, and add a new (or multiple) servers within a subnet.

Enter the server’s IP address/host name, port number and the password of the admin account to establish a connection to the server.
Obtain server information
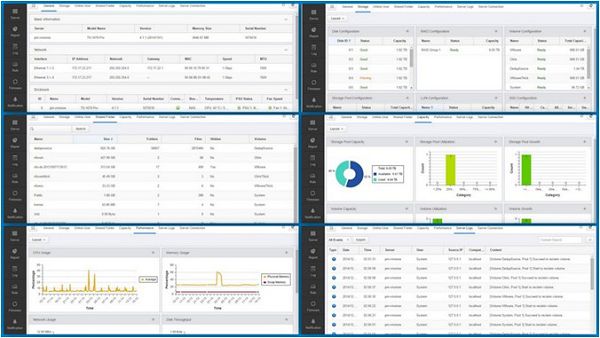
On the “Server” screen, select a server to view its status and other information.
It will show the following information regarding the server: General, Storage, Online User, Shared Folder, Capacity, Performance, Server logs and Server Connection.
QTS Login Screen
You can also go to the login page of that server by clicking.
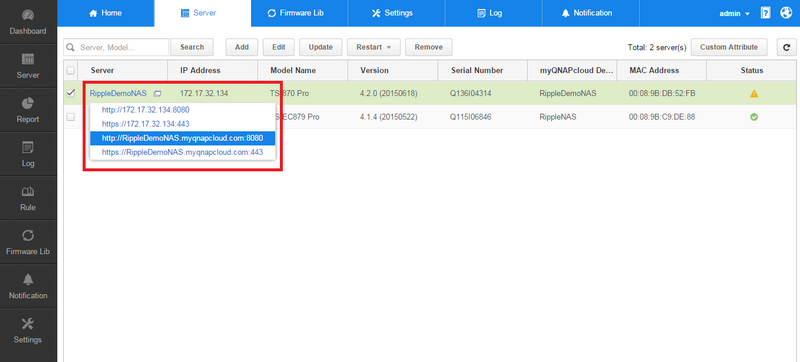
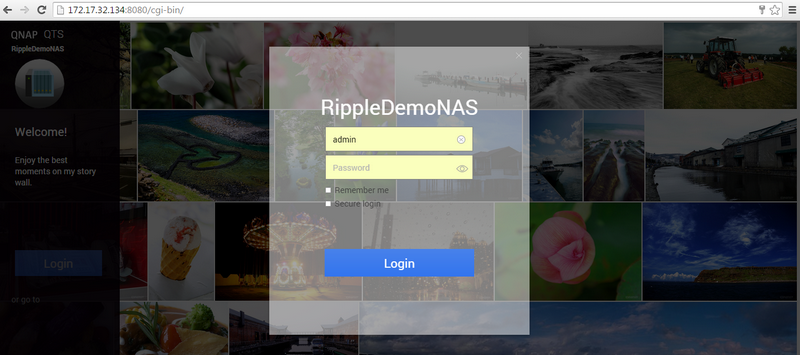
Then you can see the login page of designated Turbo NAS in a new tab.
 |
You still need to input the account and password to login QNAP NAS. |
Add Custom Attributes
An attribute is a characteristic of a server that can be given different values. Select “Custom Attribute” to add an attribute to servers. To assign an attribute value to a server, select the server and then “Edit “in the “Server” menu. Choose the “Custom Attribute” tab and then double-click the attribute’s corresponding value field to enter its value. These attributes can be used as filters in the “Report” function.
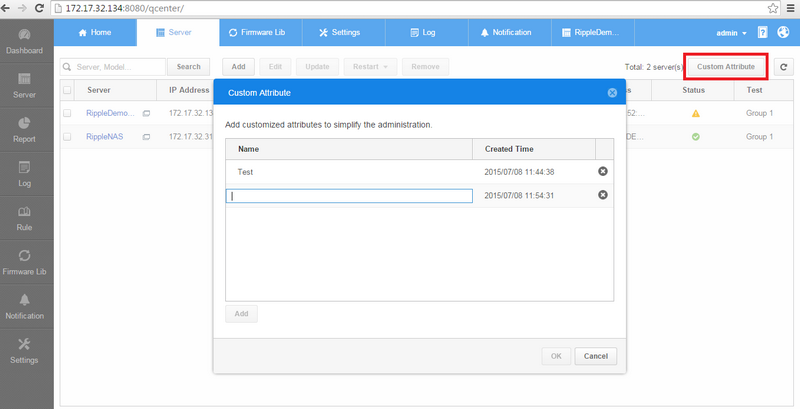
Select “Custom Attribute” to add an attribute.
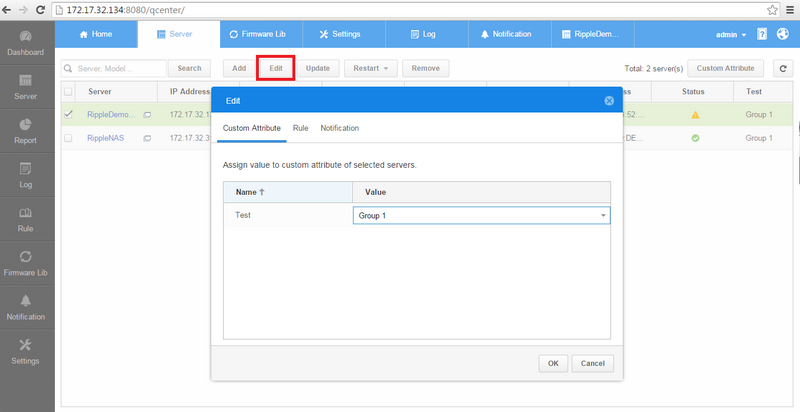
Select “Edit “in the “Server” menu, choose the “Custom Attribute” tab and then double-click the attribute’s value to assign a value to a selected server.
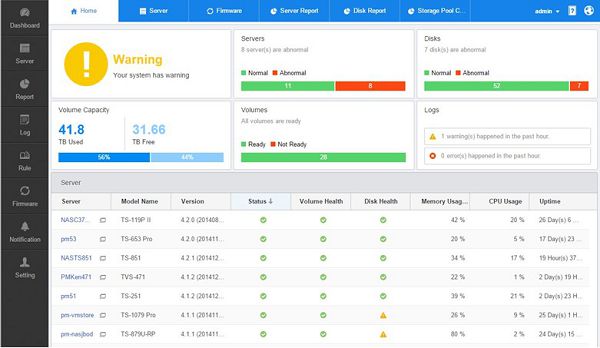
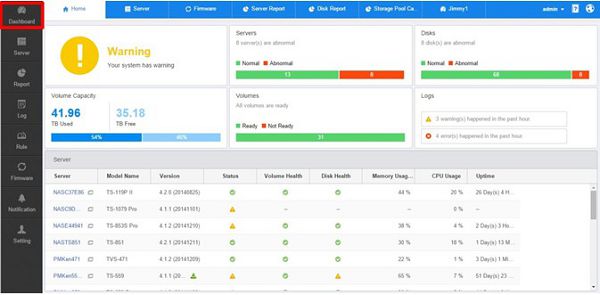
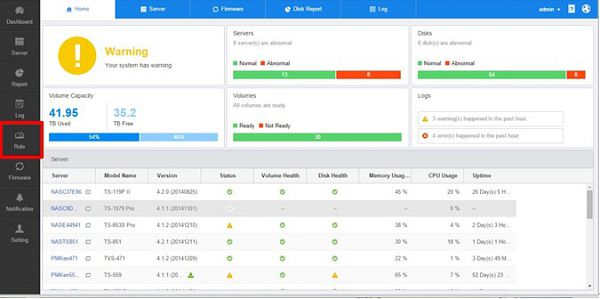
Dashboard
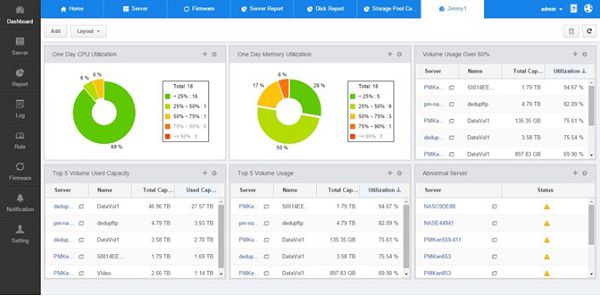
The “Dashboard” screen provides you with tools to conveniently inspect and monitor system status. You can customize dashboards to get a quick overview of specific system information or statuses (including resource usage, disk volume and health).
Open a Dashboard
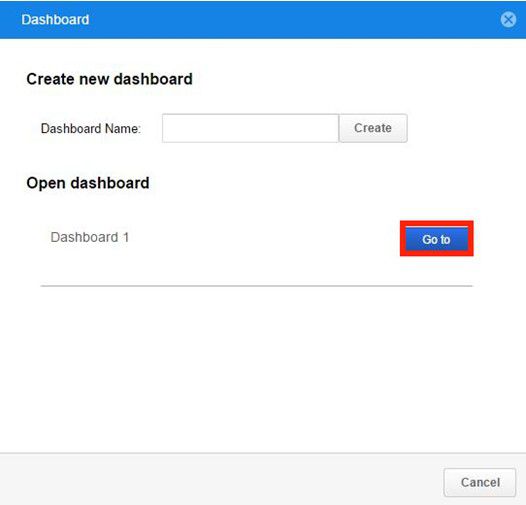
Select the “Dashboard” icon on the taskbar, and use the “Open dashboard” list.
Create New Dashboard
Select the “Dashboard” icon on the taskbar and enter a dashboard name in the “Dashboard Name” field under the “Create new dashboard” section.
After creating a new dashboard, you can add various widgets provided by the “Add” screen.
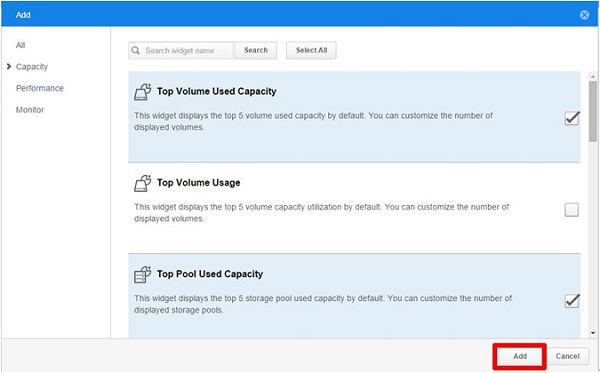
Add Widgets
When you open a specific dashboard, you can add more widgets to it by selecting “Add” in the top-left corner.
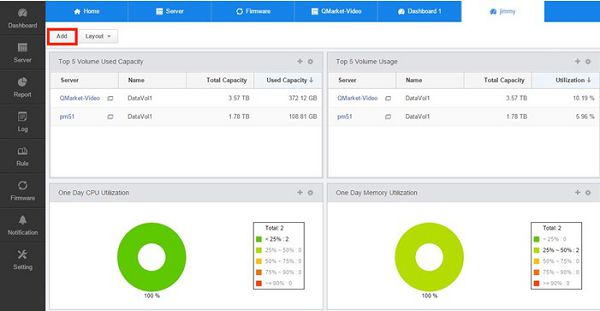
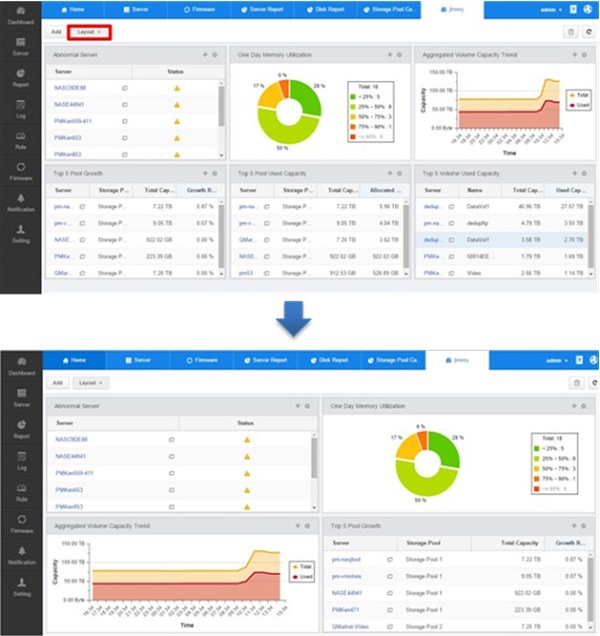
Change Layout
Select “Layout” to switch between a two-column or three-column layout.
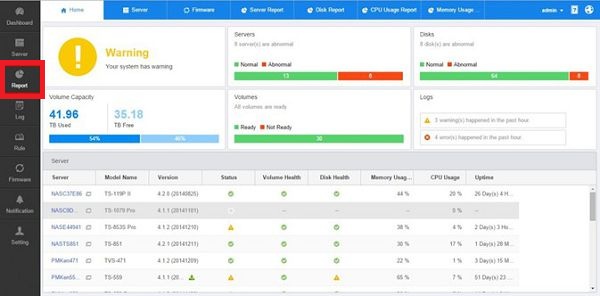
Report
The “Report” screen provides a variety of aggregated reports to assist administrators in easily obtaining an overview of various settings and statuses.
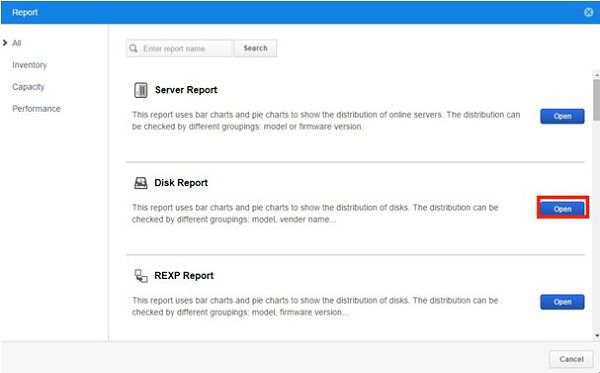
Open a Report
Click “Report” on the taskbar to bring up the menu and select one report from the report templates.
Open other Reports
Click  to open other types of report. It is very convenient to switch between different reports.
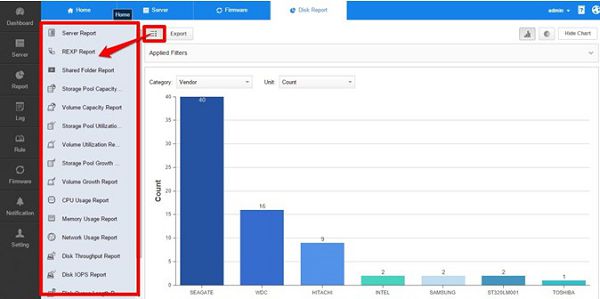
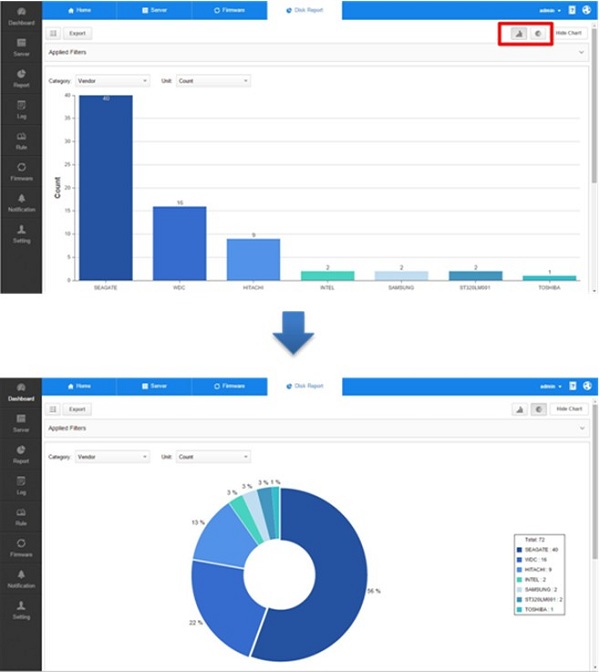
Report Graph Type
You can switch the display between pie charts and bar charts depending on the subject of the report.
Switch from bar charts to pie charts by selecting  as shown below:
Export a report
Select “Export” and the displayed report will be converted to a CSV file for downloading to your computer.

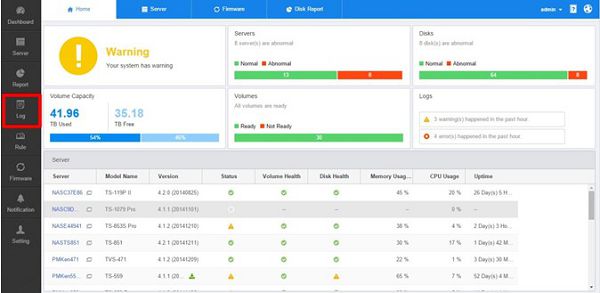
Log
The “Log” screen provides a history of server activities, allowing you to quickly review the actions and connection records of all managed servers. It also maintains records of alert notifications and system events.
View Server Activities
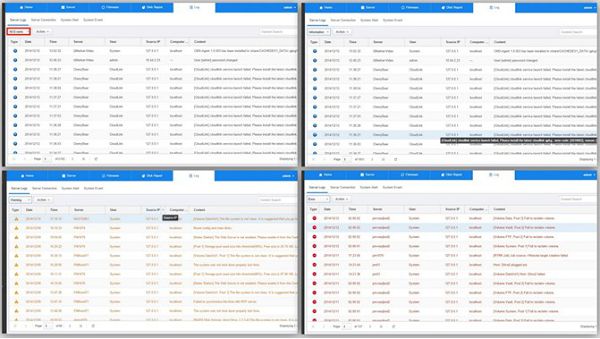
Select “Server Log” to view all server activities from every managed server. Use the search function for content-based filtering by entering a keyword in the search field.
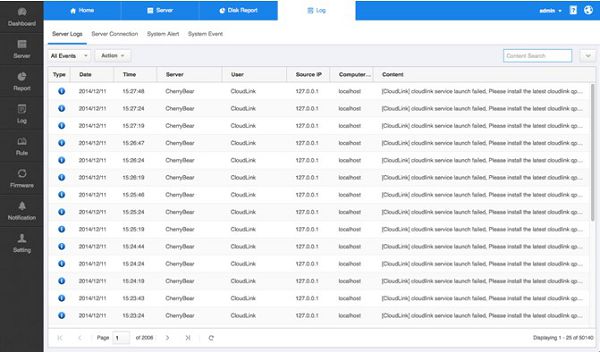
In addition, you can classify log entries by information, warning or error to help you browse through the list.
Rule
The “Rule” screen allows administrators to set rules to efficiently manage multiple servers using the same configuration. You can set up multiple configuration parameters in one rule and apply the rule to selected servers. Servers assigned with the rule will be automatically configured according to the rule settings.
Add a rule
In the “Rule” menu, select “Add” and then “Rule”.
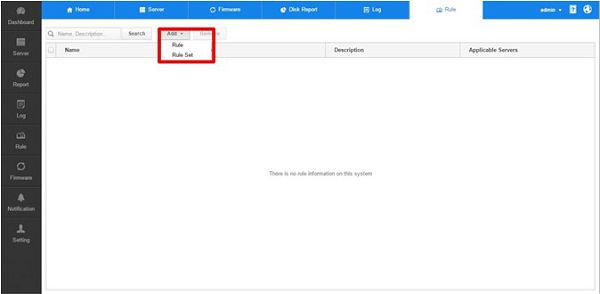
Enter the rule name and description, and select “Next”.

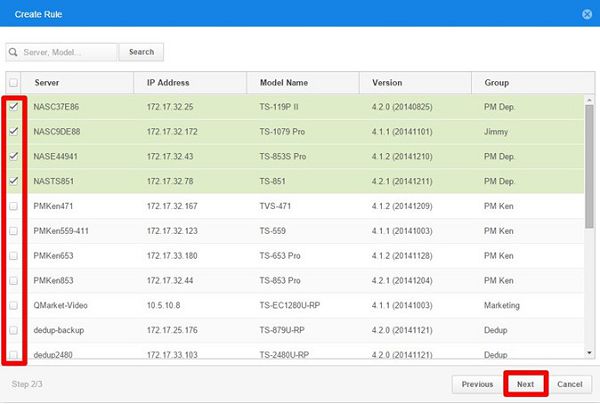
Select servers that the rule set should be applied to and then “Next”.
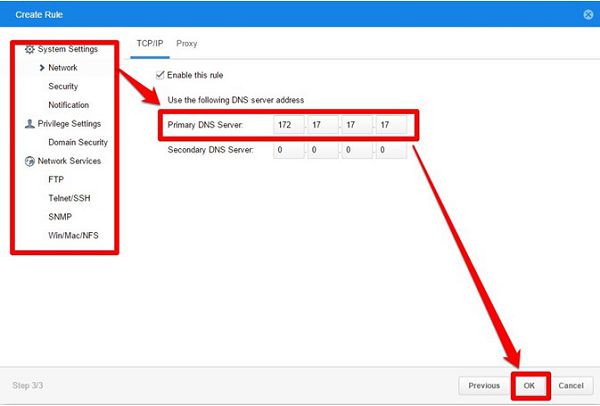
You can configure Turbo NAS servers with defined system and privilege settings and how they will control network services. Selected servers should be automatically configured with the settings that you have configured.
For example, you can configure a DNS server to be used on all of the selected servers.
Add a rule set
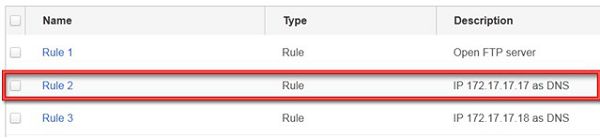
A rule set can consist of multiple rules. For example, we can combine the following rules into a rule set.

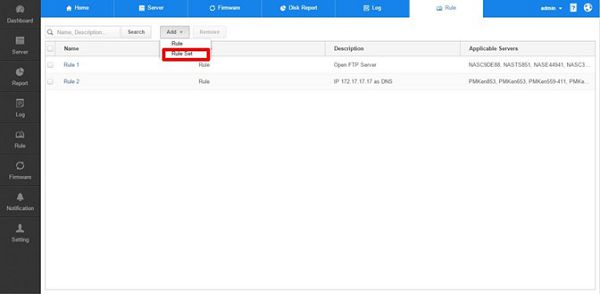
In the “Rule” menu, click “Add” to add a new rule set.
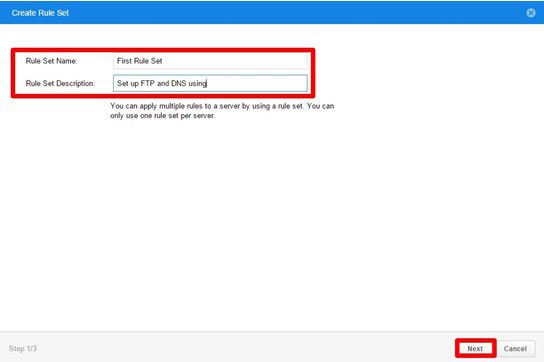
Enter the rule set name, description, and then select “Next”.
Select servers that the rule set should be applied to, and then “Next”.

Drag and drop rules from the ”All Rules” to the “Selected Rules” list.
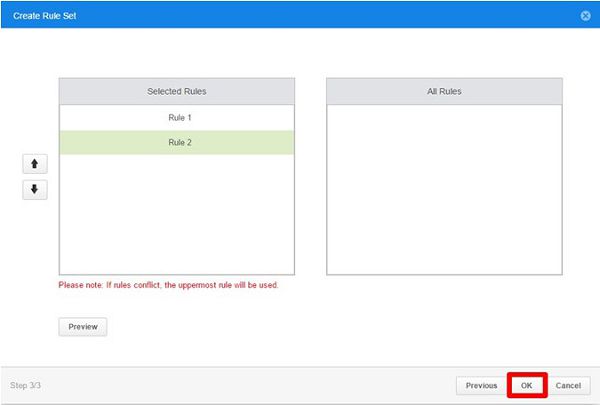
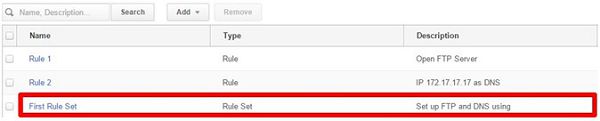
The rule set will be created.
If two rules have the same configuration parameters, the one in front has higher priority. For example, in the following configuration, the system will use 172.17.17.17 as the DNS server instead of the other option.
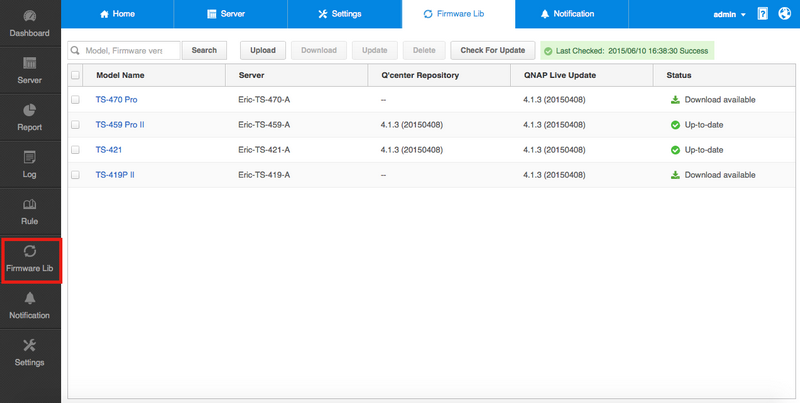
Firmware Lib
The “Firmware Lib” screen allows you to manage firmware on Turbo NAS servers. You can view the firmware version of all servers and instantly get the latest firmware from QNAP.
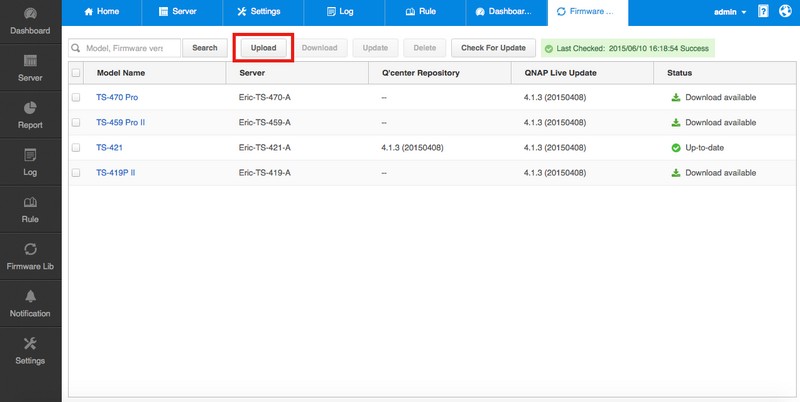
Upload Firmware
Select servers from the list and then click “Upload” to send firmware from your computer to the designated servers.
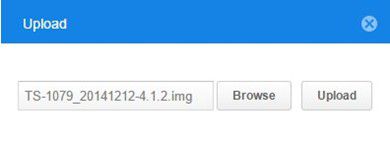
Browse your computer and select the firmware to be uploaded.
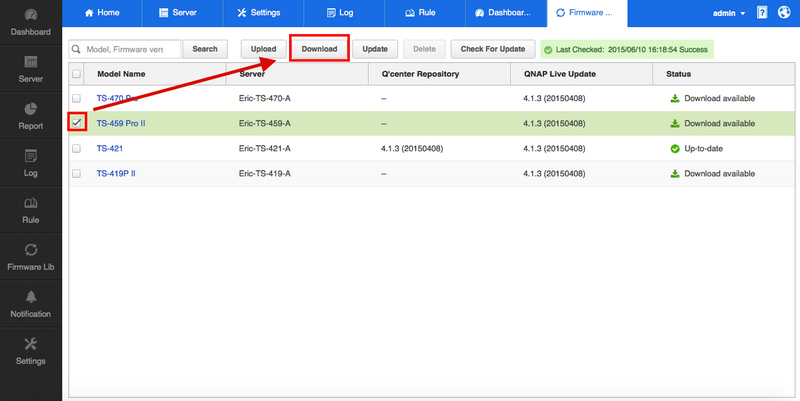
Download Firmware
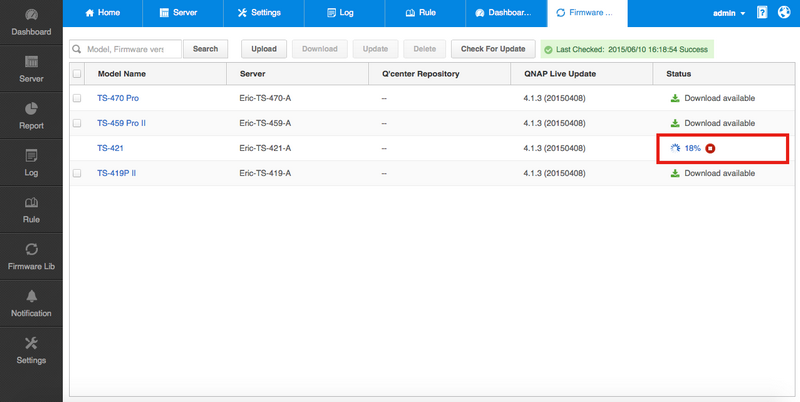
Select servers from the list and click “Download” to download the latest firmware version.
It will display the download progress. You can stop the download at any time.
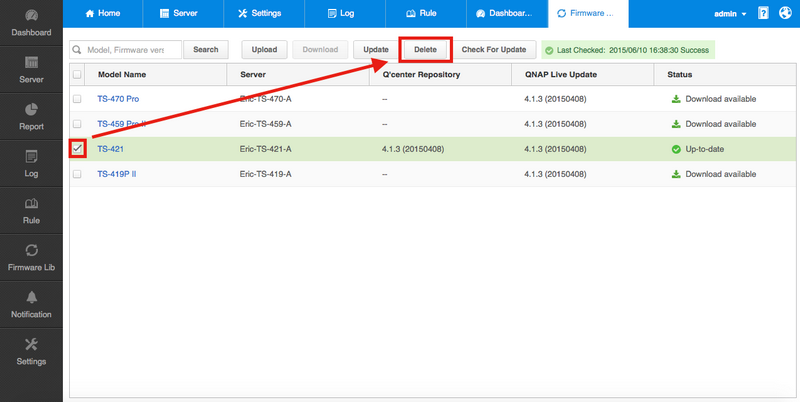
Delete Firmware
Select unwanted firmware from the list and click “Delete”.
Check for Update
Select “Check for Update” to check if any firmware updates are available.

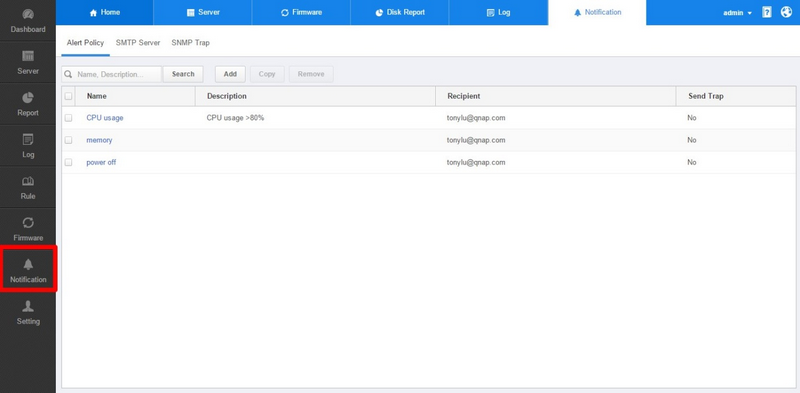
Notification
The “Notification” screen lets you configure sending notifications via email when certain predefined system conditions occur.
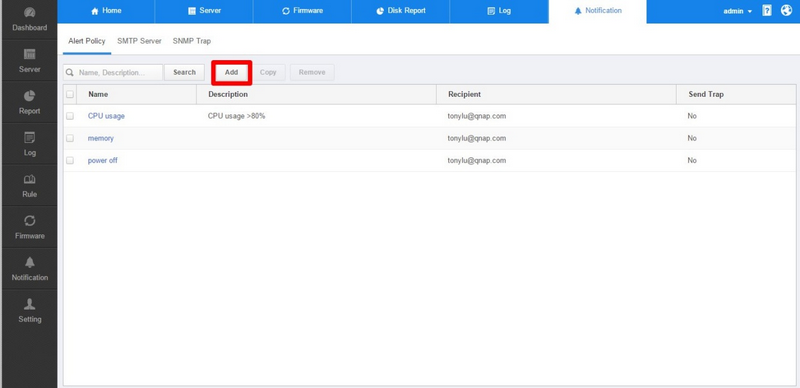
Add an Alert policy
Select “Add” in the “Notification” screen to add a new alert policy.
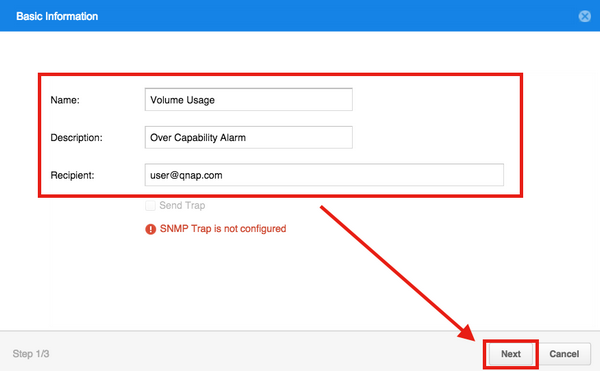
Enter the name, description and the email addresses to receive the notification, and then select “Next”.
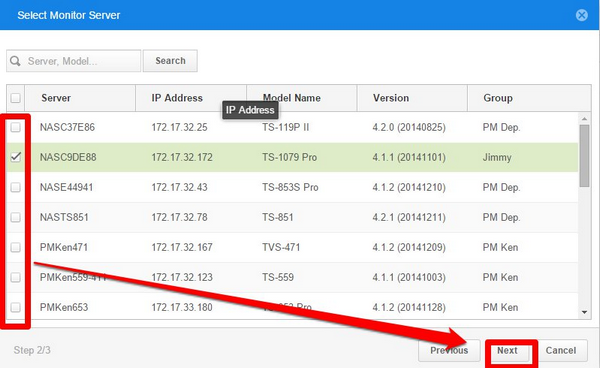
Select the servers to be monitored on the list, and then “Next”.
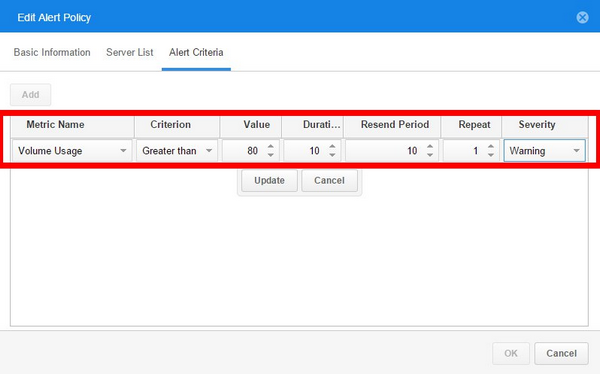
Select “Add” to add a new criterion.
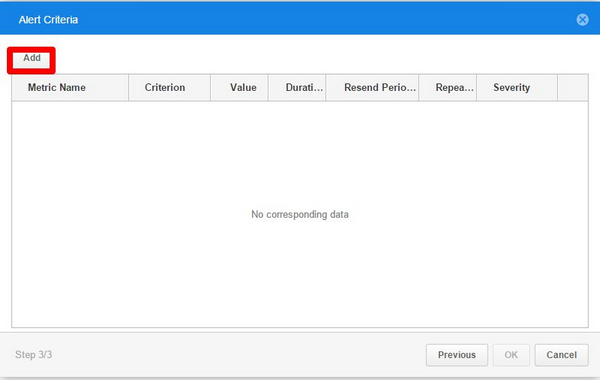
You can set an alert criterion based on CPU usage, memory usage, volume usage, pool usage, network download, network upload, or server abnormalities (including disk failure or excessive system temperatures) for this alert policy. Please note that if you set multiple criteria for a policy, you will be alerted if any one of the criteria is met.
Please note that you must have already configured the SMTP server in the “SMTP Server” tab to receive email notifications.
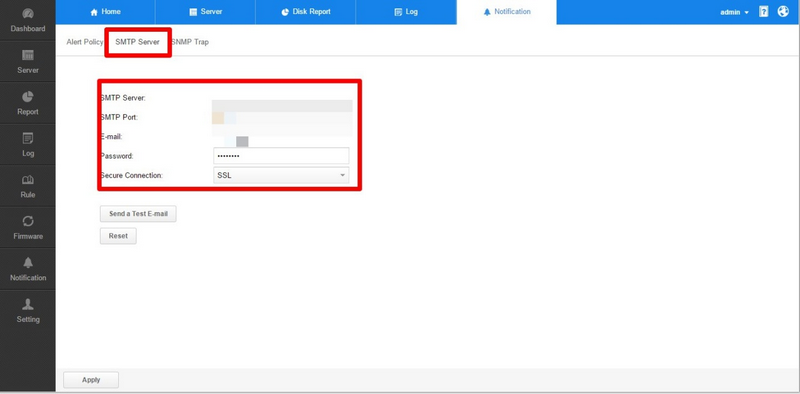
Configure SMTP Server
Select “SMTP Server” in the “Notification” menu. Configure the SMTP server to receive email alerts. Please refer to your email provider to get correct SMTP settings.
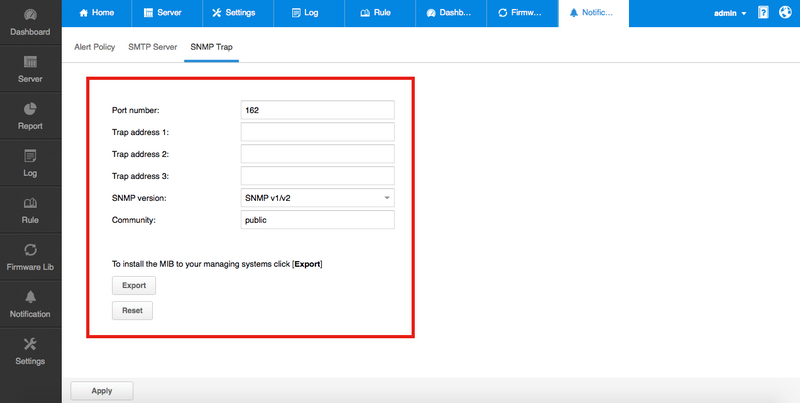
Configure SNMP Trap
Select “SNMP Trap” in the “Notification” menu. Enter the IP address of the SNMP server with the SNMP program installed and the communication port. In the “Community” field, enter the name of the SNMP community (which is usually public or private) to be sent with the traps. You can also export the MIB (Management Information Base) file here and then import it into your SNMP management program.
Settings
The “Settings” screen provides you with comprehensive functions to manage Q’center, including Account, LDAP Configuration, AD Configuration, Patch, Export/Import Settings, and Remote Backup.
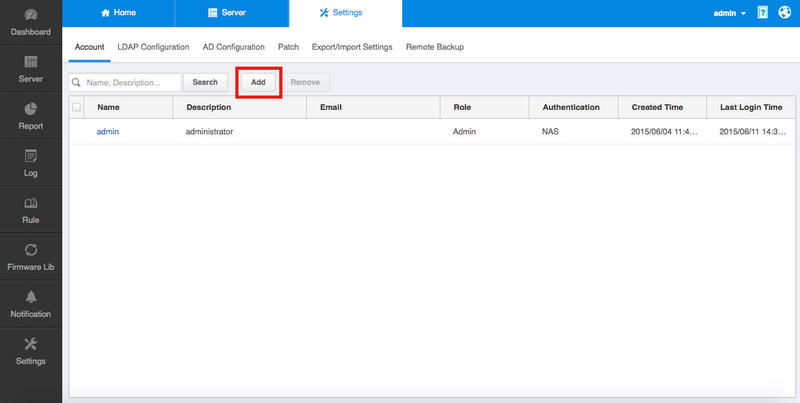
Account
Select “Add” in the “Account” screen.
Enter the Name, Description, Email, Authentication, Password, Role, Time Zone, and Register Code, then select “OK”.
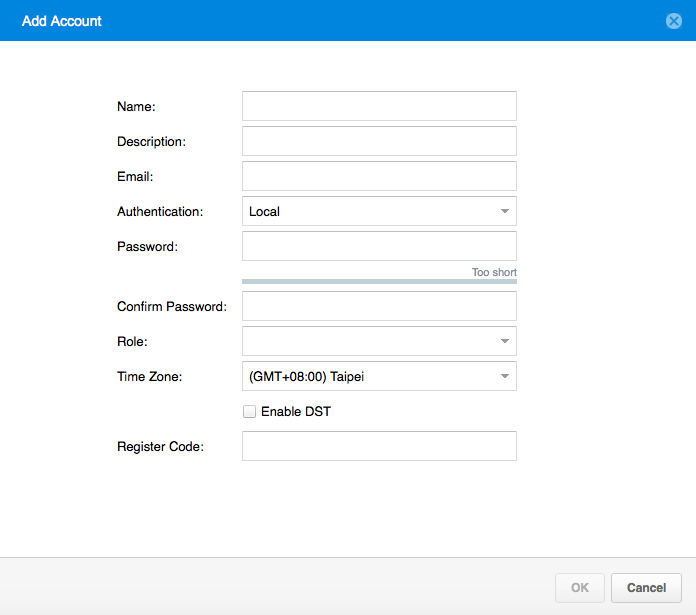
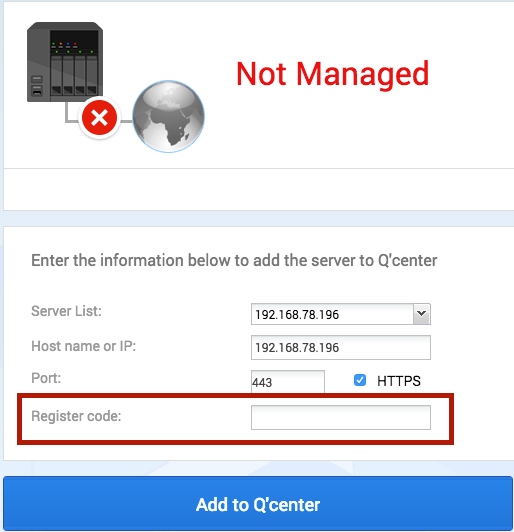
The register code is an authenticated method Q’center provides. When you want to add a NAS to Q’center in a NAT router environment, you can use the Q’center Assistant to install the Q’center Agent with a Q’center IP, port, and register code, and then add a NAS to Q’center with Q’center Agent.
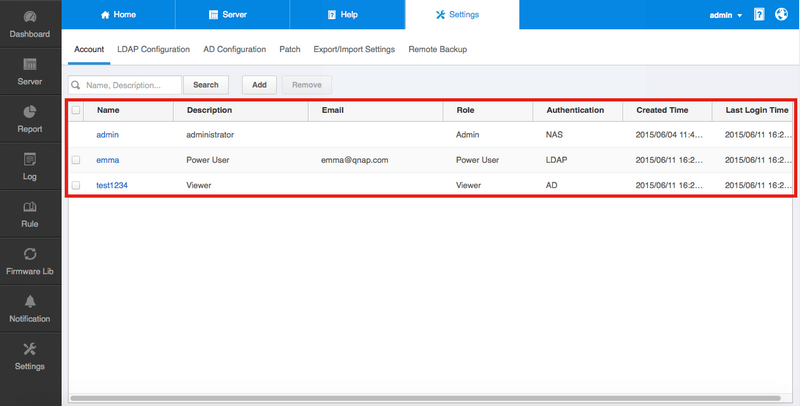
You can check the account’s roles, authentication, creation time and the last login time in the account list.
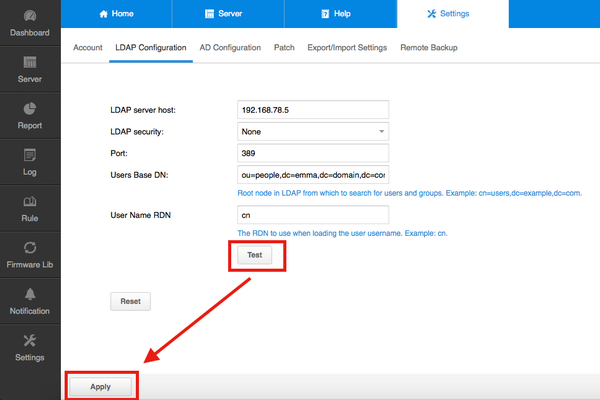
LDAP Configuration
If you want to use LDAP to perform account authentication, you should set the LDAP configuration in this page. Select “Test” after entering all the settings to ensure the LDAP server has enabled the LDAP service, then select “Apply”.
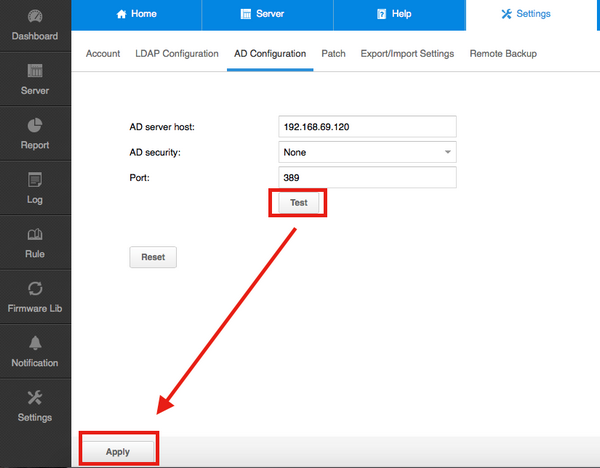
AD Configuration
If you want to use AD to perform account authentication, you should set AD configuration in this page. Select “Test” after entering all the settings to ensure the AD server has enabled the AD service, then select “Apply”.
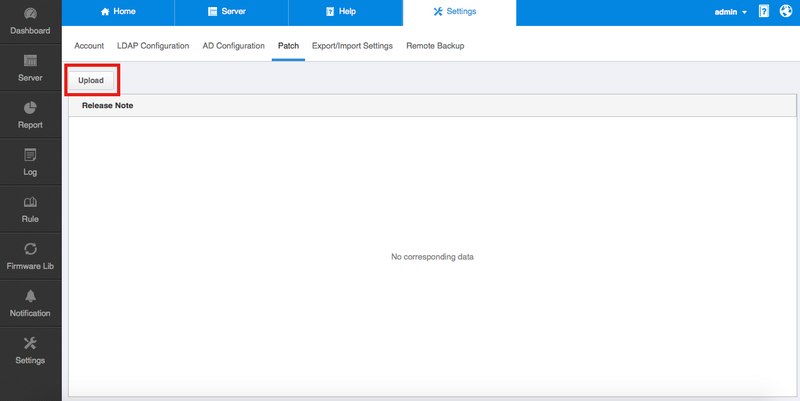
Patch
Select “Upload” in Patch screen to upload patch files which QNAP provides to update Q’center.
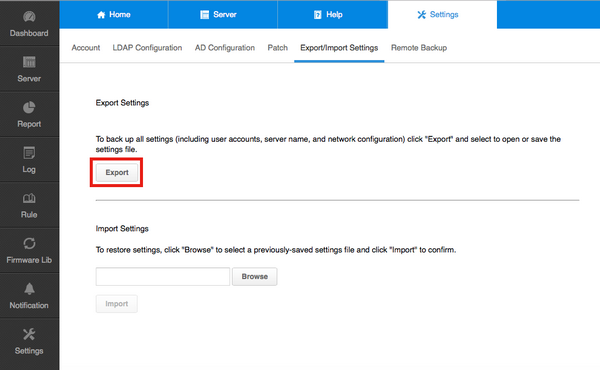
Export/Import Settings
Select “Export” to export settings that include all of Q’center’s system settings and historical data.
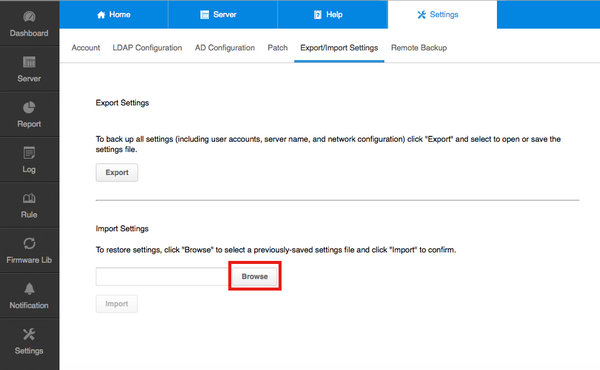
You can also select “Browse” to upload settings.
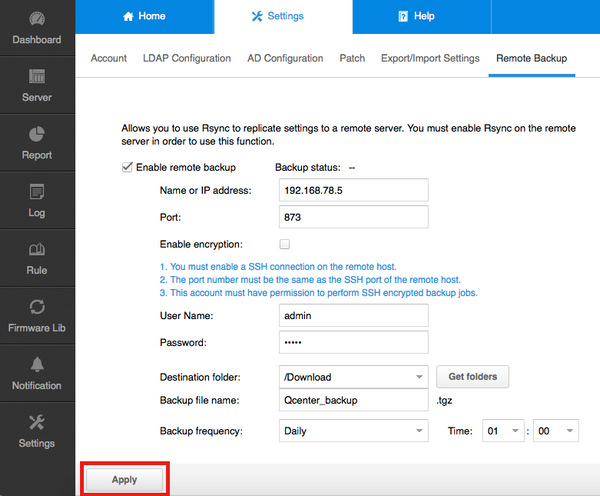
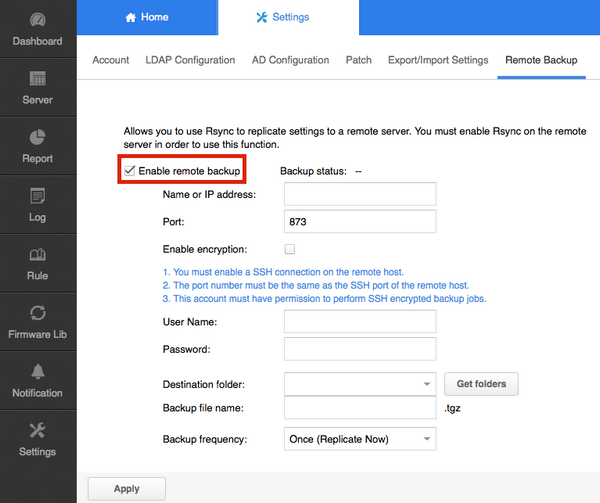
Remote Backup
Remote Backup lets you backup all of Q’center’s system settings and historical data to a remote server.
Select “Enable remote backup” and enter the connection information.
Select “Get folder” to get the remote server’s folder list.
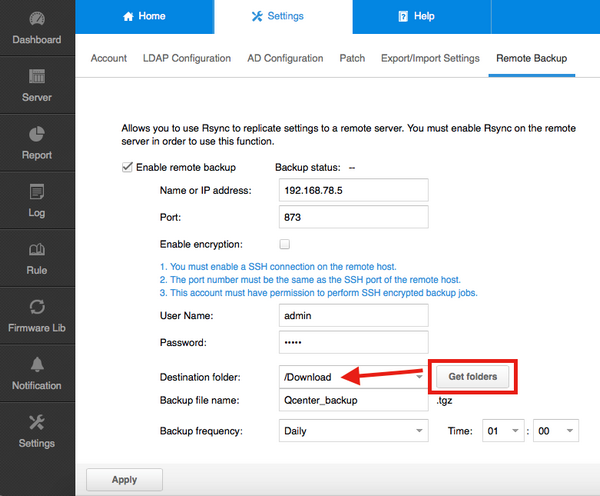
Set “Destination folder”, “Backup file name”, and “Backup frequency”, then select “Apply” to enable remote backup.