I – Starting Photo Station & Introduction
II – Importing photos/videos to the Turbo NAS
III – Creating an album
IV – Creating a smart album
V – Sharing albums
VI – Advanced Management (Media Library)
VII – Confused? Fast Tutorial To Create & Share Albums
.
I – Starting Photo Station
Starting Photo Station
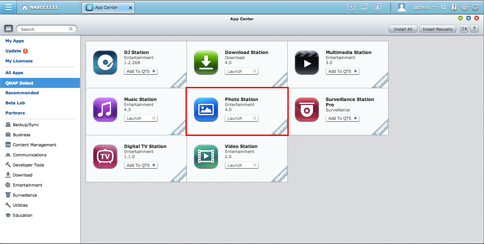
1. Please make sure that the Photo Station has been installed and enabled in the App Center (QTS 4.1 and later versions only.)
Photostation Features;
Back up precious photos
Photos capture all the beautiful memories and every moment of life, and you need a reliable device to back up the photos. The Turbo NAS features large storage capacity to be your life treasure box for backing up enormous amount of photos. No more worry about unexpected file loss or hard disk crash.
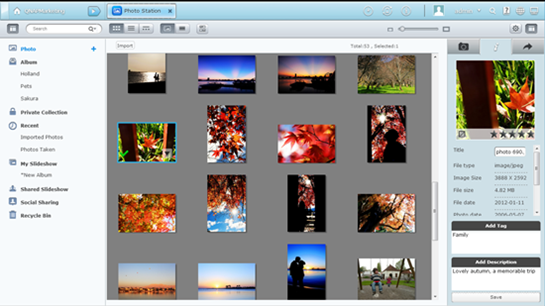
Online photo showcase with Photo Station
The Photo Station utilizes the storage capacity of Turbo NAS and provides a convenient way to upload and share photos over the Internet.
Personalized photo wall on log-in screen
Personalize your QTS log-in page with your public photo collection from the Photo Station. You can share your favorite photos publicly to the photo wall on the login page, so every time when you log on your Turbo NAS, you will start with happy memories from your photo collection.
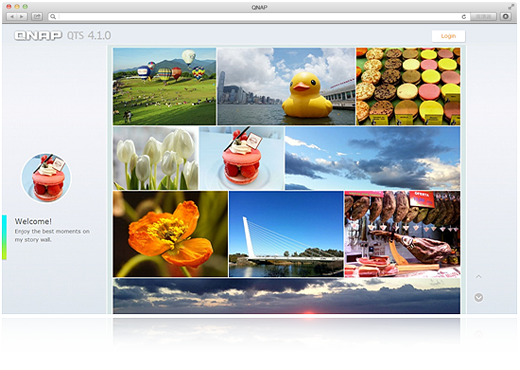
Upload and view
The intuitive web interface allows drag-and-drop convenience to upload a batch of photos from desktop computers to the Turbo NAS. Simply organize uploaded photos into folders, and the Photo Station automatically creates online photo albums on a nicely arranged page for browsing on the web browsers.
Convenient virtual albums
Freely drag and drop photos from your photo gallery to arrange various virtual albums. These virtual albums are convenient for you to enjoy photos in an organized way and make them easier to share. Feel free to create as many virtual albums as possible as they don’t take up additional storage space.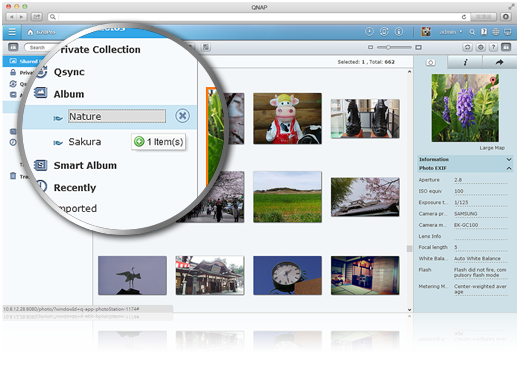
Smart photo albums
You can create smart albums of photos by your predefined criteria such as dates and tags. The smart photo albums automatically collect photos with the same dates or tags. It’s easier and more fun to browse through memories and organized photos. For example, show the photos taken on this day in history, and make an album for your anniversary that collects each anniversary moments in years.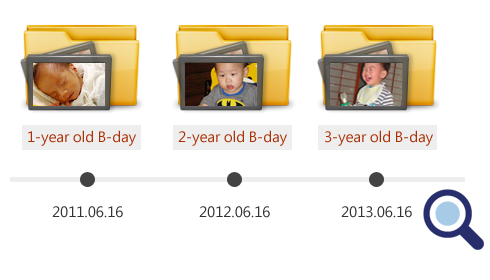
Manage photos in an organized way
The QTS Photo Station introduces smart options to help organize your photos, such as auto-sorting photos in a timeline and adding tags on photos. It is especially helpful when you want to search for specific photos.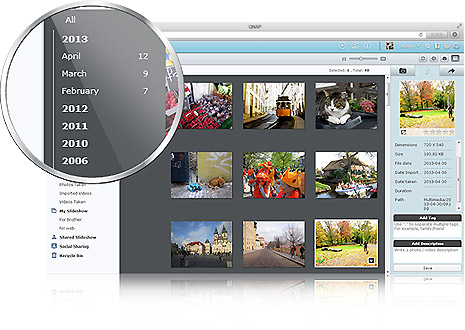
Save and back up photos and videos with Smart Import
“Smart Import” is right for you to save and back up photos and videos frequently. Just connect your digital camera to the USB port on the front of the Turbo NAS, and all the photos and videos will be imported automatically in a newly created folder named “Smart Import”.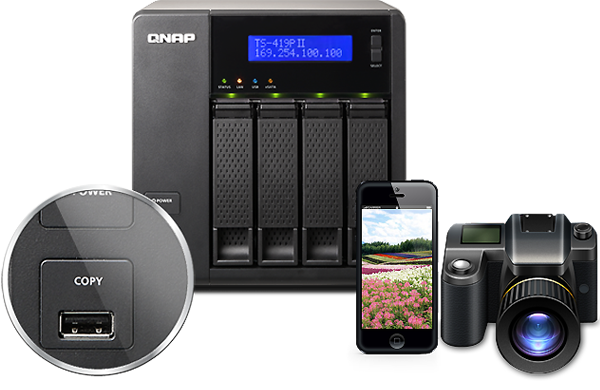
Play dazzling slideshows
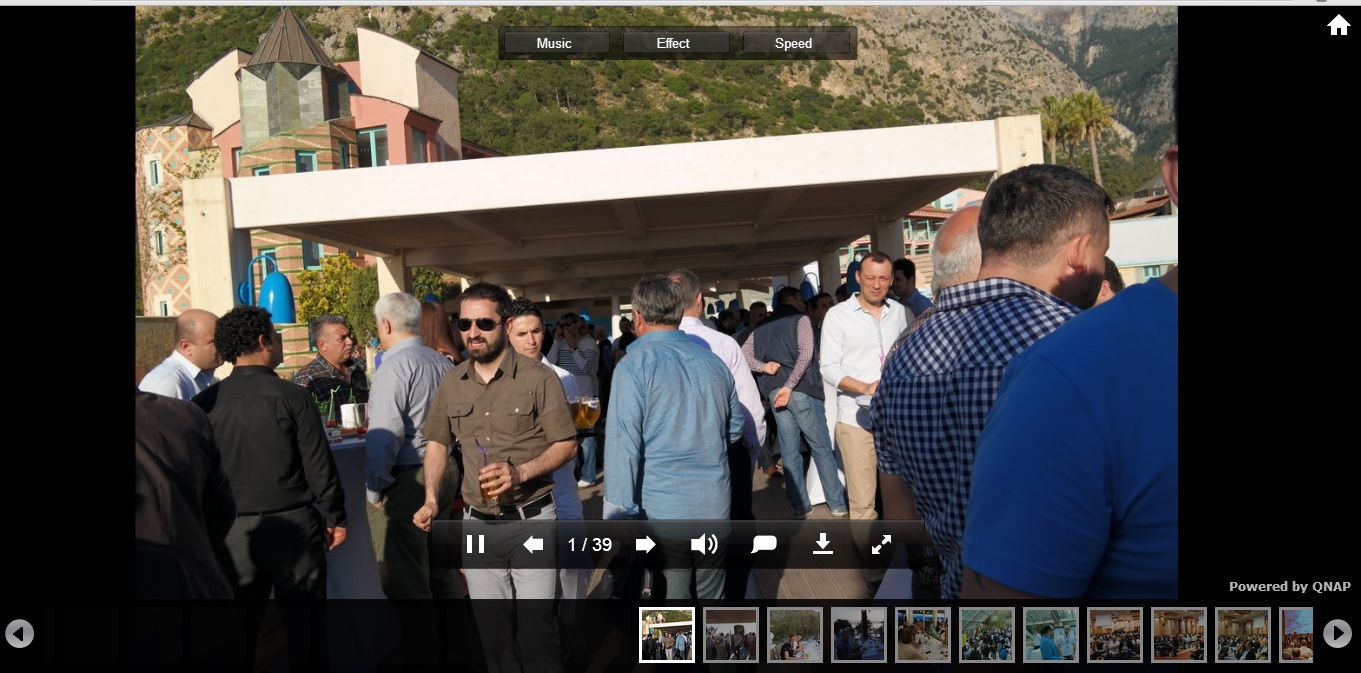
View the photos by slideshow with dazzling transition effects. Turn on the background music to add more fun while enjoying the photos. The offerings of thumbnails and photo title display presented with the slideshow enable you to preview the photos ahead.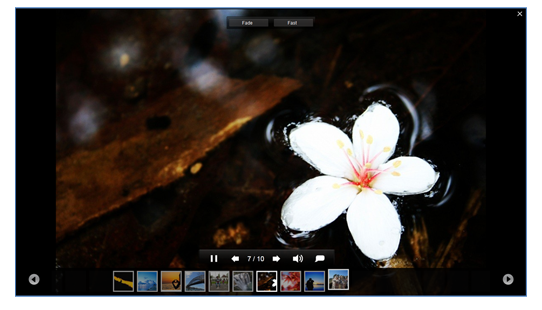
Retrace the steps of your photos on Google Maps
In your photo albums, you can use the geo-tagging function to pinpoint the location of the photo on Google Maps to identify where the photos were taken. In each photo album, you can review the history of your photos on Google Maps to rediscover your path around the world.
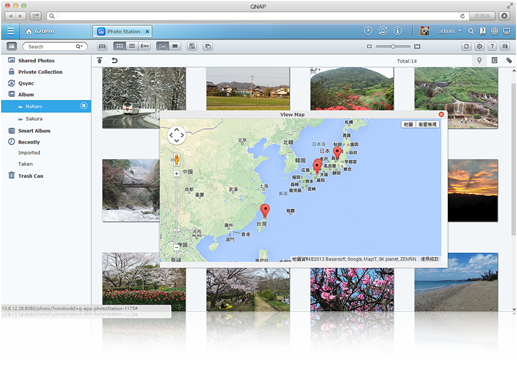
Share photos publicly or privately
Photo sharing via Turbo NAS is easy and flexible. Sharing can be made public on Facebook, Google+, and Twitter, or private albums can be shared with specific friends through email. Just share your visual memories easily in the way you prefer.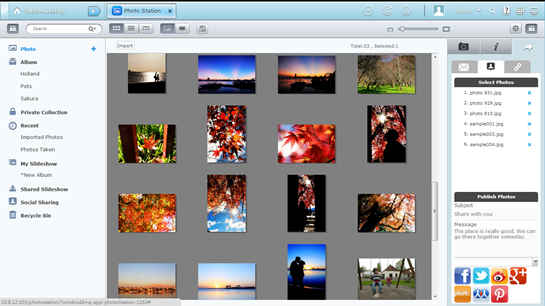
View photos on TV
You can also stream the photos from the Turbo NAS to a DLNA-compatible player and enjoy the photos on the big screen in the living room.
Log on with Facebook account
You can bind with social networking sites for your friends to log into the Photo Station and browse shared albums. It allows friends to access shared photo albums with their Facebook account. Sharing photo albums with Facebook friends has never been easier.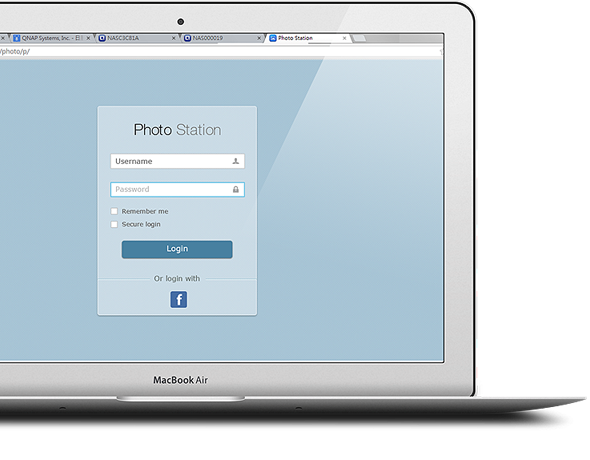
.
II – Importing photos/videos to the Turbo NAS
Importing photos/videos to the Turbo NAS
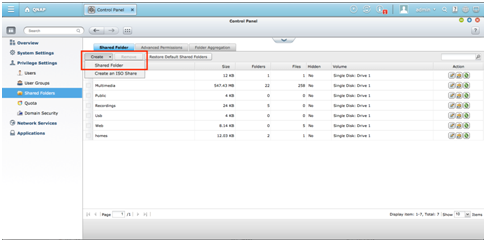
In the Photo Station, the contents are displayed according to shared folder permissions. For example, if a user has read/write, or read-only permissions to a certain shared folder, that user can see all the photos and videos in the shared folder. In other words, you can upload them to a shared folder, such as “/Multimedia”, “/home”, or a new shared folder, that you are granted the write permission with. To create a new shared folder, please go to “Control Panel” > “Privilege Settings” > “Shared Folders”.
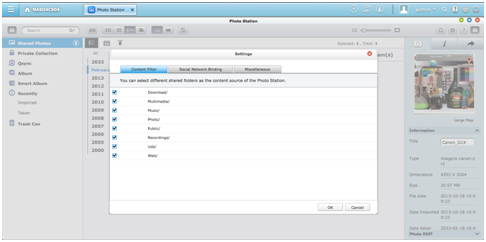
A user’s home folder will be shown in “Private Collection” inside the Photo Station and all other shared folders will be shown in “Shared Photos”. In some cases, your photos might be mixed with undesirable images from other folders. At time like this, you can use the content filter in “Settings” to show only desired contents.
To import a large number of files or folders, please follow the instructions provided in the table below. You can also upload files through the Photo Station, File Station, FTP, or Qfile from your mobile device.
Note: Thumbnails of those multimedia files will be generated automatically to enhance your user experience. The duration may vary based on NAS models and the total number of multimedia files involved. Please be patient.
|
Windows Users
|
Mac Users
|
|
Install the QNAP Qfinder utility on your PC and set up a network drive. Then, you can quickly upload files to your preferred shared folders. 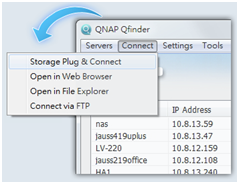 |
Run Qfinder for Mac and select “Go” > “Connect to Server” (or use the shortcut keys “Command + K” on your keyboard) to establish a connection with the QNAP Turbo NAS via SMB or AFP. 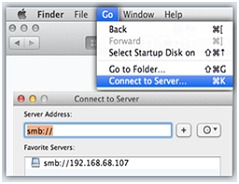 |
.
III – Creating an album
An album is a virtual folder used for to collect photos/videos, and you do not need to worry about where the files are stored on the Turbo NAS. If photos/videos have already been organized in the folders, you can right click on a folder that you prefer (in the folder view) in “Shared Photos”, “Private Collection”, or “Qsync” and select “Create New Album” to turn the folders into an album.
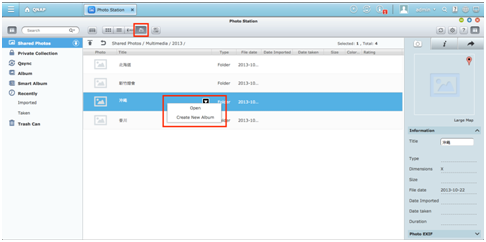
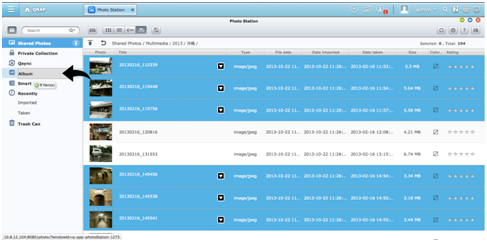
You can also drag photos/videos to “Album” on the left panel to create a new album and drag more photos/videos from different folders to the newly created album for your customized collection.
.
IV – Creating a smart album
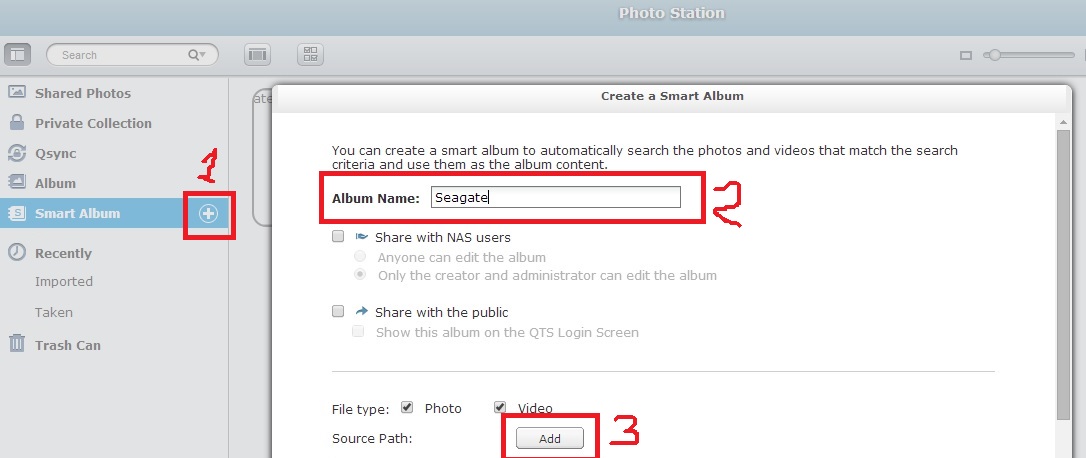
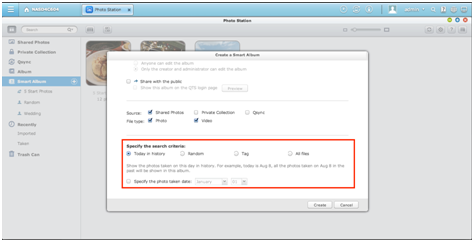
A smart album automatically displays the photos and videos that match the search criteria defined for you and can save you a lot of efforts on photo management. To create a smart album, please click the “+” button next to “Smart Album”. In the album creation window, you can configure the smart album with different search criteria such as “Today in history”, “Random”, “Tag”, or “All files”.
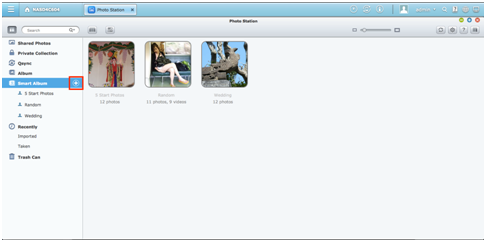
If “Today in history” is chosen as the search condition, photos taken today in history will be displayed to give you some surprises about what you have done in the past. Besides, if you often take photos on certain, important days such as a wedding anniversary or birthday, you can specify a date to show these special occasions immediately from the smart album.
.
V – Sharing albums
In the album creation window, you can also set the album for personal use, sharing with NAS users, or sharing with the public. To change the album settings, please right click on an album and select “Album Settings”. As a Photo Station administrator, you can even share a public album on the NAS login screen. (The photo-wall style login screen can be set in “Control Panel” > “General Settings” > “Login Screen”.)
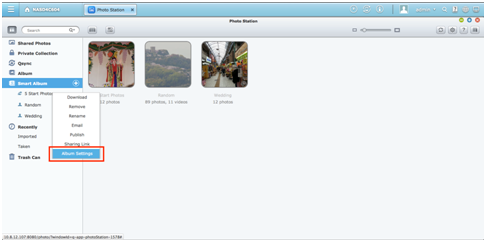
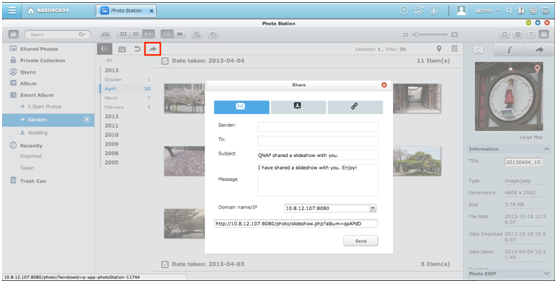
If an album is set to share with the public, you can click the “Share” button to email its slideshow link, publish the link on social networking sites, or paste the link on your blog, forum, or instant messenger programs. You can still edit the album content later, and the updated slideshows will be presented when viewers click the same link again.
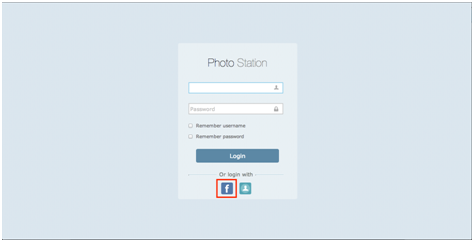
To share photos with your friends on Facebook, please bind your Facebook account with the Photo Station in “Settings”.
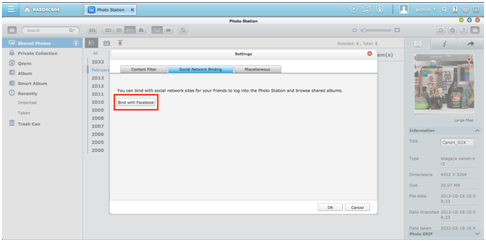
After the account is bound successfully, your Facebook friends can log into the Photo Station (http://NAS_Name_or_IP/photo/) with their account to browse photos from shared albums.
.
VI – Advanced Management (Media Library)
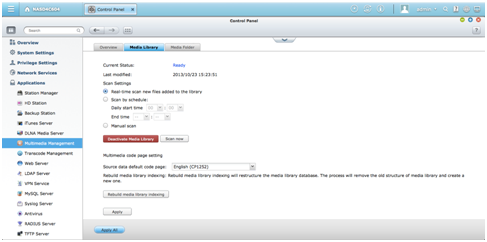
The Photo Station is an application developed from a database known as the Media Library. You can manage its settings in “Control Panel” > “Applications” > “Multimedia Management”. The Media Library can scan multimedia files, such as photos, music and videos, from the designated media folders and index them. To scan multimedia files by schedule or manually, please set up the scan method under the “Media Library” tab.
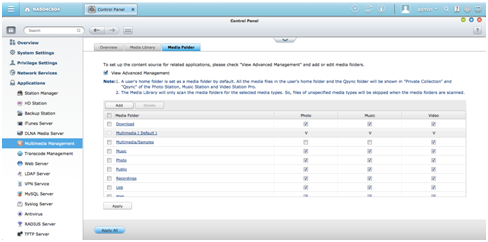
To set the Media Library to scan for certain folders or media types only, please specify them under the “Media Folder” tab.
Note: As the media folders in the Media Library are shared by the Photo Station, Music Station, Video Station and DLNA Media Server as the source of their contents, the contents will be affected in those applications if new media folders are added or existing media folders are removed from the Media Library.
.
VII – Confused? Fast Tutorial To Create & Share Albums
1 – Create a Smart Album and Press Add Button;
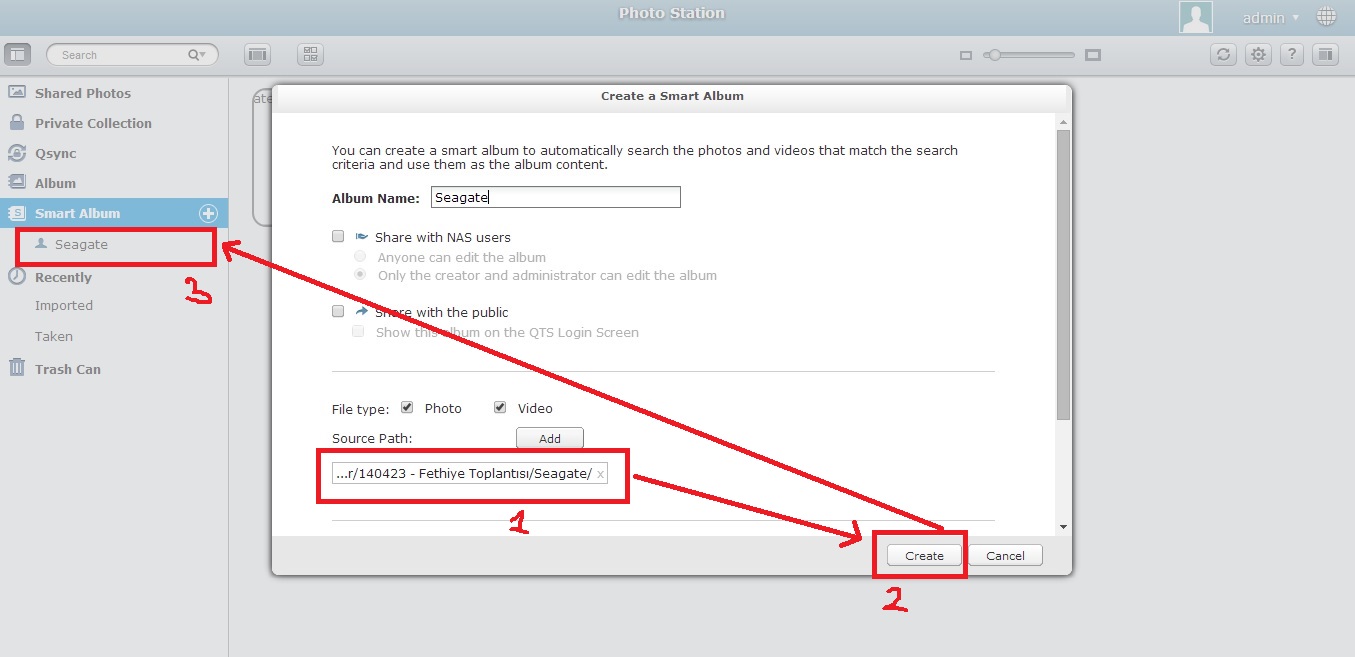
2 – Press Plus İcon Next To Your Folder To Add Folders And Click Ok;
3 – Press “Create”
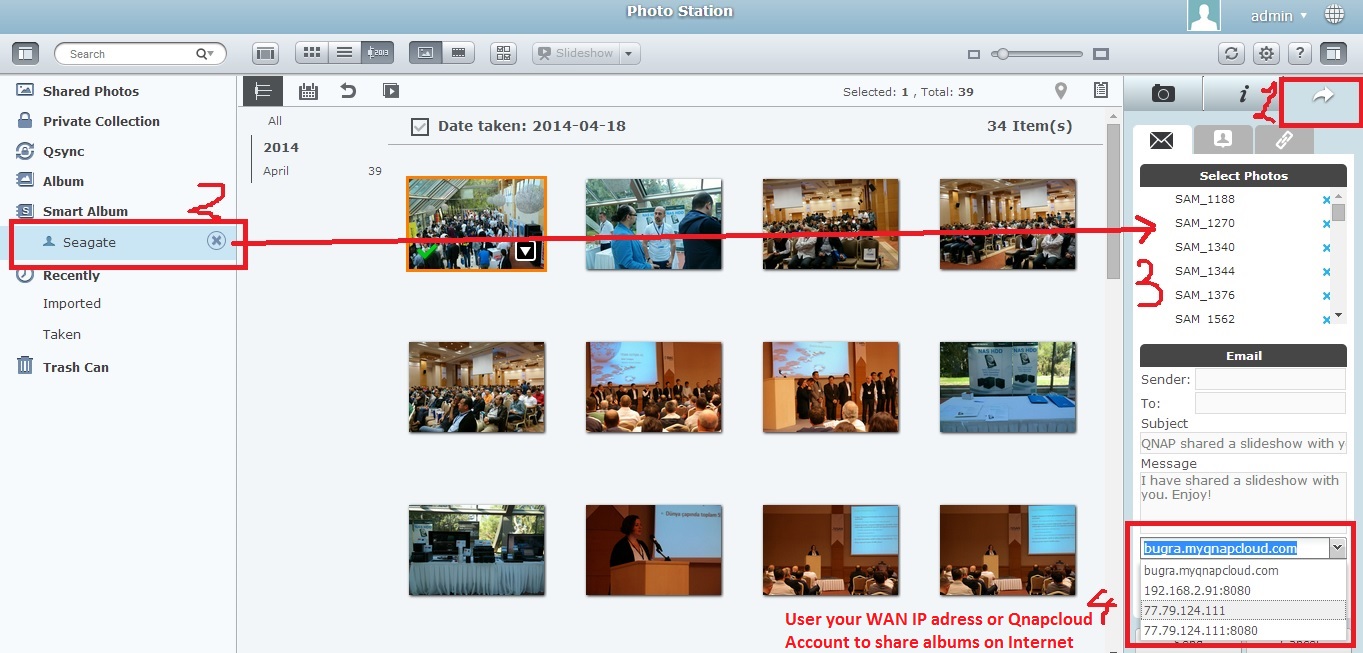
4 – You Can Drag & Drop Album into Mail;
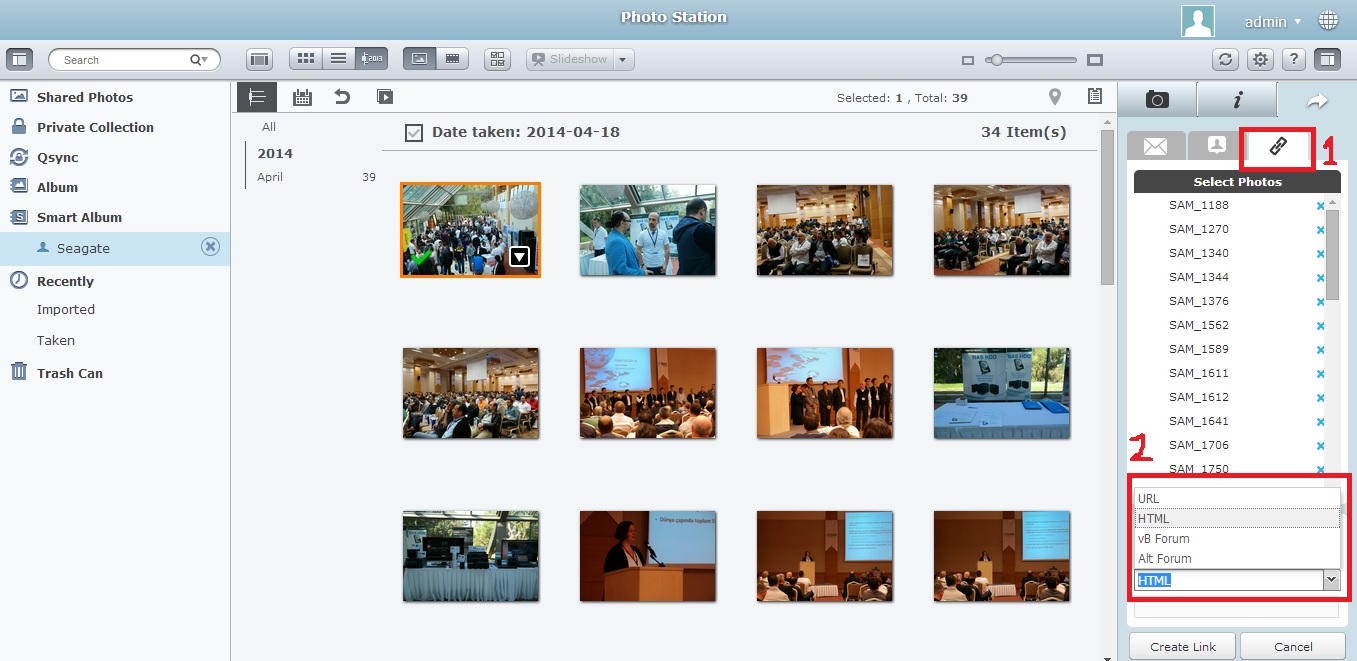
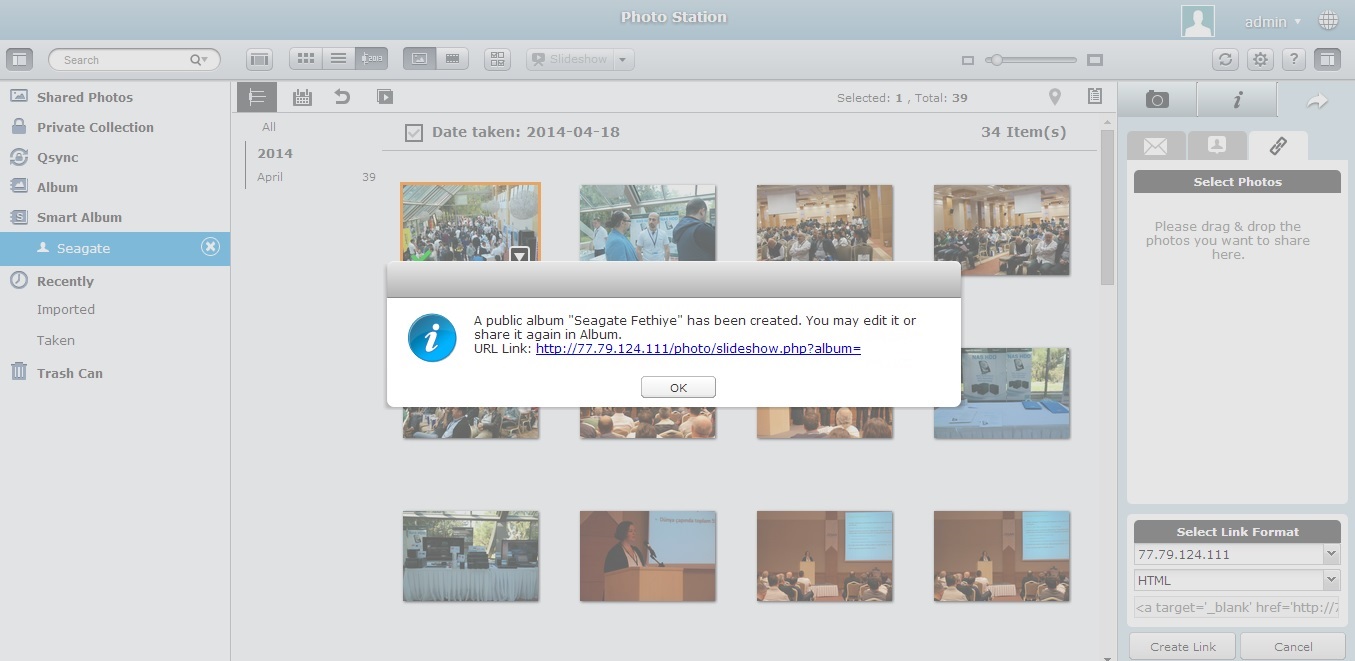
5 – Or Drug & Drop Album To Create a Share Link. Choose Your Album Stlye And Press “Create Link” Button;
6 – Copy This Share Link and Send To Your Friends;
7 – Your Firends Now Can See Photos Just Like This, and Can Download To Their Computers;
Qnap PhotoStation: Publish Your Photo CollectionQnap PhotoStation: Fotoğraf Albümünüzü Oluşturup Yayınlama,
