I – Qnap first time Installation;
II – Problem on First Time Installation?;
III – How to configure Ip with same subnet
IV – What is RAID / RAID Data Process
V – Must I use RAID? / How to setup multi-RAID? / Does Qnap Performance change if I build different RAID systems?
VI – Questions & Answers about expanding capacity
VII – My 3 TB HDDs size seems 750 Gb;
VIII – Qnap couldnt recognize one of my HDD;
IX – My Qnap recognize HDD size as 0 MB;
X – Thing You Should Know After Installation / My Advices
XI – QNAP NAS Offical Frequently Asked Questions – First-time Installation & Setup
XII – I Cannot Remember Which RAID I Install, How Can I Learn RAID Level Or My HDD’s?
.
I – Qnap First Time Installatin;
1 – Power On Nas Witout HDDs, and Dont Plug till Qnap Wants you to plug a HDD,
2 – Install Qnapfinder from www.qnap.com
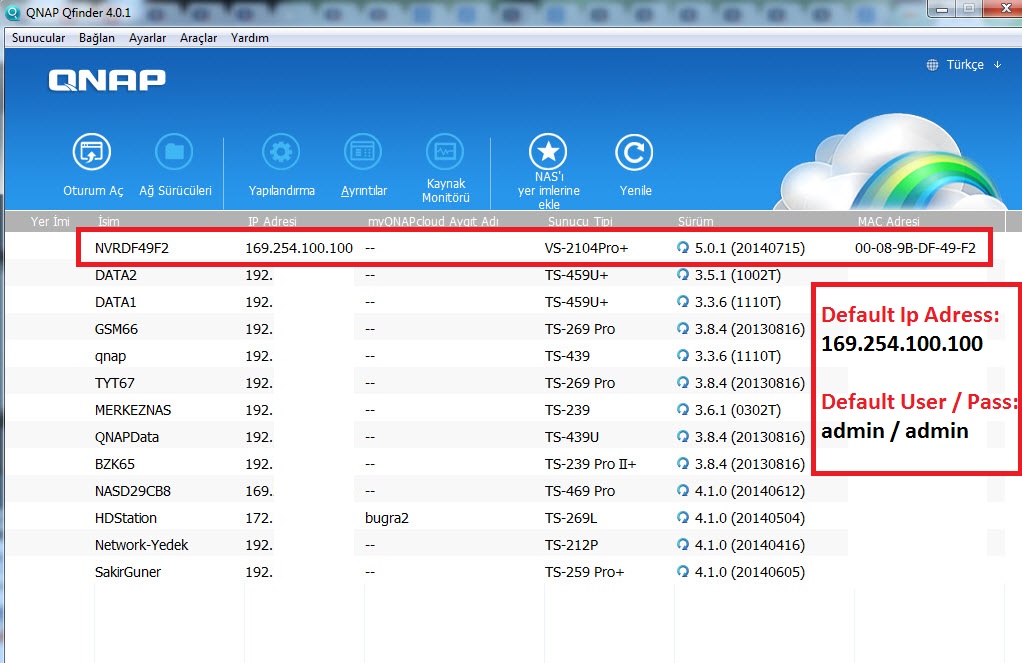
3 – A few minutes later, Qnapfinder should find your NAS.
4 – You can continiue installation bu double click on your nas, but My advice is, just type this IP number to your favorite Web browser
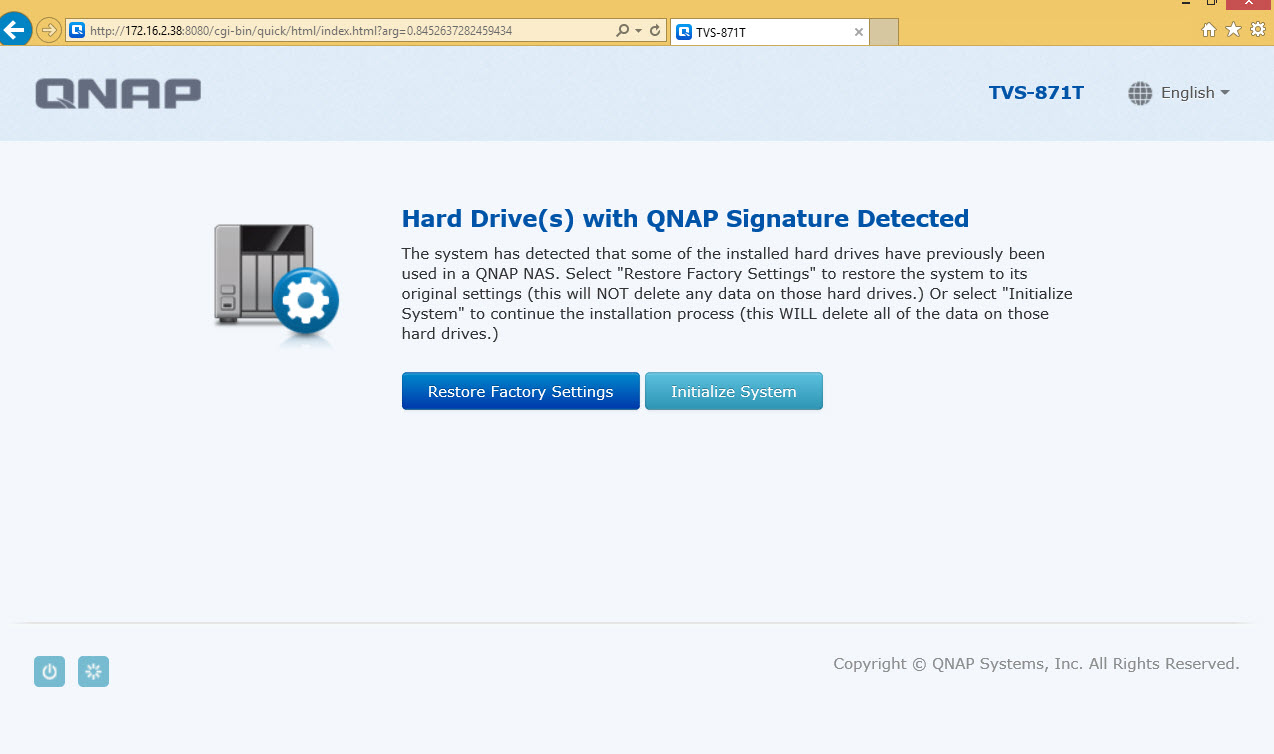
5 – Plugin all your HDD’s on this point;
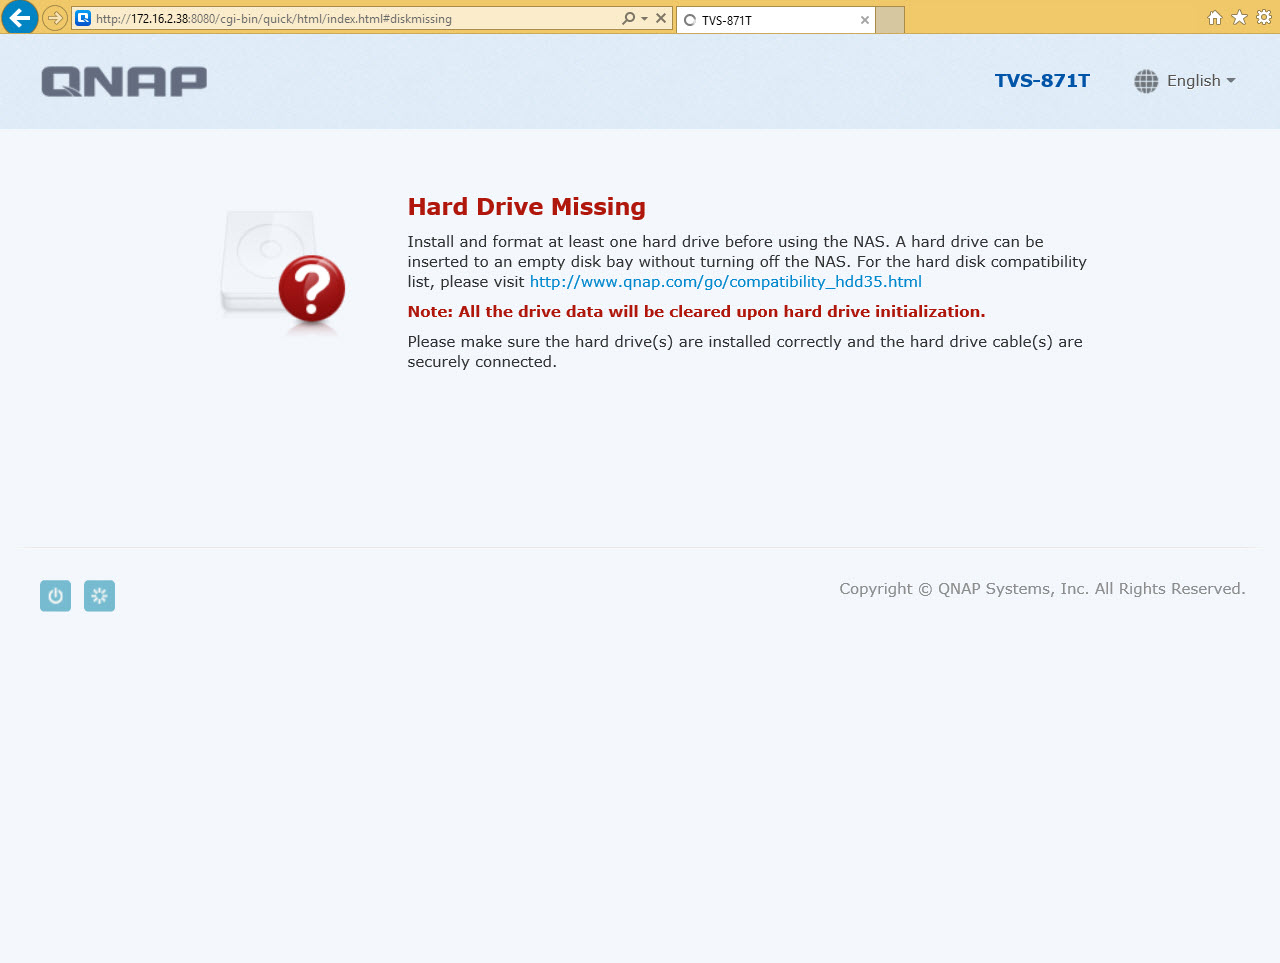
If you use your HDD on another NAS before and dont want to loose data, just click Restore to Factory Settings”. If you want to format HDDS and need fresh install, just click on “Initilize System”
.
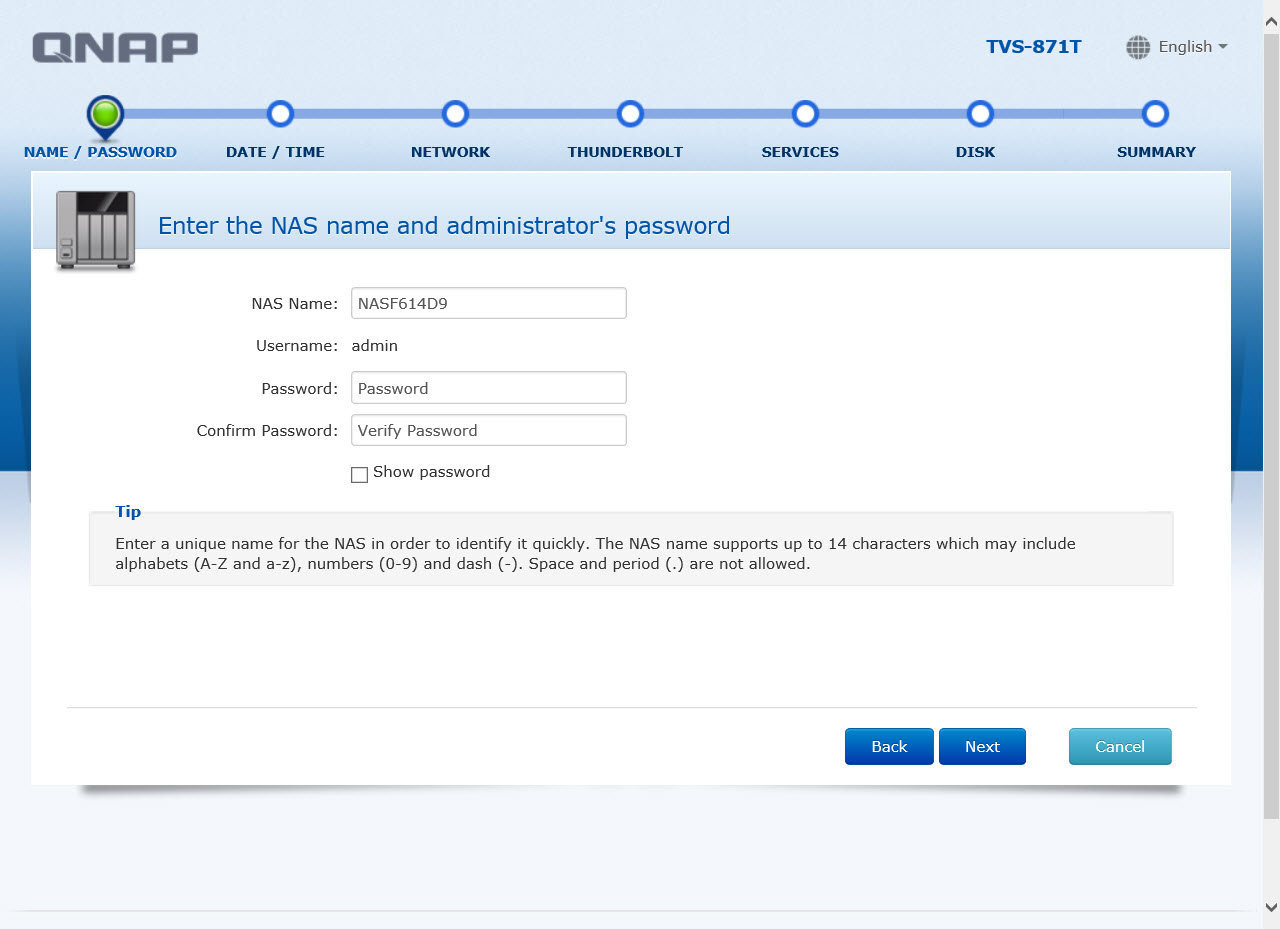
6 – Identfy your admin password;

.
8 – Your time server settings (My advice is choosing this manually)

.
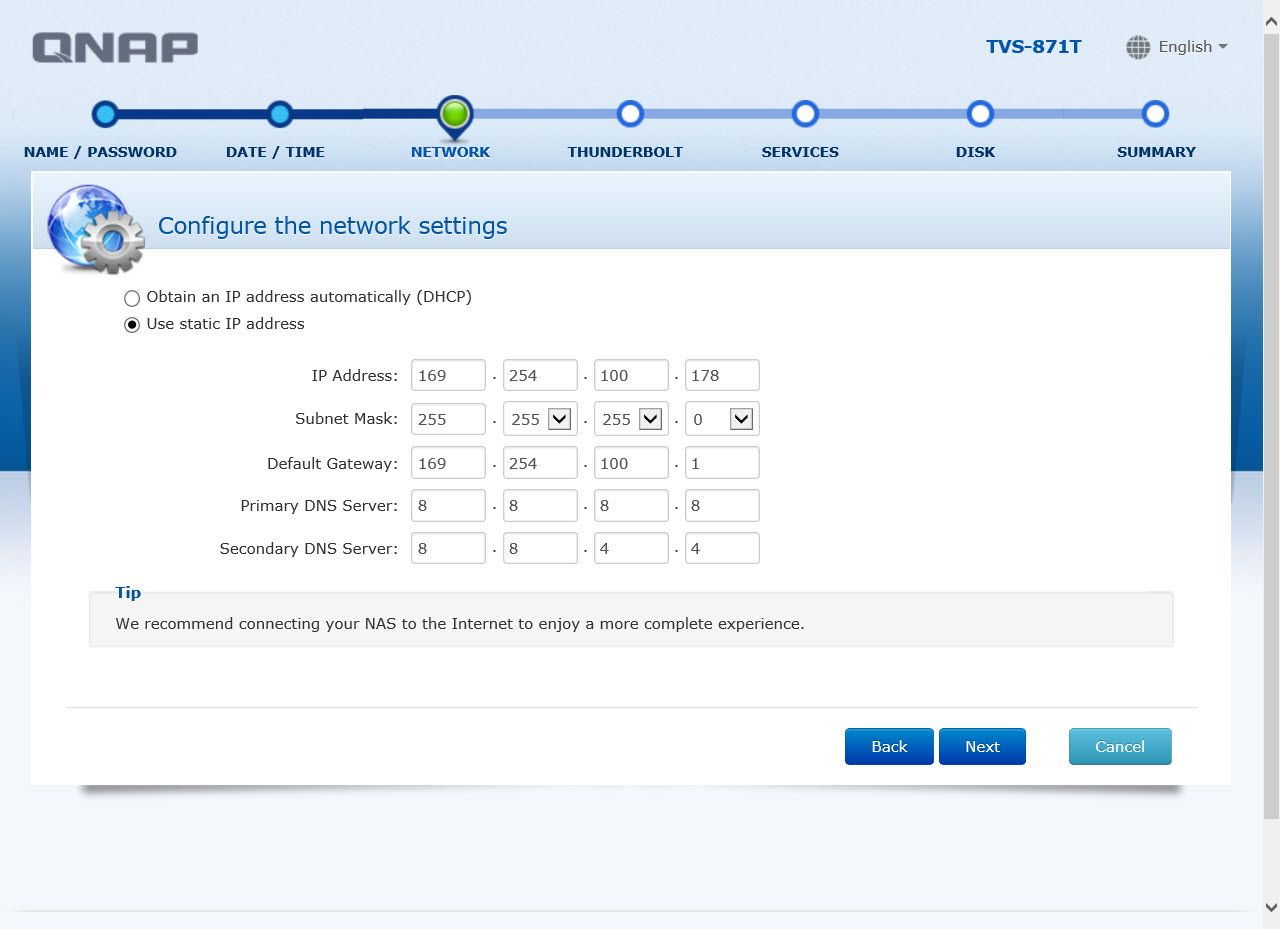
9 – Choose your Qnap IP adress; dont forget that, this IP adress means your Qnap first ethernet port,
.
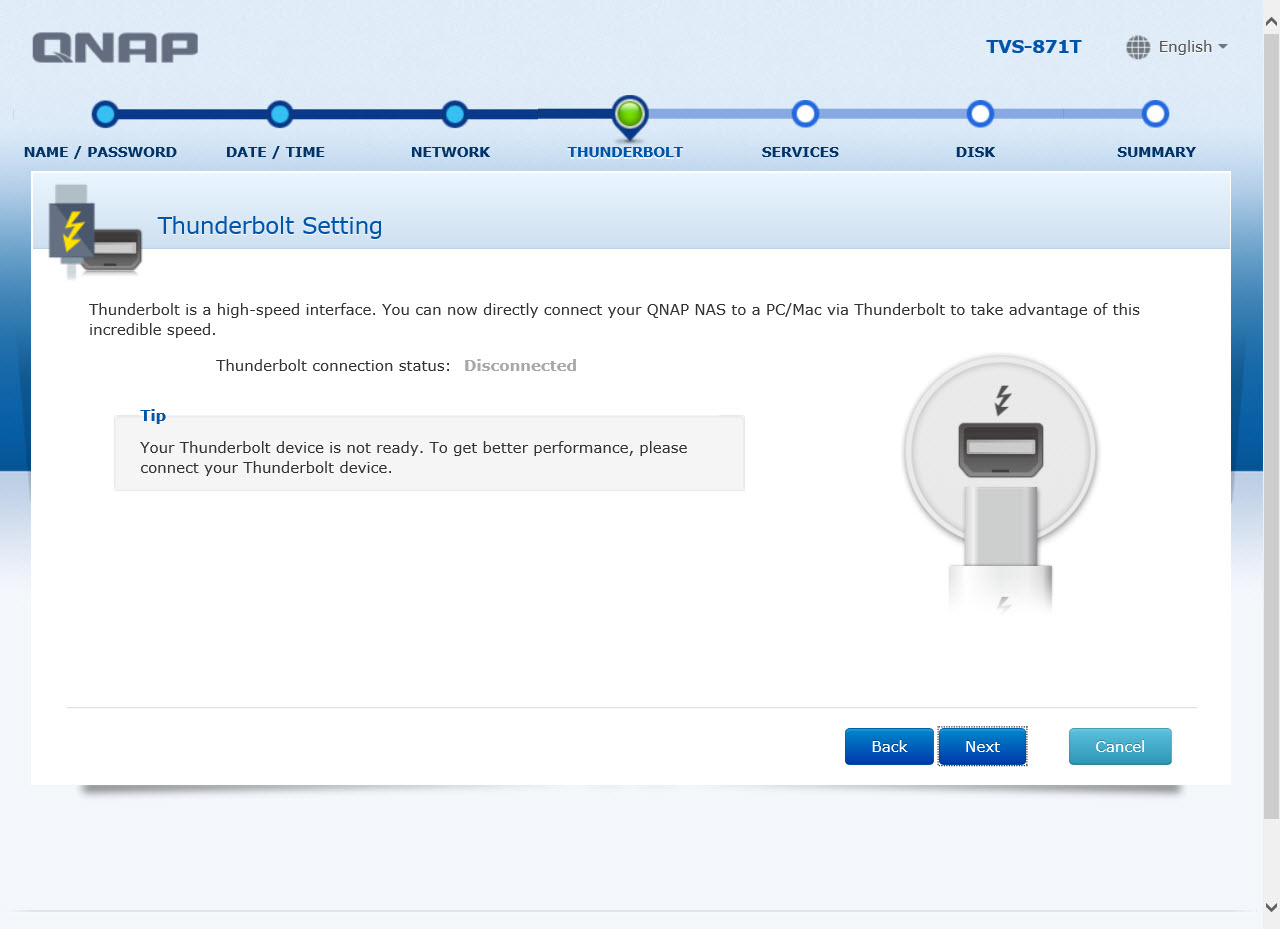
10 – Setup your Thunderbolt IP adress if you have one;
.
11 – Dont forget to open Linux / Windows / Mac connection services;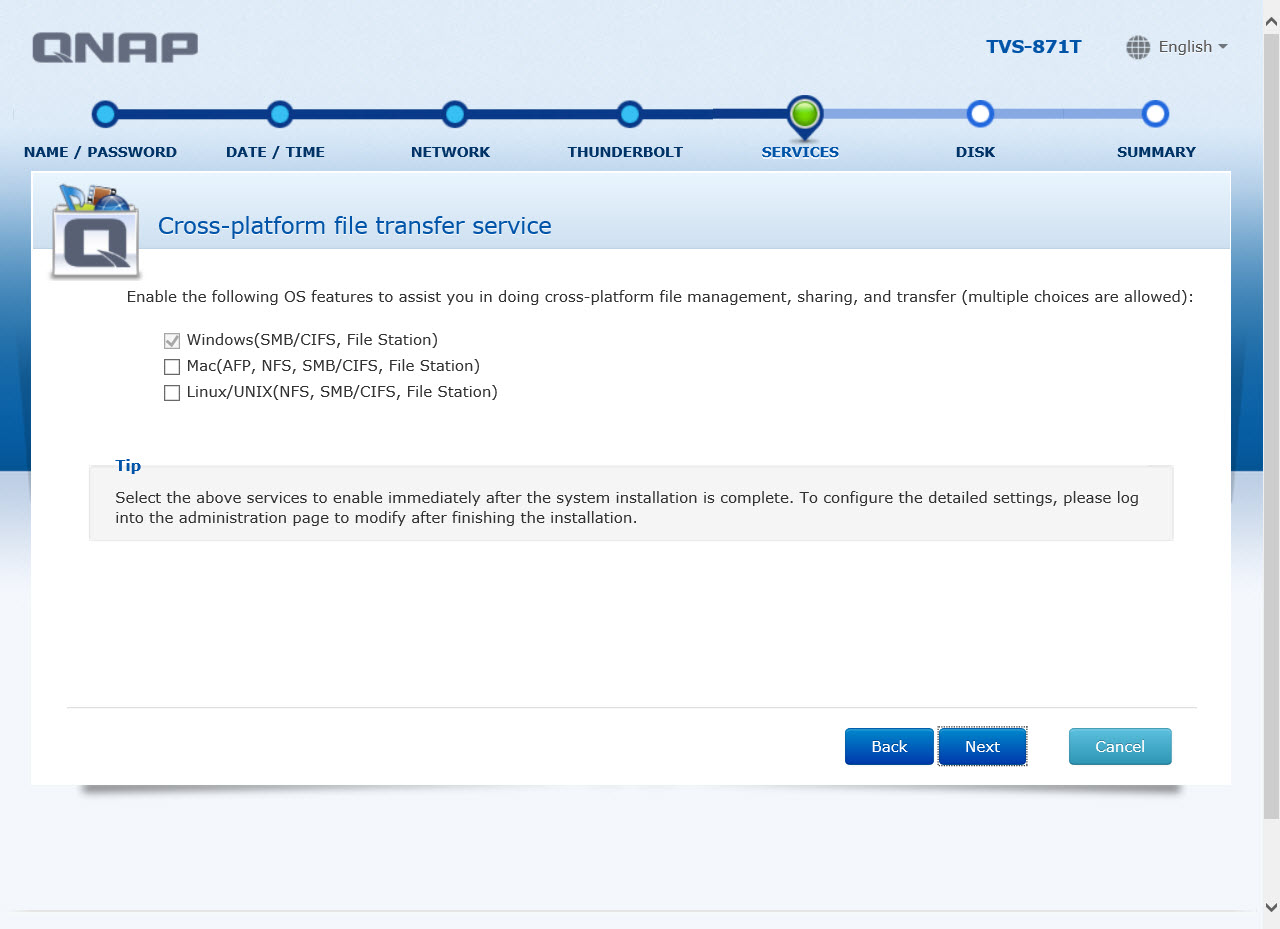
.
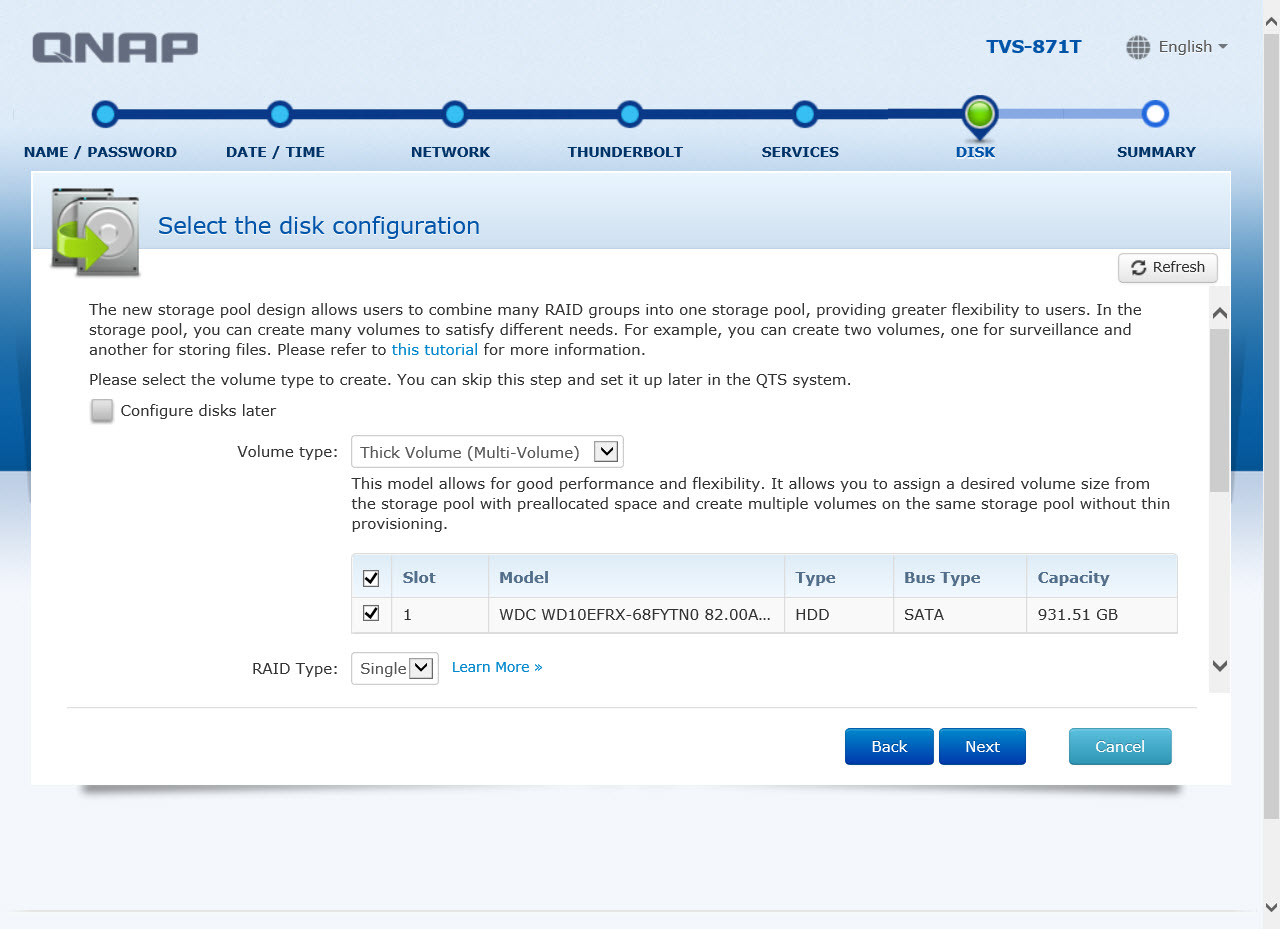
12 – On this RAID configration, my advice is;
if you have 2 HDD, choose RAID 1
ify yoru have 4 HDD, choose RAID 5
if you have more than 5 HDD, choose RAID 6
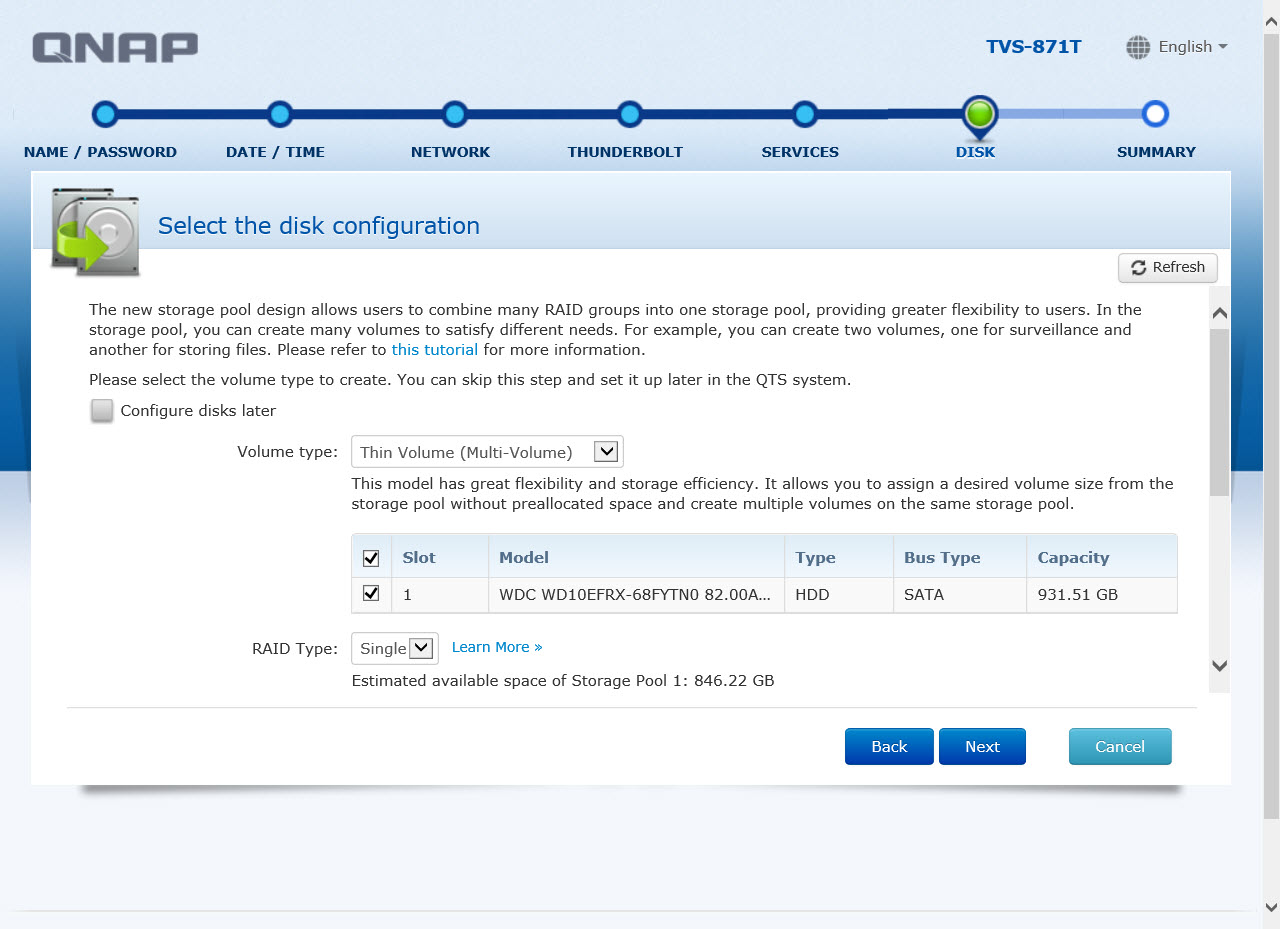
My advie is also choose “Thin Volume” to make enable “Snatshot” feature

.
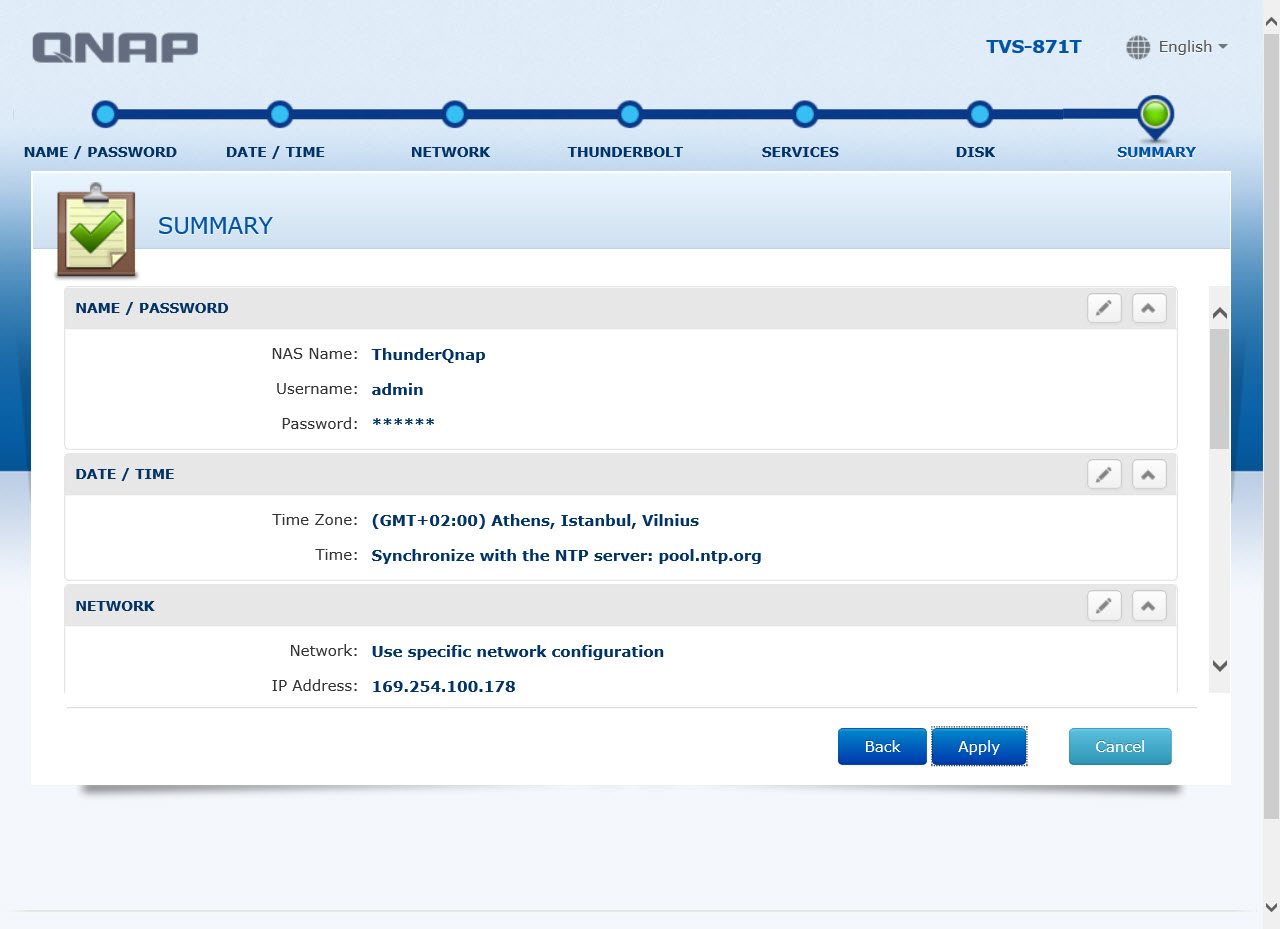
13 – On final step, Qnap ask you to confirm this settings. Dont forget that you can change all of these settings after installation; Except RAID building..
.
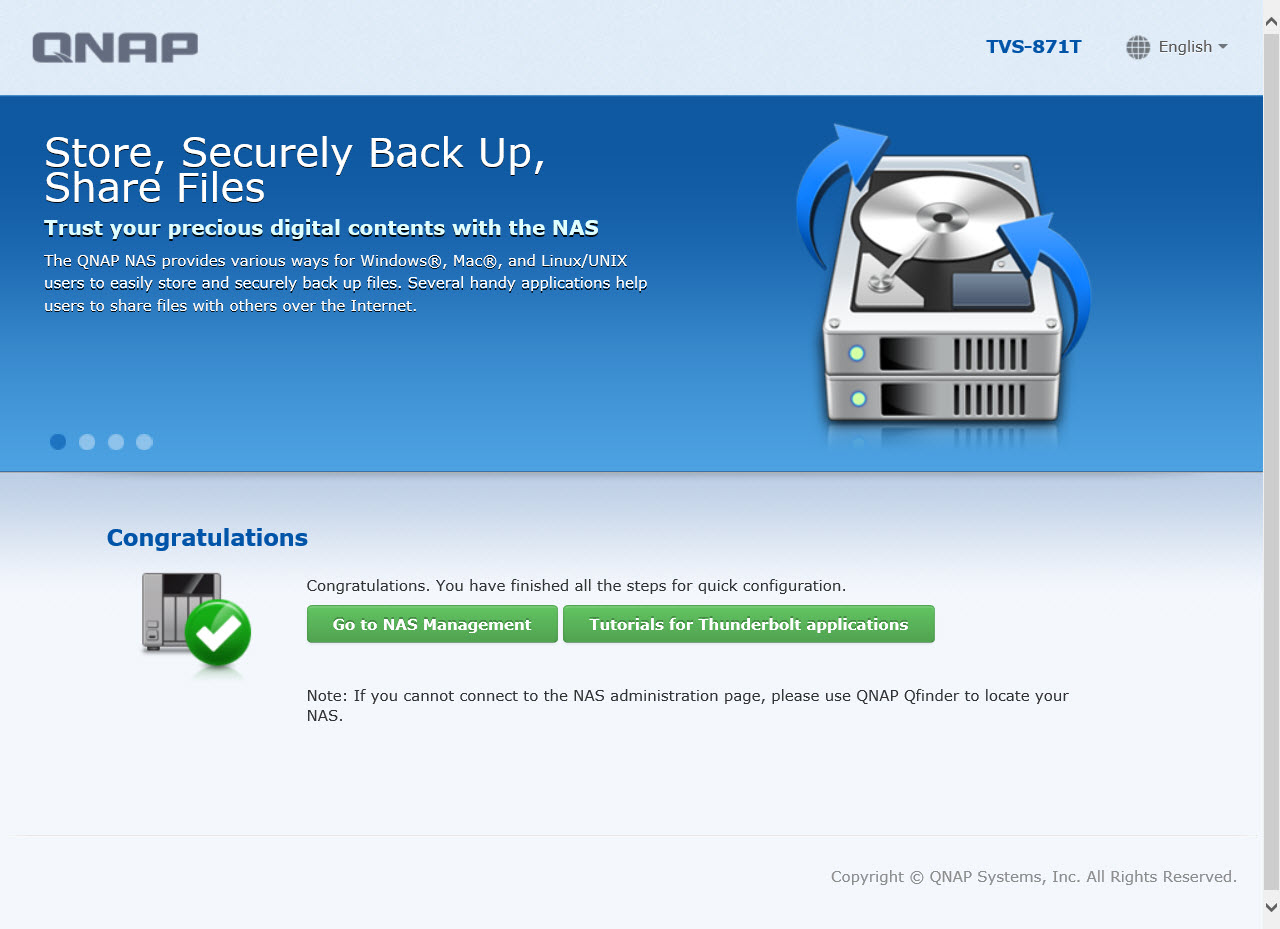
14 – RAID Installation may take around 4-12 Hours, so dont try to close device while this process is running,

.
Qnap First Time Installation:
.
Where to Download Qnapfinder
Go -> www.qnap.com ->support -> Download. Check table at the left side;

Software is here;

Where to Download Device Firmware?
Go -> www.qnap.com ->support -> Download. Select your device model (Check Storage of Archive) and your device model.
.
II – Problem on First Time Installation?;
Please Follow this Guide;
1 – Power Off Qnap, and unplug all HDD’s
2 – Open Qnapfinder, and start installation
3 – On Installation steps, Qnap ask you to insert an HDD, and Plug only 2.th HDD (Dont use 1.st HDD, or dont Plug in all HDDs), and finish installation with “Single Disk”
4 – After 15th minutes later, Qnap should format HDD and could be accessable. Go to Administration Panel, and insert another HDD to one of Qnap HDD slots.
5 – Start formatting that HDD, (Choose Single disk in RAID menu)
6 – After this process complete, format other HDD’s with the same way.
7 – If one of that HDD’s coulnd be format, or give “Read / Write” / “Abnormal” or “Normal” Error, dont use that HDD, and Plug out.
8 – If all HDDs, seems fine, choose your RAID, choose all HDD’s and start RAID Rebuilding.
A – Could not Enter Qnap Installation Screen
+Just be sure that Ip adress that you give to Qnap is not exist at another Network device on your Network.
+Use another laptop / Pc whis is not joined your network, close Antivirus & Firwall. Directly Plug Qnap Ethernet cable to this Pc.
+Be sure if Qnap and your laptop / Pc is is in same Ip subnet Range.(If Qnap Ip is 192.168.2.91, Your computer IP adres must be 192.168.2.x)
+Press around 15 second to Qnap’s reset Button.
B – While Installation Problem;
+If Qnap get this error, just be sure that you download right firmware. Dont forget, Ts 459U and Ts-459 PII doesnt use same firmware.

+If Qnap doesnt recognize one of your HDD, just change HDD slot with another one. If it still doestn recognize HDD, just dont use it.
+If you’r using 3 or 4 TB’ HDD’s just be sure that your Qnap firmware version is 3.5.0 or higher. If you try to start Installation lower Firmware with these 3 / 4 TB HDD’s, their size seems as “0 mb” or installation may failed. Start Qnap Installion with 1 or 2 Tb HDDs, upgrade device firmware and than start Installaion with this 3 or 4 TB HDD’s again.
C – Screen comes Corrupted at first time installation
+If Installation completes, but coulnt enter login, just clean explorer cookies, or try another web borowser (Firefox, Chrome). If problem still exist, start installation from begining;

.
D - After Installation Problem;
If your RAID seems Unmounted, Not Active or Synchronizing stucks at %0 after first time Installation Please fallow this document (Sometime New HDDs comes with “Bad sector” problem, and we’ll Identify which HDD is Infected.)

.
Open Qnap without HDD’s again, and dont plug them back yet. At first time Installation, Qnap ask you to plug a HDD at 1.th or 6.th step. At this step, Plug Another HDD to first HDD slot and complete Installation.
+After Installation finish, go to Volume Managment -> Disk managment and Plug all of your HDD’s back to Qnap. Start “Format” process for all of these HDDs at the same time and check with HDD gives error. If any of these HDD’s give “Read/write Error”, or seems ”Normal” just remove it from system and send it to service.
If you Still get problem, please contact with Qnap support Team.
.
III – How to Configre IP settings;
You must be at the same subnet with Qnap to start Installation.
Go to your computer Network Settings -> IPv4 settings
If your Ip configured DHCP, give Ip manually. Go “advance” and Add 169.254.100.99 Ip tou your IP range.
Now Qnapfinder should find Qnap and you can enter with double click.
.
IV – What Is RAID?
RAID (redundant array of independent disks, originally redundant array of inexpensive disks) is a storage technology that combines multiple disk drive components into a logical unit.
I make a table about RAID level & Performance. Generally RAID 1 and RAID 5 is popular with Qnap devices.
| Raid Level | Performance (a) | Usable Size (b) | Data Security | Required HDD Number |
| Raid 0 | Best Read / Write Performance | Total Size of your HDDs | None, If you loose one HDD, All data is wiped. | 2 or More HDD |
| Raid 1 | Better Read, Lower Write performance agaisnt Single Disk | Only one HDD size | If one HDD damaged, no data lost | 2 |
| Raid 5 | High Read / Write Performance | All HDD’s capacity except one HDD | Yes. If one of HDD broken, no data lost. If second HDD damaged, you loose all of your data. | 3 Or More HDDs |
| Raid 6 | High Read / Write Performance | All HDD’s capacity size, except 2 HDD’s | Most secured solution. Not good as RAID 5 performance, but got tolarance 2 HDD lost. If you loose 3 HDD, you loose all of your data. | 4 or More HDDs |
| Raid 10 | High Read, lower Write Performance | Total Size of 2 HDD | Yes. More secure than RAID 5, but less secure thant RAID 6. If you loose 2 HDD on the same RAID 1 Level, you loose all of your data. | 4 |
| Jbod | Single Disk performance | Size of your HDD’s capacity | None. If you loose 1 HDD, you loose all of your data. | 2 or More HDDs |
(a) – Compare with single HDD performce.
(b) – Raid Level capacity is calculated with the smallest size HDD capacity. If you build RAID 5 with 1 Tb, 2 Tb and 3 TB HDDs, your size will be 2 TB
(1 Tb x 3 HDDs) -1 TB : 2 TB
.
V – Must I setup RAID to Qnap? or I have 8 HDD slot. Can ı setup RAID 5 with my first 4 HDD, RAID 1 with 2 HDD and use as Single HDD last 2 ones?
Nope, you dont have to setup RAID and you can use x8 single disk on the device without problem. Also Qnap supports multi RAID systems, so setup your Qnap however you want.
How to setup multi-RAID?
1 – Simply Setup Qnap as single Disk at first time Installation.After Login device, go to Disk Managment -> Volume Managment and press which RAID you want to setup and just press Which RAID building you want to setup.

2 – Choose HDD’s you want to add RAID. At this screenshot I choose my first 1 Tb HDD and my second 3 TB HDD to build RAID 1. I I complete setup, My total RAID 1 size will be 1 TB, and dont make a mistake like this.

3 – Now, while creating New folder, just choose which RAID or HDD you want your datas.

Does Qnap Performance change if I build different RAID systems?
Yes, it change. Check my test Results;
Qnap Ts -459 P II with 3.6.0 Firmware. I use 26 x Qnap firmware images which size is around 41 mb – 129 Mb. I use Teracopy software to calculate performance. First disk block is Single Disk, and second is RAID 0
Qnap single disk upload speed: 49 MB/S and completes at 43.seconds
Raid 0 upload speed : 57 Mb/S and completes at 37 seconds.
Also I create 2 diffetent ISCSI blocks on Single & RAID 0 Block.
Single Disk Upload speed: 45 MB/S and completes at 47.seconds
Raid 0 Upload Speed: 46 Mb/S and completes at 46 seconds.
.
VI – Questions About Qnap RAID Capacity Expansion;
QNAP NAS supports a disk volume of larger than 16TB. To use these models with QNAP NAS, please upgrade the NAS firmware to v3.4.0 or later. A disk volume of less than 16TB of storage can only be expanded to maximum 16TB by online RAID capacity expansion or adding hard drives. Online RAID capacity expansion and adding hard drives are not supported for a disk volume of over 16TB.
I have 3 HDD and plan to buy a new one a few weeks later. Can I add that new HDD to my RAID without loosing data?
Yes, you can setup RAID with 3 HDDs, and than Add one more HDD to Qnap and expand your RAID with adding this HDD witout loosing data with Qnap’s “Add Hard Drive” Feature.
You can add new HDD to expand capacity till your total size doesnt more than 16 TB!
What if I setup Qnap with 1 TB HDDs, and need more capacity in future, can I change them with 3 TB HDD’s?
Yes, you can do this Qnap Expand capacity feature. You can expand your RAID capacity till your total size doesnt more than 16 TB!
.
VII – My 3 TB HDDs size seems 750 Gb;
Just upgrade your device firmware to 3.7.2. Also Ts-509 series doesnt support 3 TB HDD’s and identify as 750 Gb.

.
VIII – Qnap couldnt recognize one of my HDD;
Your HDD maybe dead or there might be a problem on that HDD slot.
If You’r installing Qnap first time, just change that HDD slot with another one and check if problem still continues on the same port. If Problem still exist, shut down Qnap, plug out HDD’s, and when Qnap request to plug HDD, plug different HDD to that port.
If you already have an installed system, Plug a new HDD (not the same) on that slot and check if problem exist in a few days again or not.
If problem still exist after changing HDDs, contact with Qnap support team
.
IX - My Qnap recognize HDD size as 0 MB;
It ‘s HDD or Firmware problem. If only 1 HDD seems like 0 mb size, that HDD maybe dead. Just plug it to another computer and check if its working or not.
Also this maybe Qnap firmware problem. example for NVR devices with old firmware, if you plug 3 TB HDD, Qnap identify it as 0 mb, so Update Qnap firmware
.
X – Thing You Should Know After Installation / My Advices
Rule 1 : Dont Plug out any HDD while Qnap is working. If device failes or becomes unreachable, Dont change Any HDD slot, or Plug out any HDD on working device with hoping device works again! (of course Qnap works Hot Plug, and you can change broken / infected HDD while device is working.)
Rule 2 : There is number on every disk tray. This HDD trays doesnt contain data, but always use Right disk tray on Right disk slot! Sometimes some costumers making grand mistakes just like changing HDD’s slots with hoping device works again and than they forget which HDD was on Which slot. Use this protection against this kind of costumers.
Rule 3 : Always keep device firmware Updated, but stay away beginin firmwares (just like 3.5.0 / 3.6.0 / 3.7.0) if your datas are important and cannot be risked.
specially stay away from 3.2.x firmware, there is something wrong with this firmware and its more than 1 year old. Upgrade firmware urgently if you have any of this firmware.
Rule 4 : Dont Restart Qnap while firmware update, or you may damage to device firmware. Fix’ing this may cost a few hours
Rule 5 : Always backup your system configration. After creating your users or AD entegration, go to Administration -> Backup / Restore Configration and take your conf backup.
Rule 6 : Open Network Recycle Bin option agains your clients possible accidenlty deleted files. Also activate Antivirus option for possable virus infection alert.
Rule 7 : Check your system log files for possable errrors or early warnings.
Rule 8 : Always take double backup. Buy a second Qnap, ar at least use external device backup feature, or Free cloud Backup features.
Rule 9 : Dont Plug HDD’s on Working Qnap. (I want to repeat again)
.
XI – QNAP NAS Offical Frequently Asked Questions – First-time Installation & Setup
Q. What’s the default username and password?
A. Default user name: administrator or admin ( depending on the NAS model ) Password: admin Q. Why the administrator password cannot be reset after pressing the reset button?
A. If the option “Enable configuration reset switch” is not enabled in Hardware Settings of System Tools, administrator password will not be restored when you press the reset button. In such case, you have to contact QNAP Support.
Q. I forgot my IP address setting, how can I find the IP address of the QNAP NAS?
A. For Windows users, please use the Install Quick Install Wizard/QNAP Finder to find the IP address of the Turbo Station. For Mac users, please use QFinder.
Q. Can I install an old HDD with my data into a QNAP NAS?
A.If you have important data on this HDD, then please back up your data on the HDD before installing the HDD in a QNAP NAS. To achieve the Hot-Swap capability, QNAP NAS automatically partitions the newly inserted HDD into 4 partitions, and all the data on the HDD will be gone. In other words, you can install any SATA HDDs in a QNAP NAS, but the data will be cleared if they are not previously used with a QNAP NAS.
Q. What should be done when the administration page cannot be opened?
A. 1. Check if the IP address is the same as the one displayed on the LCD panel. For NAS models without LCD panel, please refer to 2 to 4.
2. Clear the cookies & cache in IE browser, or remove Proxy settings and try again.
3. Restart NAS. 4. Reset network configuration (IP: 169.254.100.100) and administrator password to default by pressing the reset button of the machine
Q. How do I access Turbo Station if I do not have a DHCP server?
A. If your network has no DHCP Server, Turbo Station will use the default IP 169.254.100.100. You can access Turbo Station via this IP address. However, you PC’s
IP should be in the same subnet. For example, 169.254.100.101.
Q. Why can’t the NAS initialize the HDDs?
A. There are several troubleshooting methods.
1. Please check your Finder and system firmware if they are the latest versions.
2. If you did initialize and failed with Finder, please try initializing via webpage. And vice versa.
3. Press & hold the reset button for 4 seconds. Connect to NAS from your PC (in DHCP:169.254.100.100) directly via Ethernet cable and try to initialize again.
4. Boot the system without HDD. After the two beep sounds, use Finder or Web Installation to locate your NAS, then hot plug-in your HDD to start initialization.
5. Use your PC to format HDD first, then try to initialize the HDD by NAS again.
6. If you still have problem with this issue, you may refer to our HDD compatibility list. (http://www.qnap.com/pro_compatibility.asp) Or please contact our Online Support. (http://www.qnap.com/onlinesupport.asp)
Q. Why can’t my PC connect to the NAS? A. Windows XP SP1 with Internet Firewall enabled will not allow the Quick Install Wizard to find the NAS Device during the discovery process. The Internet Firewall must be momentarily disabled for the Quick Install Wizard to find the NAS Device properly. Once the Shortcut icons are created on the Desktop, the Internet Firewall settings can be re-enabled. In Windows XP SP2 the Internet Firewall does not need to be disabled. However, a popup message will appear when running the Quick Install Wizard. Agree to the popup message to continue with the detection process. If you cannot find your NAS using QNAP Finder or type the NAS IP directly, please follow these trouble shooting methods:
Step 1. Check the LAN LED if it is flashing. [YES] — Go to step 2 [NO] — Check your LAN cable connection.
Step 2. Check the Status LED(same as Power LED in some models) if it’s in steady green. [Yes] — Go to step 3
[No] — If flashing RED or flashing RED/GREEN, the system is not initialized or the hard drive(s) is not ready. If a reset (Step 3) or reboot does not solve your problem, then please re-install the firmware again (Step 4).
Step 3. Reset NAS by pressing the reset button for 3-4 seconds (on the back)–This will clear the account and network settings (back to DHCP and the admin user name and password is: admin/admin). After the two beep sounds, try to locate your NAS again with Finder or via Http://NAS_IP:8080. (If you directly connect the NAS to a PC, then NAS IP is 169.254.100.100:8080) [YES] — Problem solved. [NO] — Go to Step 4
Step 4. If you still cannot find NAS from QNAP Finder: power off your NAS, take out all Hard Disks, reboot the NAS. Check to see if you can hear 2 beeps (about 2 minutes) [YES] — Your NAS hardware is fine. That is: After the two beep sounds, plug-in all the HDDs and initialize system(format) then try QNAP Finder again. [NO] — The hardware or FLASH memory of the NAS may be damaged. Please contact your local reseller or our technical support for further assistance.
Q. What happens if I press the reset button of NAS?
A. When you press and hold the reset button for about 3 seconds on NAS, a beep sound will be heard. The following settings are reset to default: a. System admin password: admin or administrator b. Network Settings/ TCP/IP Configuration: Obtain IP address settings automatically via DHCP c. Network Settings/ TCP/IP Configuration: Disable Jumbo Frame d. Network Setting/ System Port Management: 8080 (system service port for TS-xx9 series) e. System Tools/ IP Filter: Allow all connections
Q. Is there a newer firmware available for the NAS Device? Do I need to install that?
A. Check the QNAP download page. http://qnap.com/download.asp If you see an available firmware, you may need to download it and install it. Please verify first which version you have and then compare the release date. There are 2
ways to check which version you have: 1. go to the WebUI of your NAS Device, the firmware version of your NAS is shown on bottom.
Q. I have installed and followed all the instructions, but I still cannot run the setup for the NAS Device.
A. You may need to RESET the device and then run the Quick Install Wizard /QNAP Finder again. For the best result, make sure you wait until the NAS Device is fully booted. When you see that the POWER LED and the LAN LED are both ON, and not blinking, then the NAS Device has completed its boot up process.
Q. What is the IP address of my NAS?
A. If your NAS and PC are connected to the same router, enable DHCP on NAS and you should be able to access the server. To set a fixed IP for NAS, make sure the subnet mask, default gateway, and the DNS server settings of your NAS and PC are the same. If you connect the NAS directly or there is no DHCP server on the network, The NAS will use 169.254.100.100 as its IP address. Please configure your PC to the same IP subnet, for example, 169.254.100.101.
Q. What does the “Reset” function do in the system administration?
A. The “Reset” function on [System Administration] -> [System Reset] is designed to reset all settings of NAS to default. When you press Reset on this page, all drive data, user accounts, network shares and system settings are cleared and restored to default. Please make sure you have backed up all the important data and system settings before resetting the NAS.
Q. What’s the limitation of the username and password setting?
A. The following information is required to create a new user: User name: The user name must not exceed 32 characters. It is case-insensitive and can contain double-byte characters, such as Chinese, Japanese, and Korean except: ” / \ [ ] : ; | = , + * ? < > ` ‘ Password: The password is case-sensitive and can be 16 characters long at maximum. It is recommended to use a password of at least 6 characters.
Q. What’s the limitation on the length of the server name?
A. The server name can be 14 characters long at maximum, which can contain alphabets, numbers and hyphen (-). The server does not accept names with space, period (.), or names in pure numbers.
Q. Can I use Unicode character in password? A. No, for password, only English alphabets and numbers are supported. You can use Unicode characters for user name only.
.
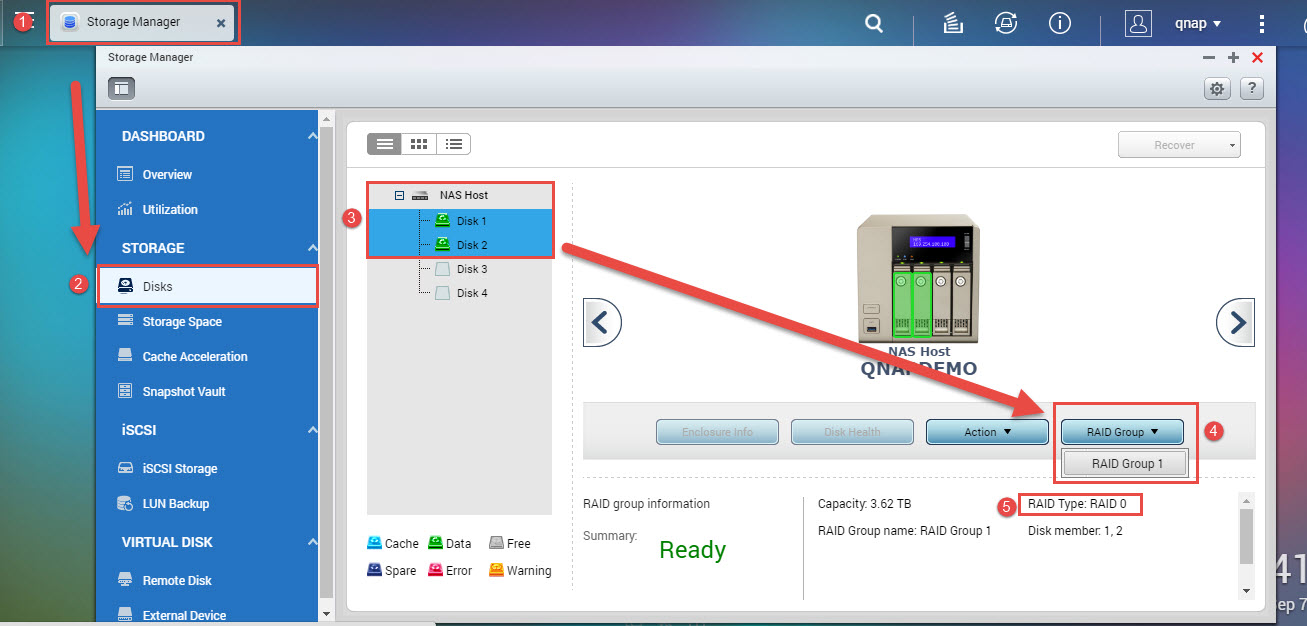
XII – I Cannot Remember Which RAID I Install, How Can I Learn RAID Level Or My HDD’s?
Go to storage manager -> disks and choose a HDD. Then Choose RAID Group to learn.

Qnap İlk Kurulum DökümanıQnap First Time Installation,
